


Creating a Requirement and Connecting it to a Resource
The purpose of this blog is to show you how you can create a requirement for a type of resource (either a database or a file handler) and connect it with a cluster of that resource so that your services can interact with it.
What is needed to create a requirement and connect it to a resource?
Below we will detail the steps to create a requirement and connect it to a resource:
- Create a cluster of the resource we want to use.
- Create a requirement for the resource in the service that needs it.
- Configure the service that will use this resource.
- Connect that service to the cluster.
By following these steps, we will be able to use databases and file handlers from our web services created with C4C7OPS.
1. Create a cluster of the resource we want to use.
In this step, we will focus on creating the cluster that will store the necessary instances for our databases and other resources used by our services.
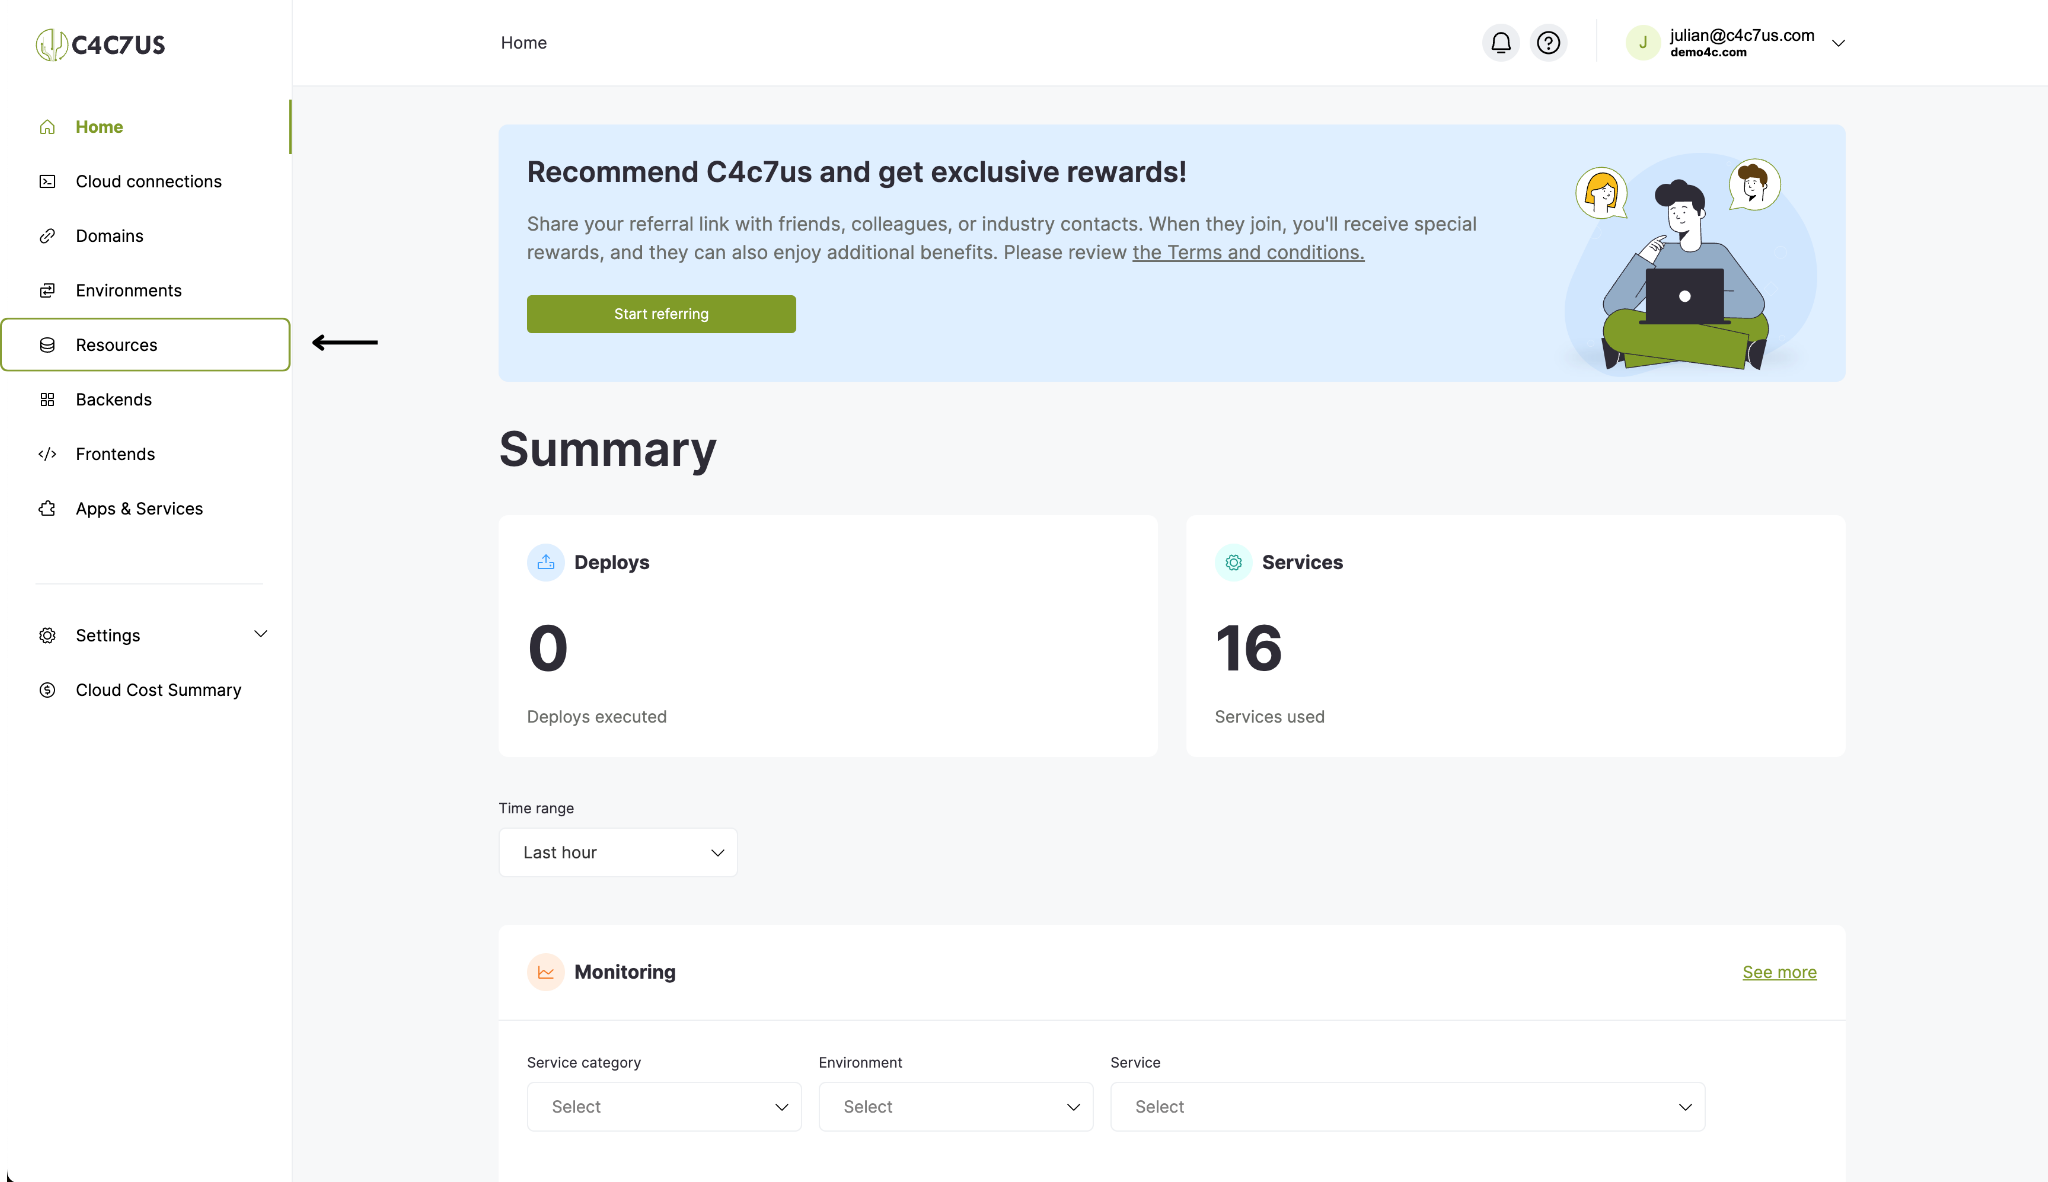
1.1. Go to the "Resources" section.
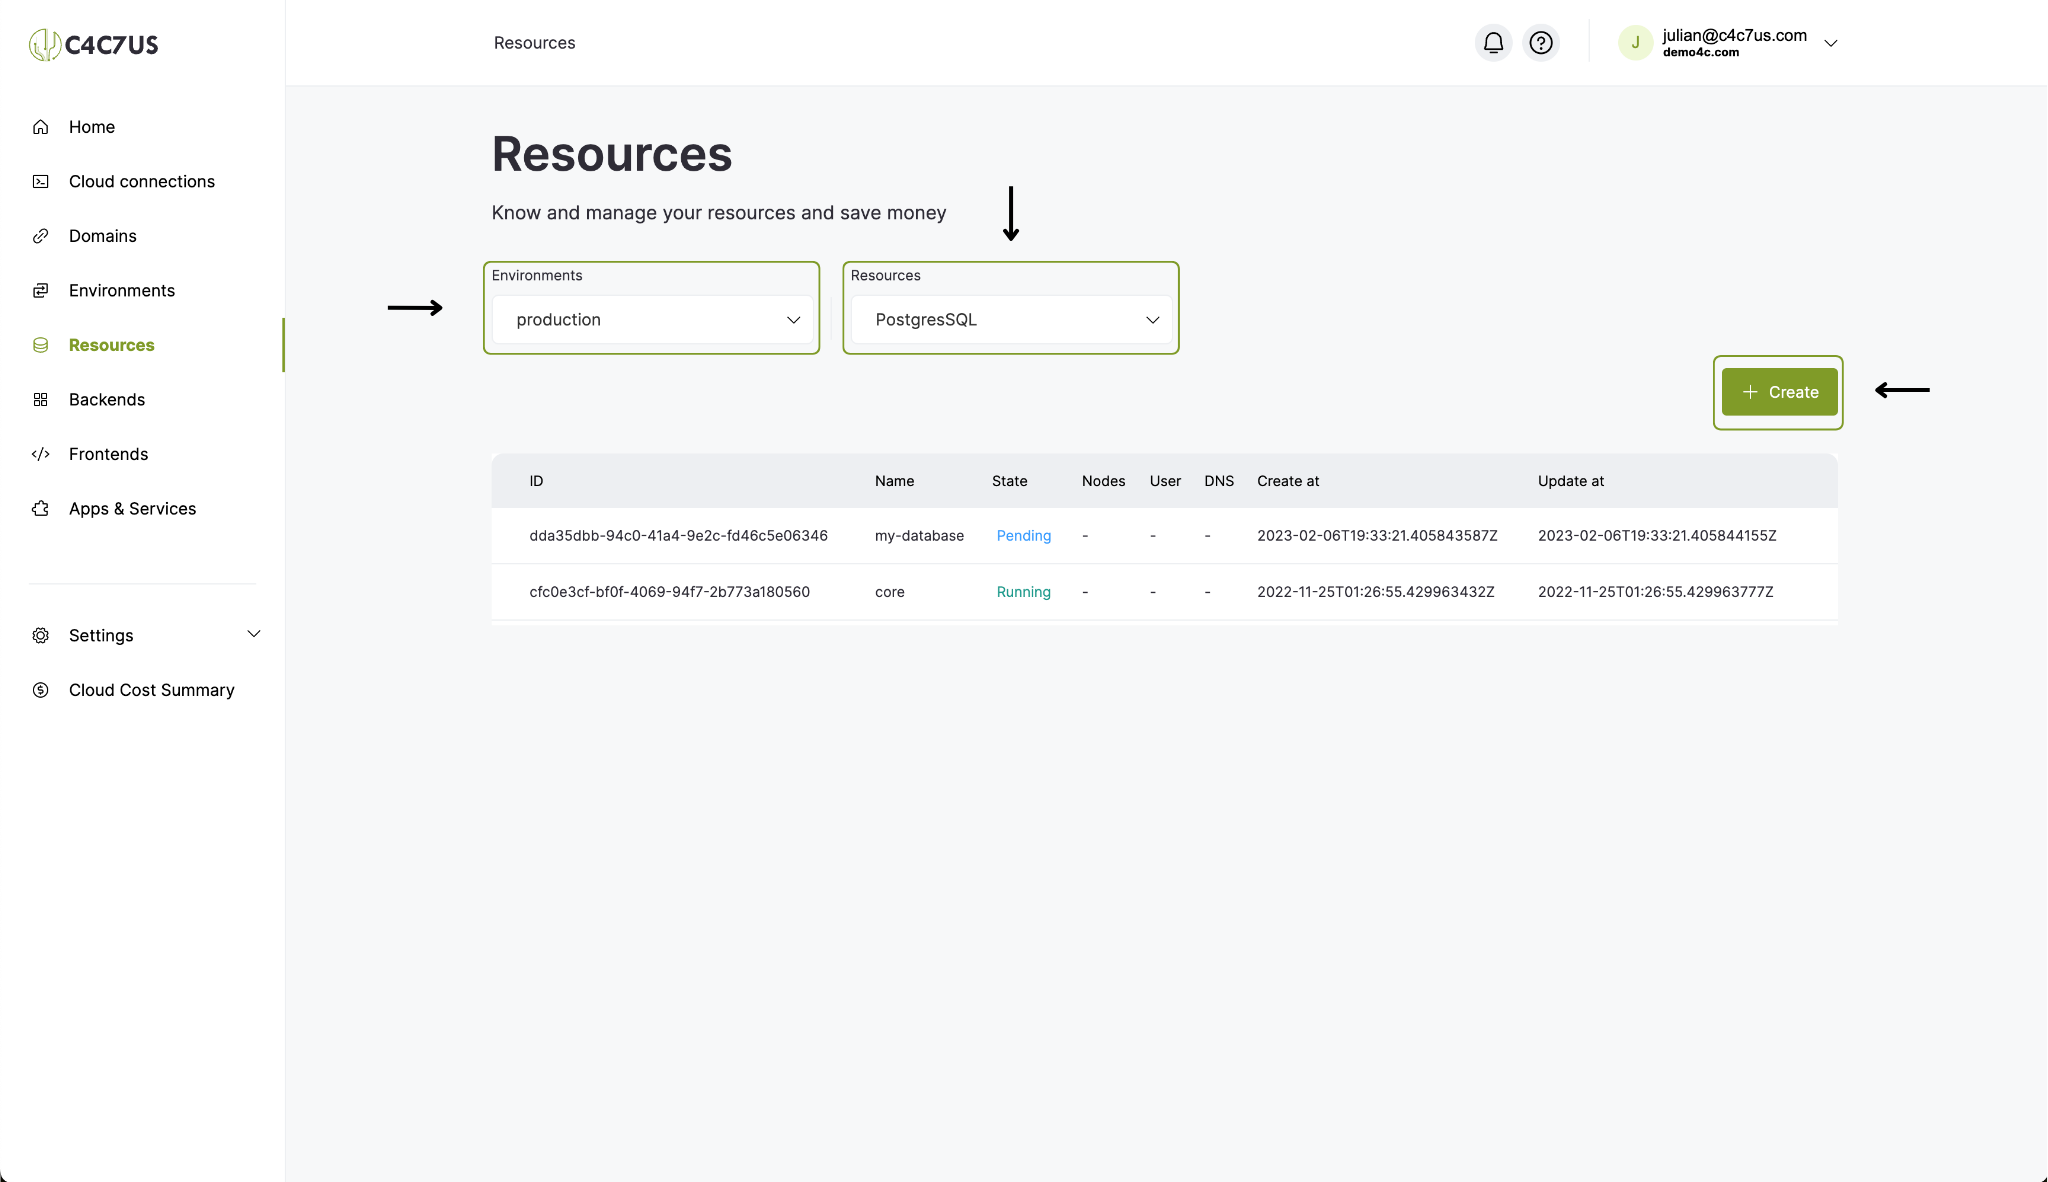
1.2. Select the environment in which we want to work, the type of resource, and click the create button.
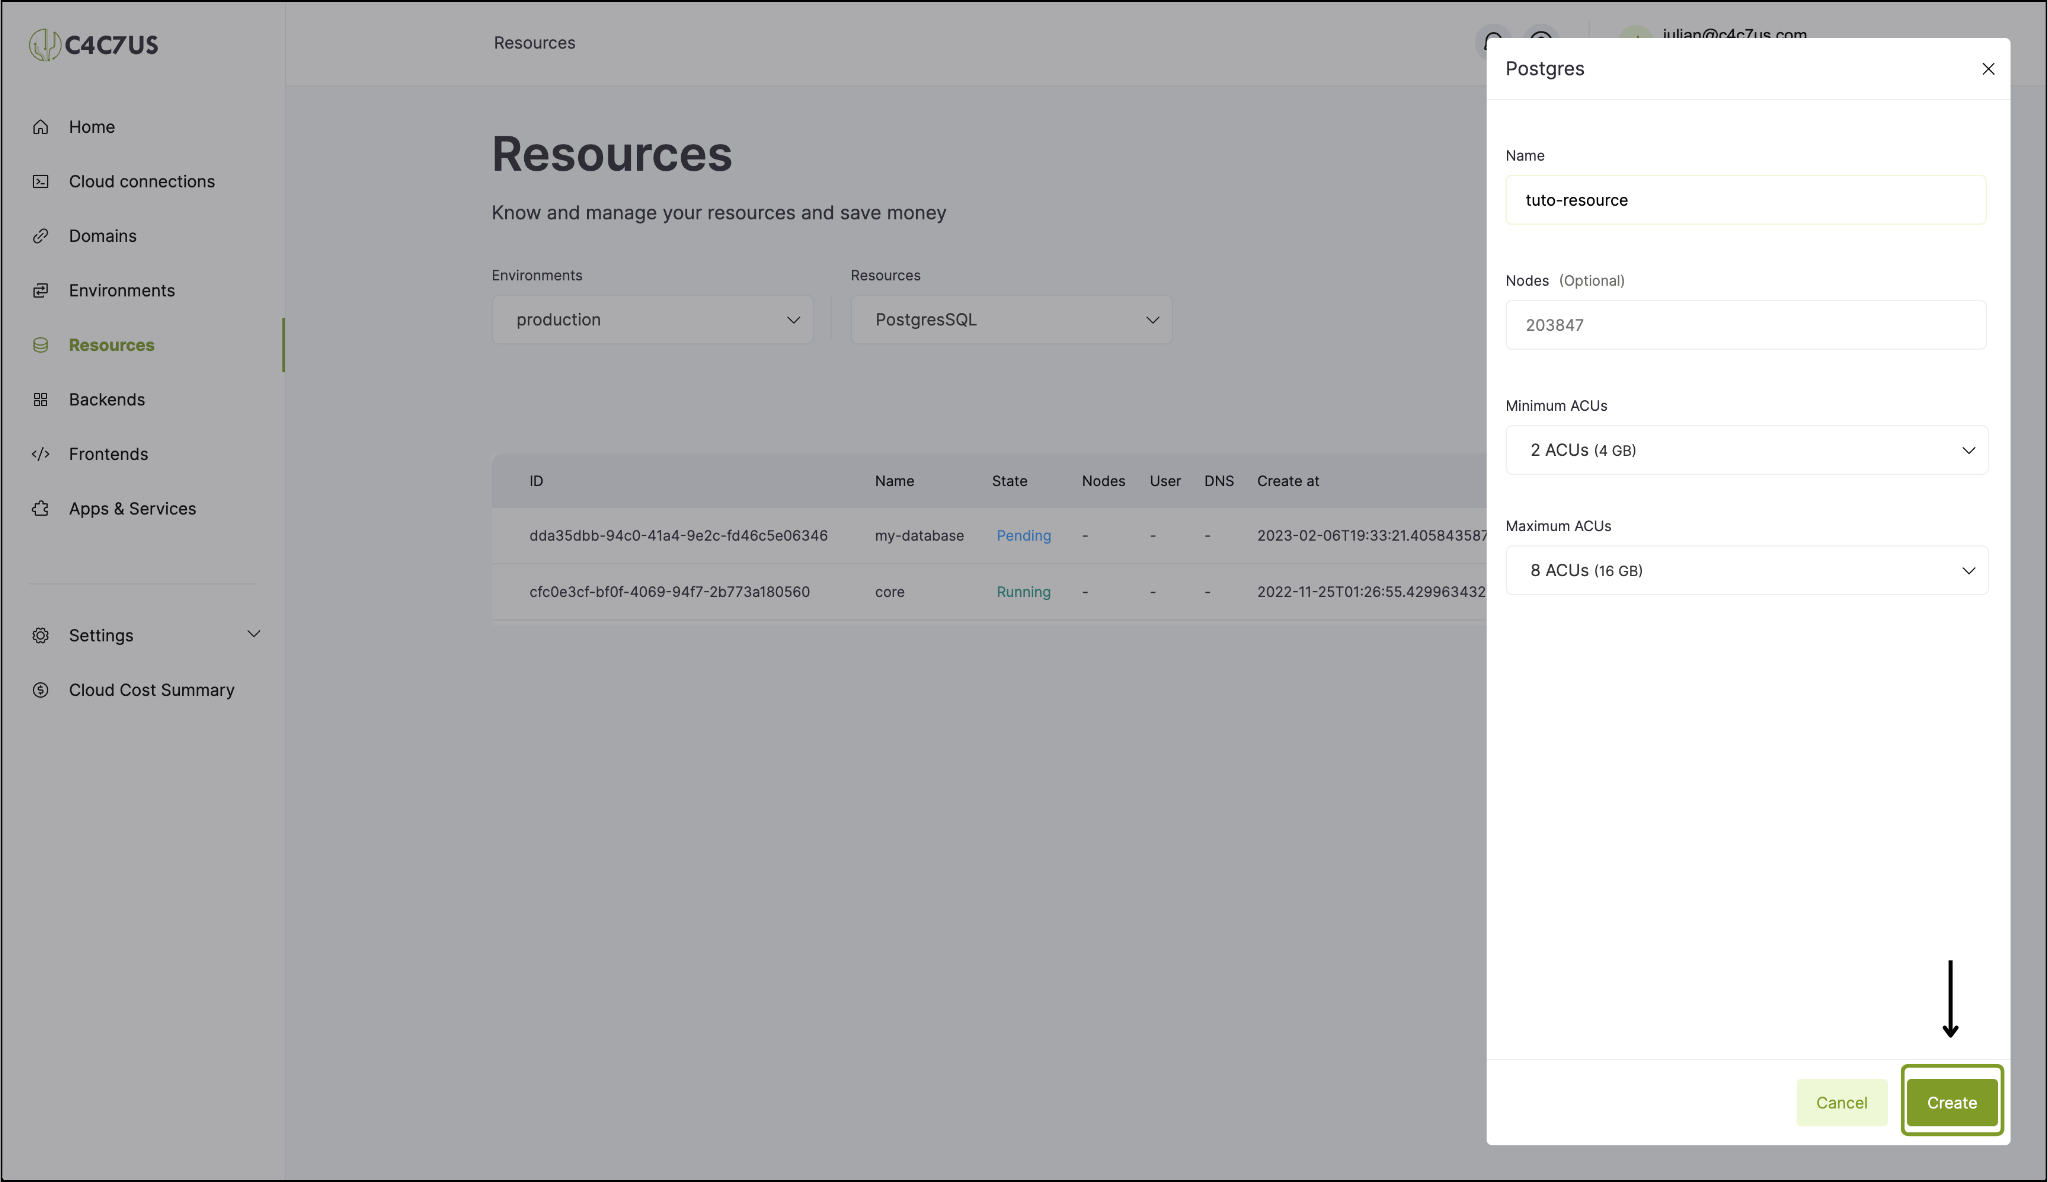
1.3. Configure our resource and click create.
2. Create a requirement for the resource in the service that needs it.
In this step, we will create a requirement so that our service can use the cluster to instantiate what it needs.
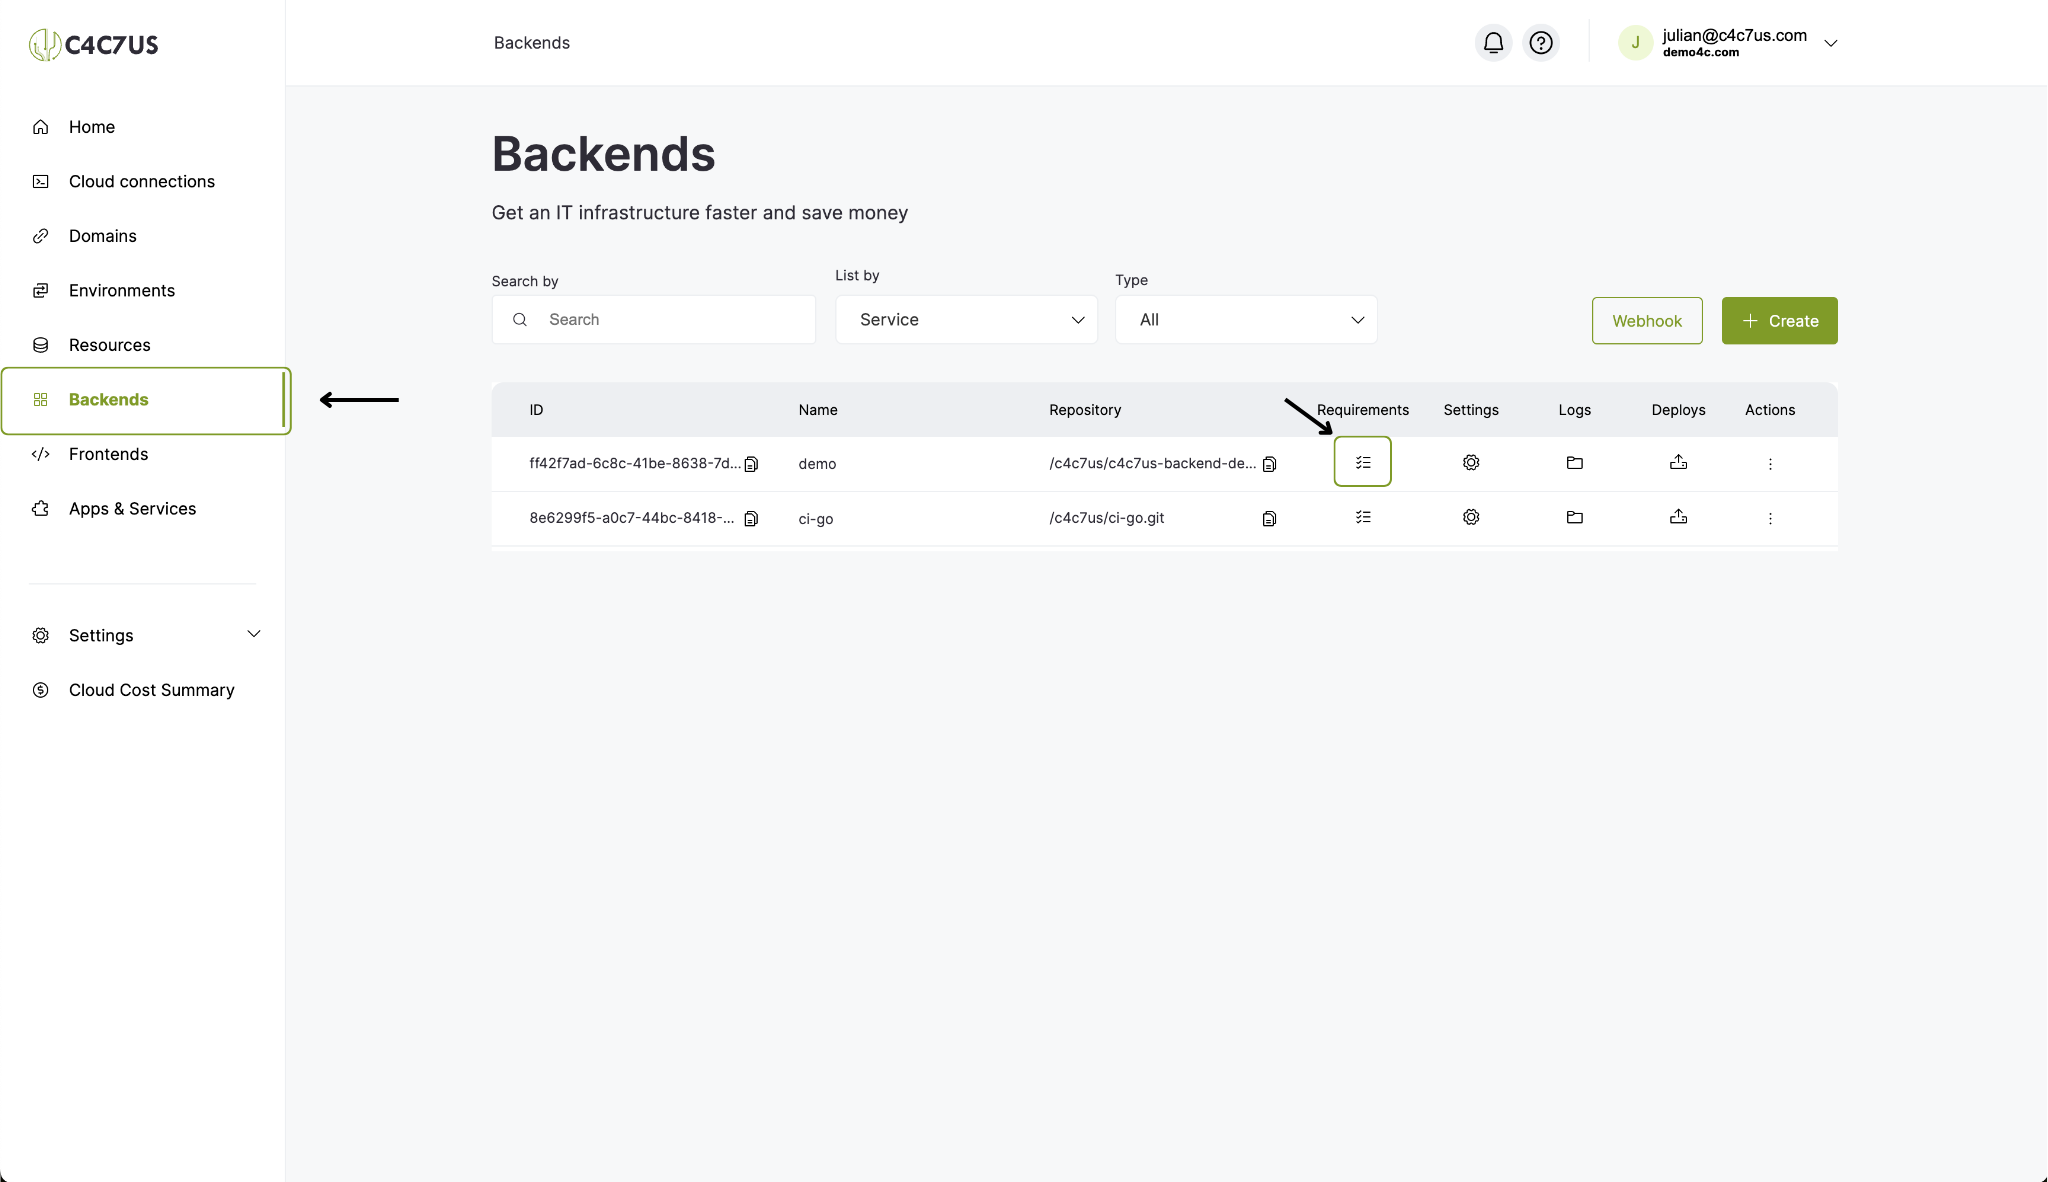
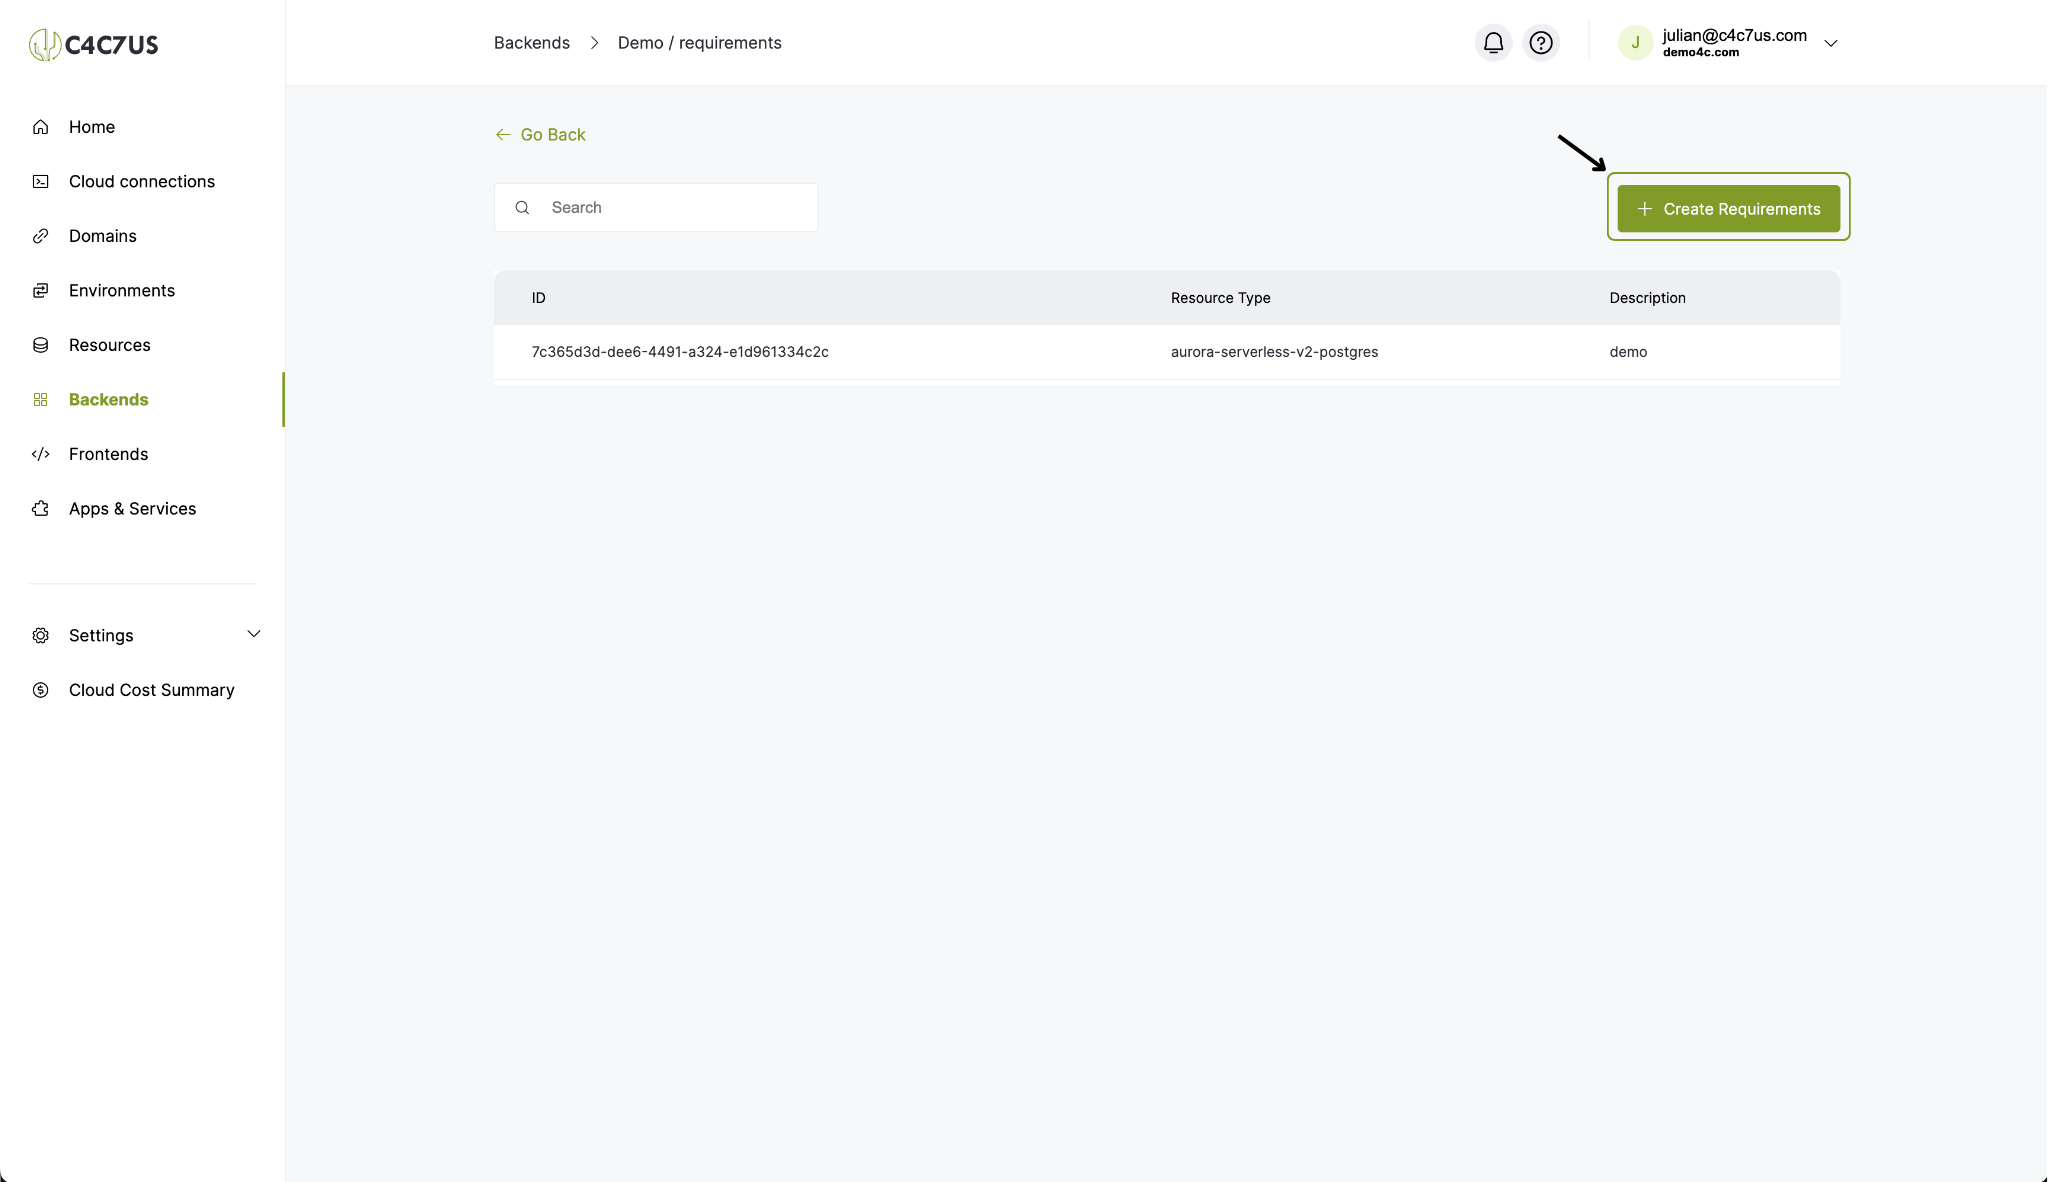
2.1. Go to the "Backends" section and click on the "Requirements" of the service that needs to be configured.
2.2. Click the create button.
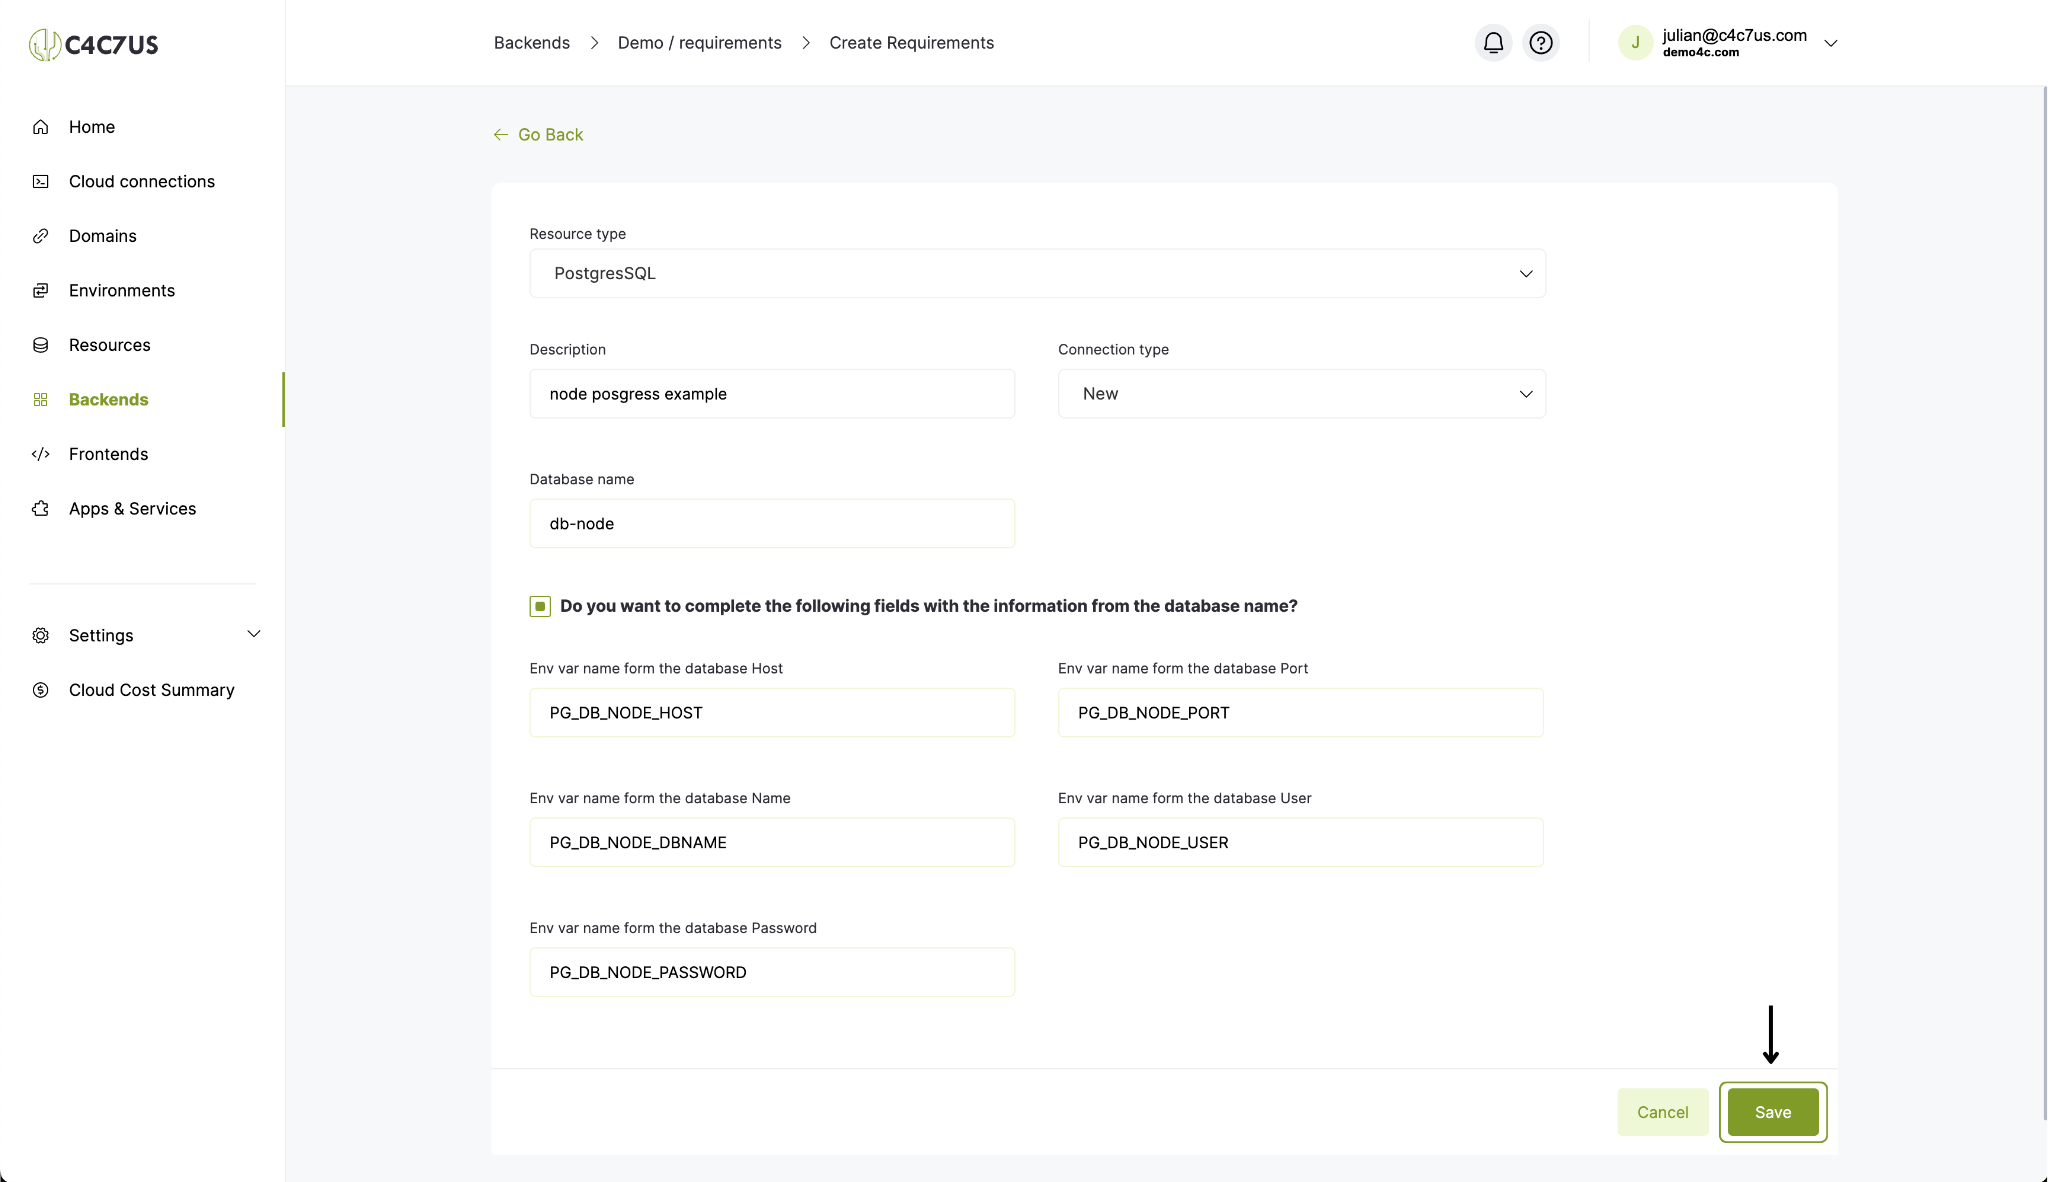
2.3. Complete the necessary information.
In this step, it is important to remember the names of the environment variables you selected since we will use them later to configure the project. (These environment variables do not need to be created later in the service from "Settings"; C4C7OPS will integrate them for us.)
3. Configure the service that will use this resource.
The names of the environment variables for our database must match the names of the environment variables we set when creating the "Requirement" (example with Node.js).
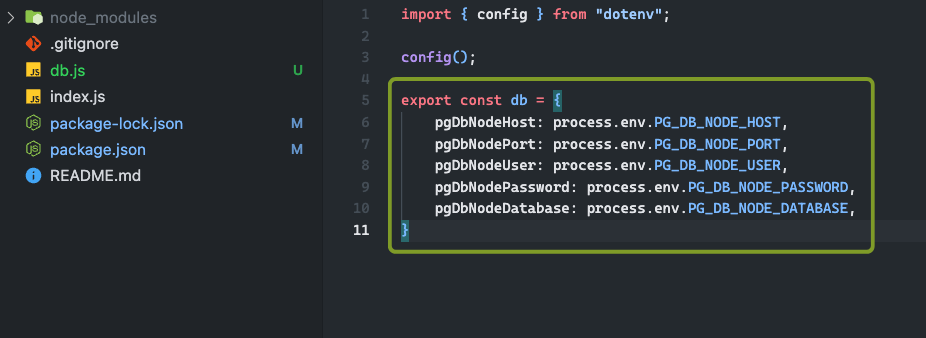
Once we confirm that the service supports the names of the variables we defined when creating the "Requirement," we can continue.
4. Connect that service to the cluster.
This would be our final step to finish configuring our resource and service together. We will link the "Requirement" with the resource we created at the beginning of the tutorial so that our service can access it without any issues.
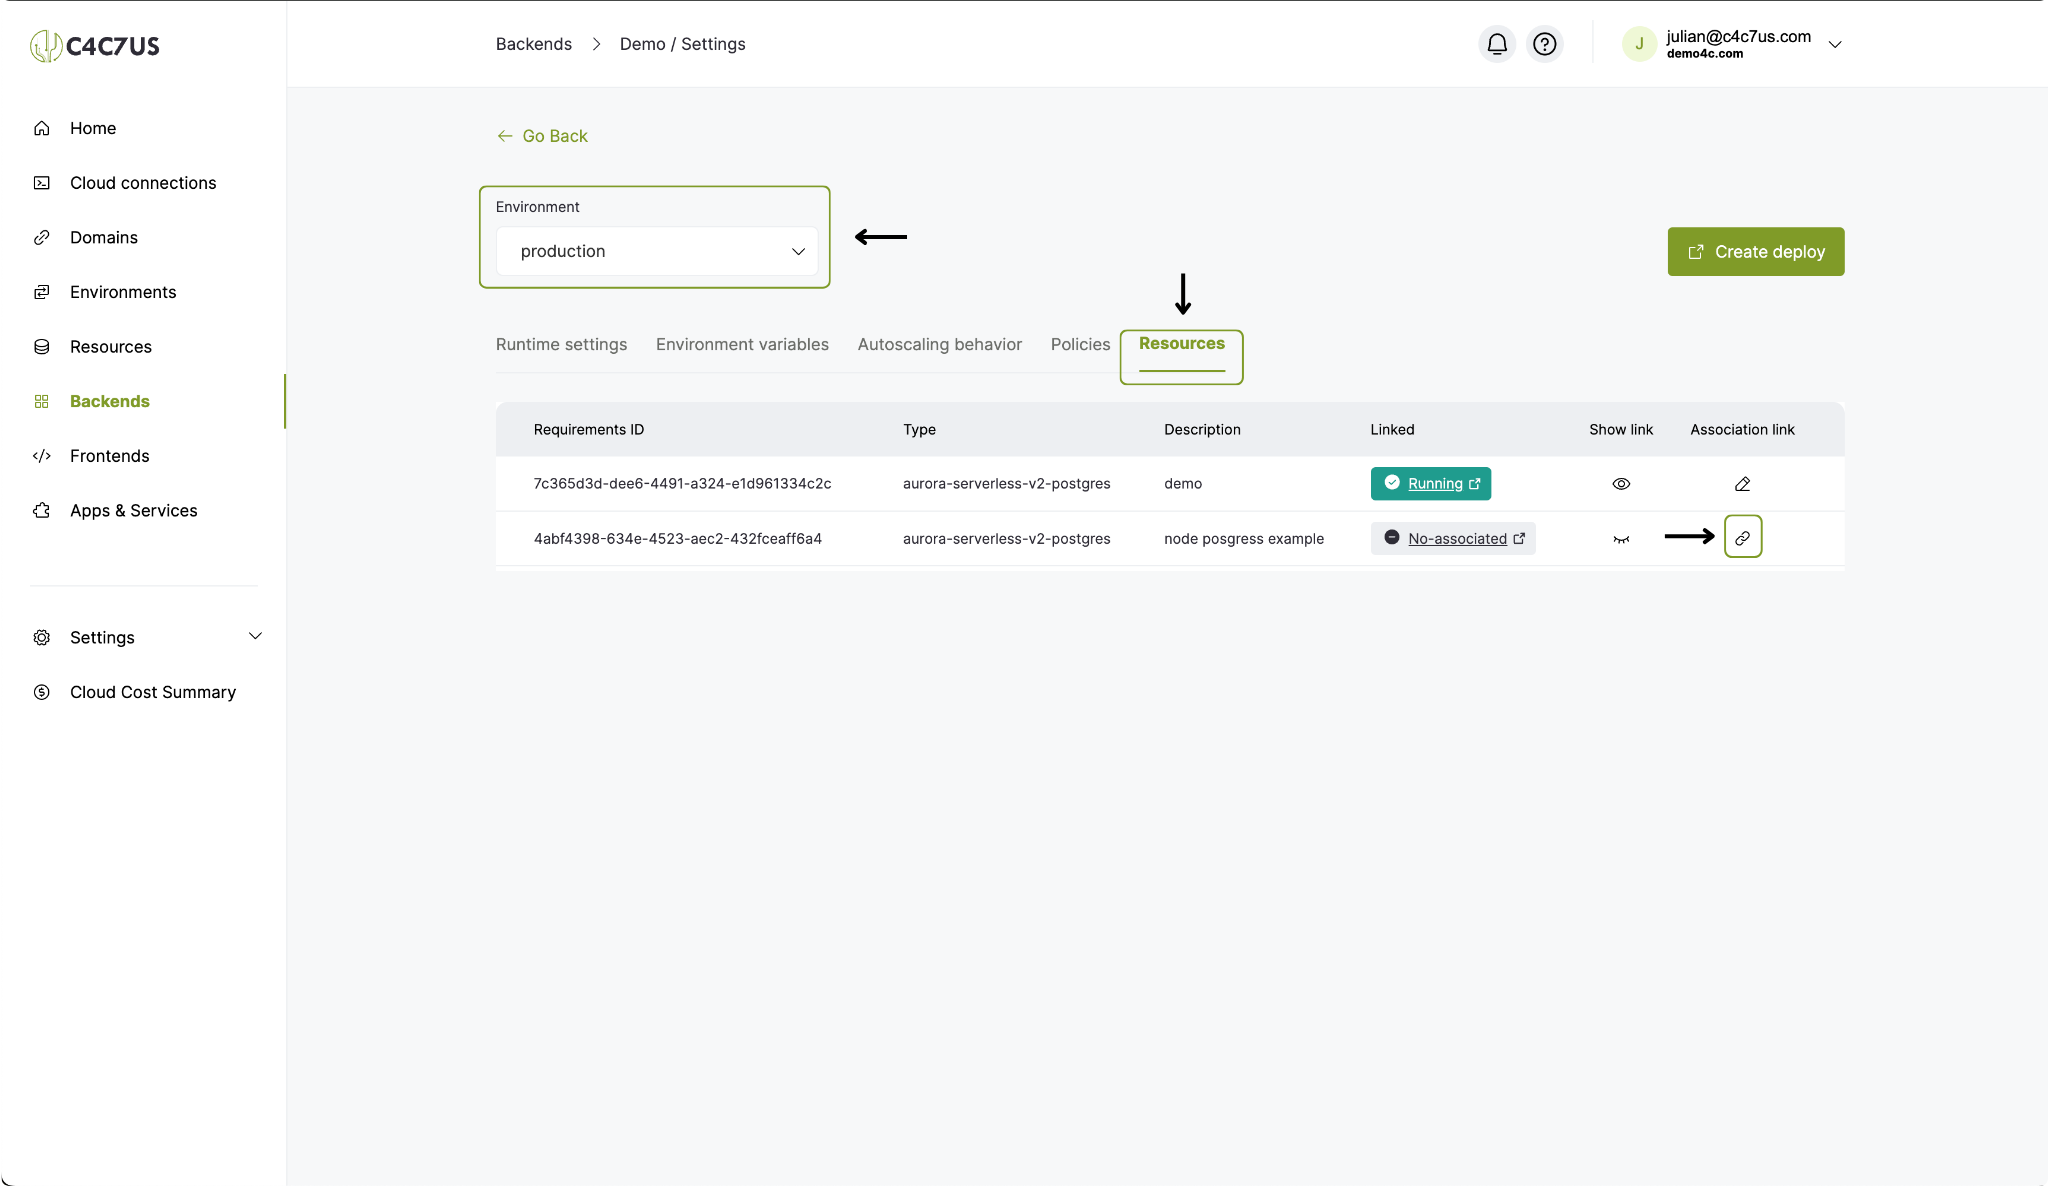
4.1. Go back to "Backends" and then enter the "Settings" of our service.
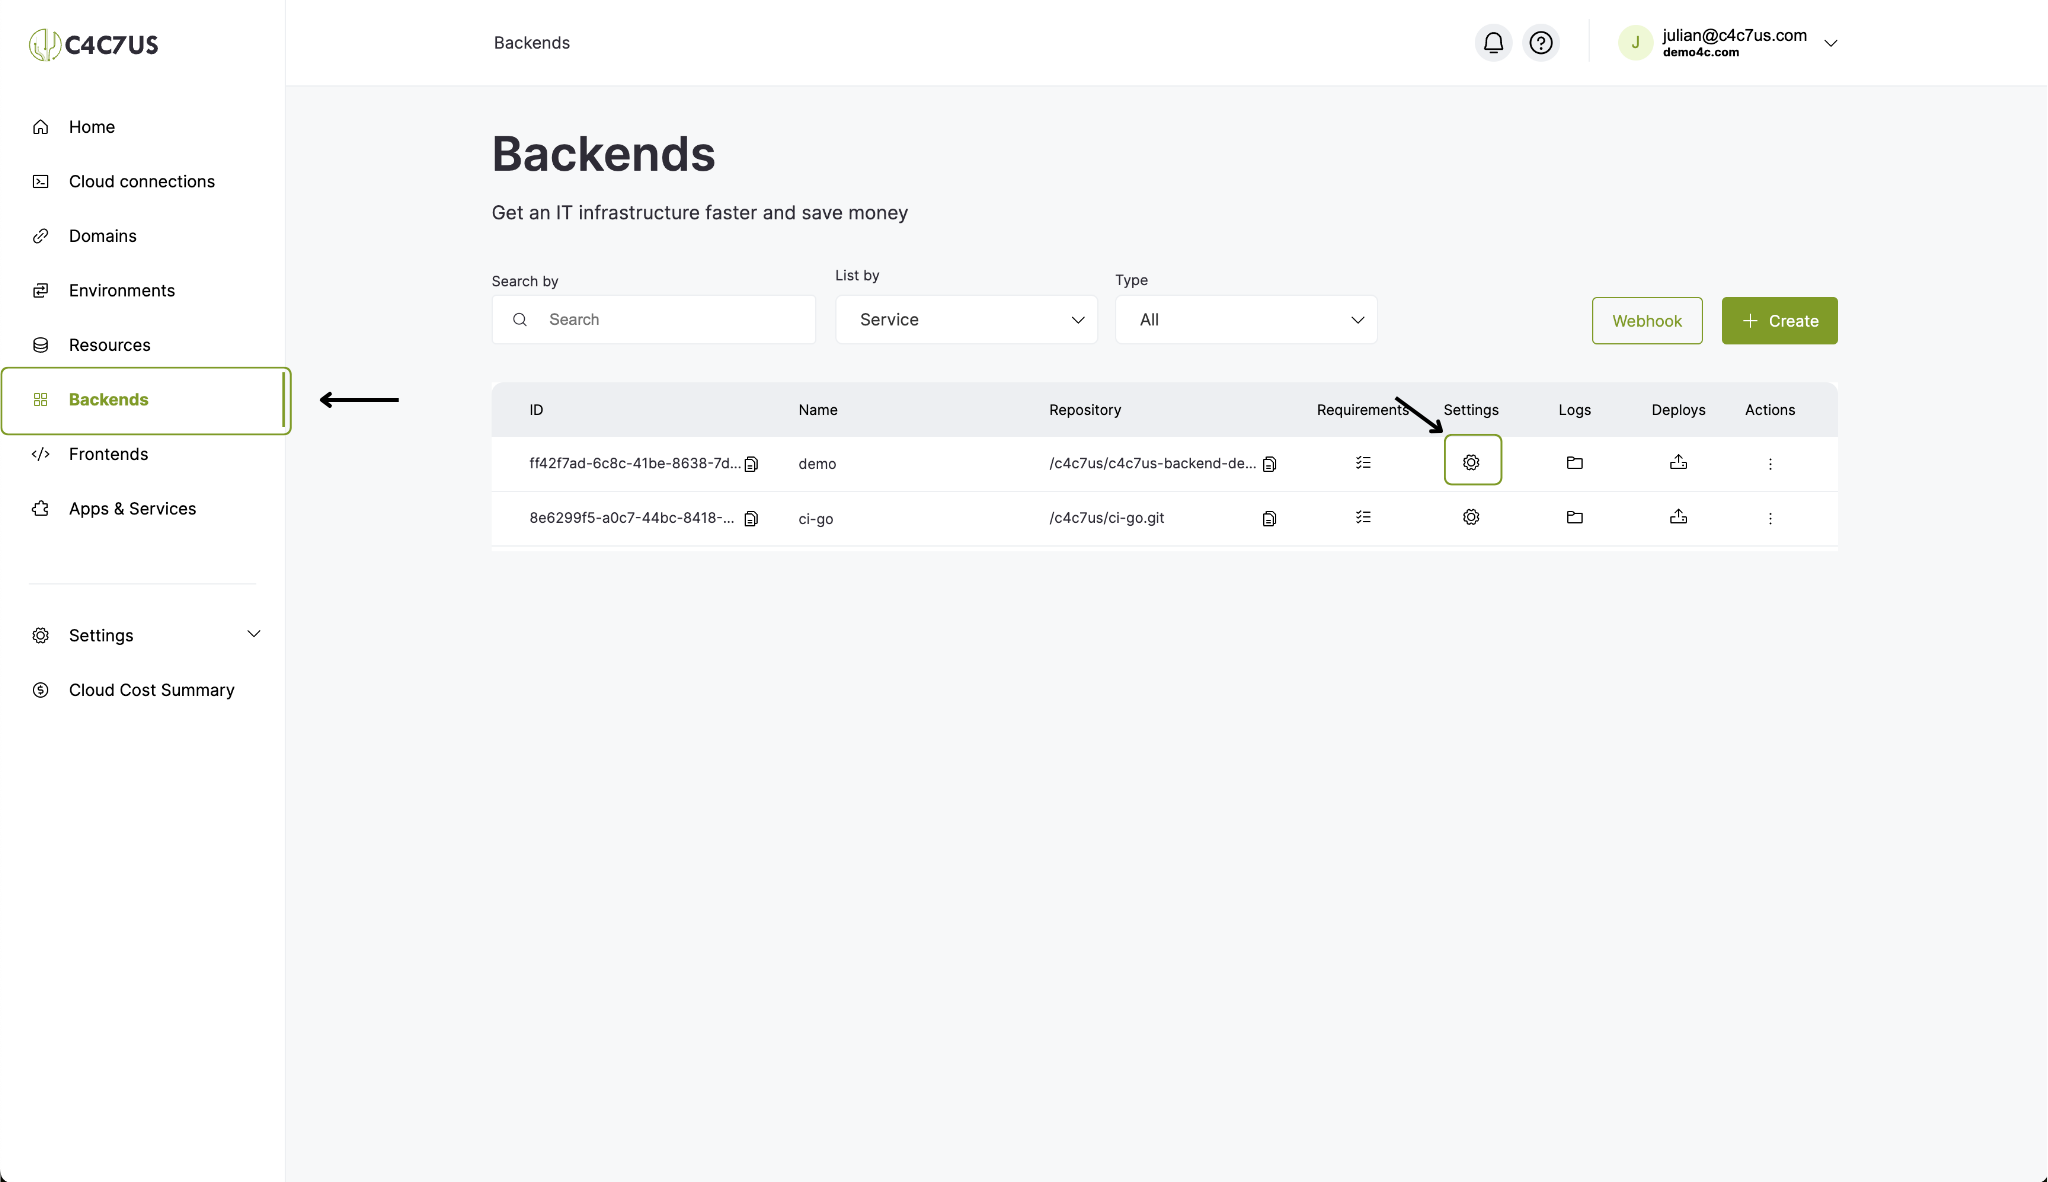
4.2. Select the environment where we previously created the resource, go to the "Resources" tab, and click the "Association link" button of the requirement we just created.
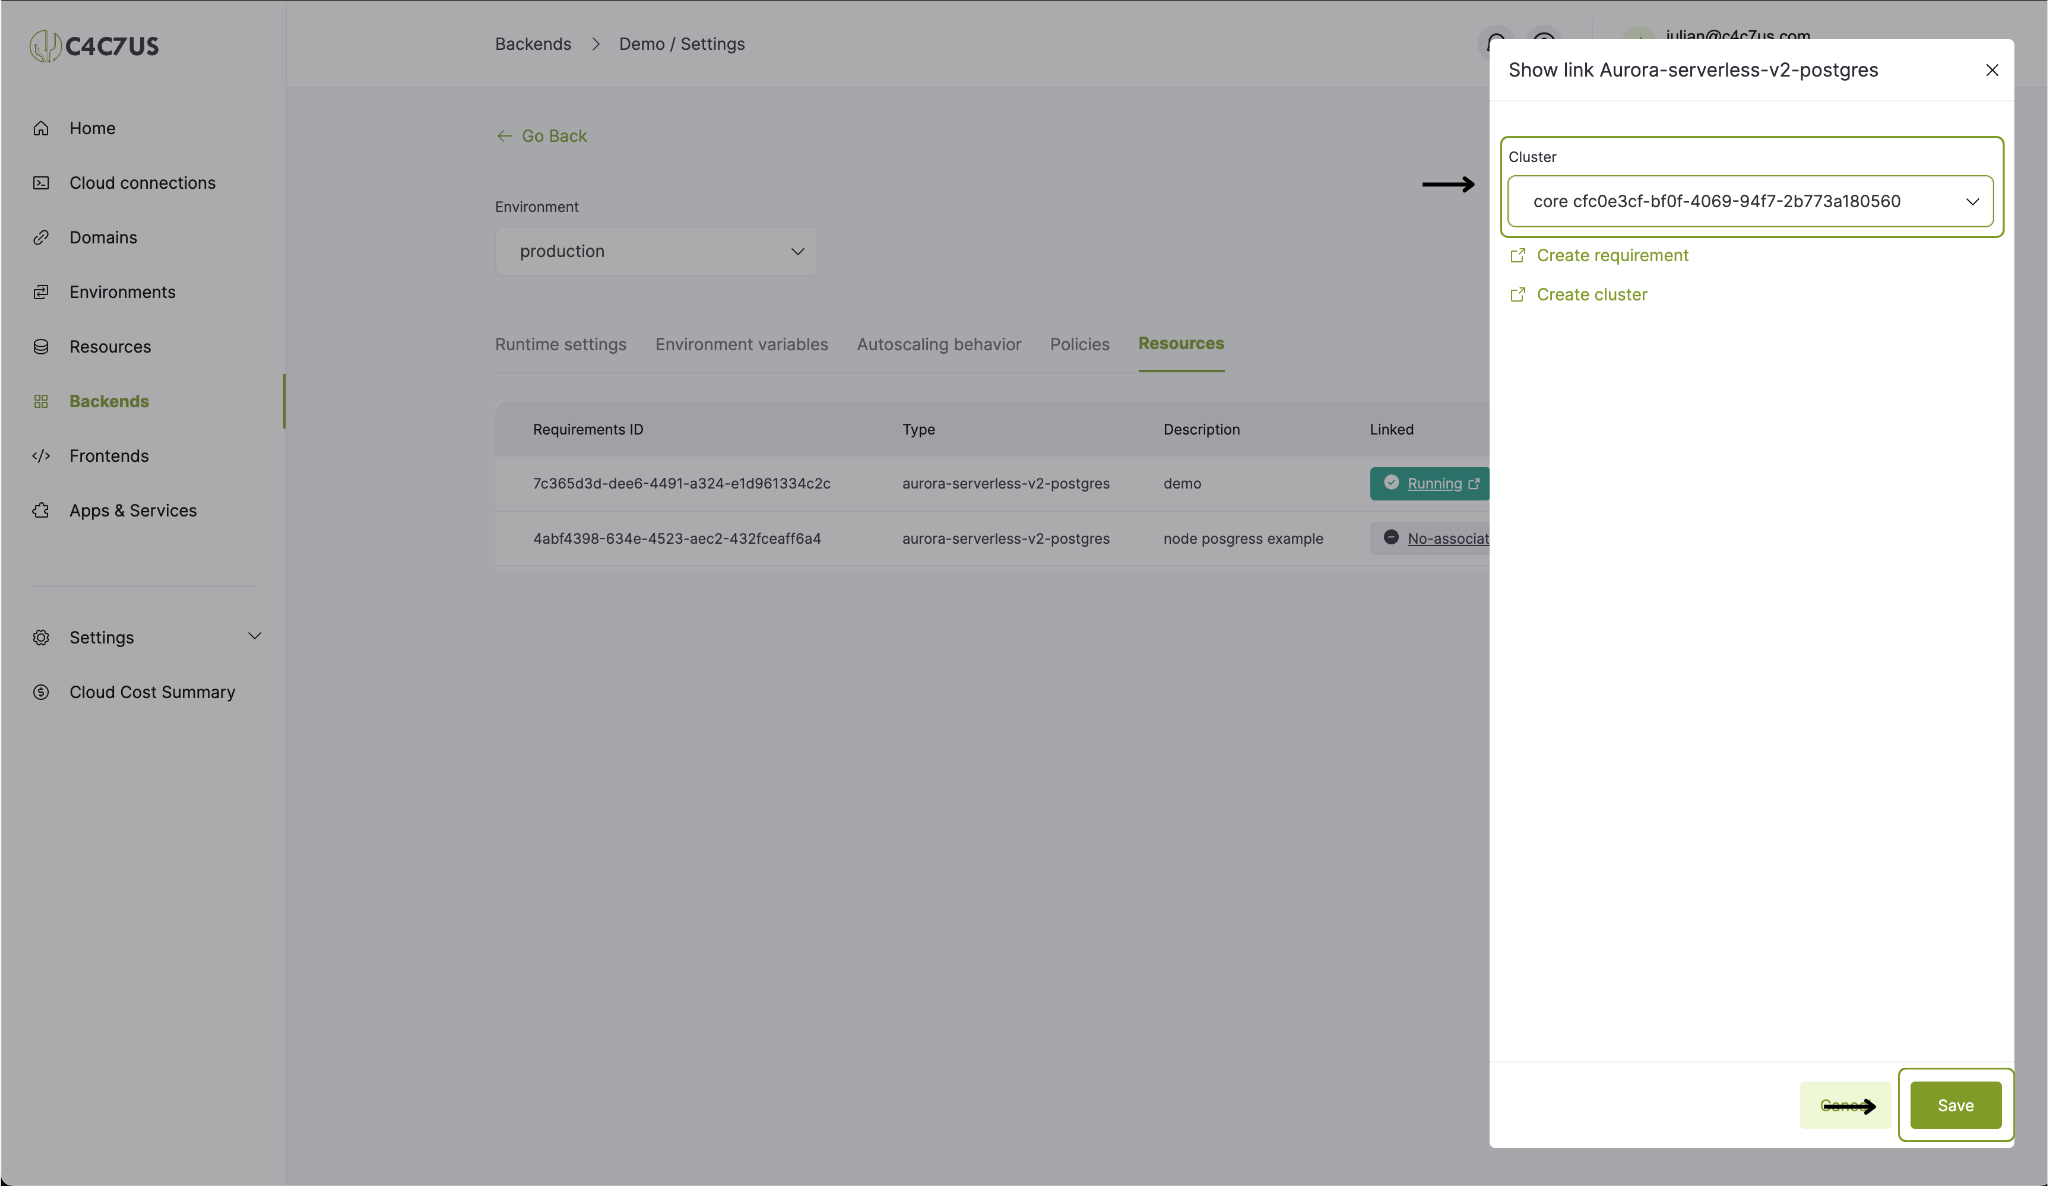
4.3. Select our cluster and click save.
5. To conclude:
Once the complete configuration flow is finished, we would have the integration of a service with a requirement ready to make calls either to databases or file handlers in our cloud provider 🌵.