


How to Set Up a Cron Expression in C4C7OPS
In this tutorial, we'll learn how to configure a service to execute a scheduled task within C4C7OPS using a cron expression to define when it will run periodically, how to deploy it, manually execute it if necessary, and view the logs of the instance each time it runs within the C4C7OPS console.
We can break it down into the following steps:
- Set Up Our Project and Upload It to a Repository within Our Git Provider.
- Configure Our Project in C4C7OPS by Defining a Cron Job
- Deploy Our Project
- Ensure Successful Execution, View the Defined Logs, and Execute It Manually.
1. Set Up Our Project and Upload It to a Repository within Our Git Manager
In this step, we will create a simple project to upload it to Git and then to C4C7OPS.
1.1 Create a file named Docker in an empty folder and configure it as follows:
1.2 Upload our file to our Git provider in a new project.
2. Configure Our Project in C4C7OPS by Defining a Cron Job
At this point, it's important to understand how cron expressions are constructed. They can be defined as follows:
Keep in mind that we can specify the day of the month or the day of the week, but we cannot leave both as * because it's impossible to apply in all scenarios. So, at least one must go with "?" and the other with *.
For example, if we want to define that a task runs every day at 3:30 a.m., it would be as follows:
Where "30" indicates the minutes, "3" indicates the hour, and for the rest of the fields, "*" means that it will run whenever the first two conditions are met.
And if, for example, we want it to run at 3:30 a.m. but only on Saturday and Sunday, we can define it as follows:
Where "SAT" and "SUN" indicate the days of the week, and the dash indicates that they run on both Saturday and Sunday.
In case we do not specify an hour in the cron but we want it to run every minute, every five, or ten, we can do it as follows:
Where the "/" means that the task will run in all scenarios, and the place where we define the value will indicate the magnitude. For example, it will run every 10 minutes:
If we want it to run every 10 minutes at 1 a.m., we can define it as follows, indicating the time interval in minutes and the specific hour:
This will run every day from 1 a.m. until 1:55 a.m.
This also applies to all magnitudes. For example, if we wanted it to run every two hours:
Now, if we want it to run in an interval but during a specific hour or at a particular time, we can use a space after the magnitude of the interval to define the range and the previous notations to define the time interval. For example, if we wanted it to run every two hours between 6 a.m. and 12 p.m., it would be as follows:
This task will run every day every two hours between 6:00 a.m. and 12:00 p.m. Once we have this concept clear, we can proceed to configure our service in C4C7OPS.
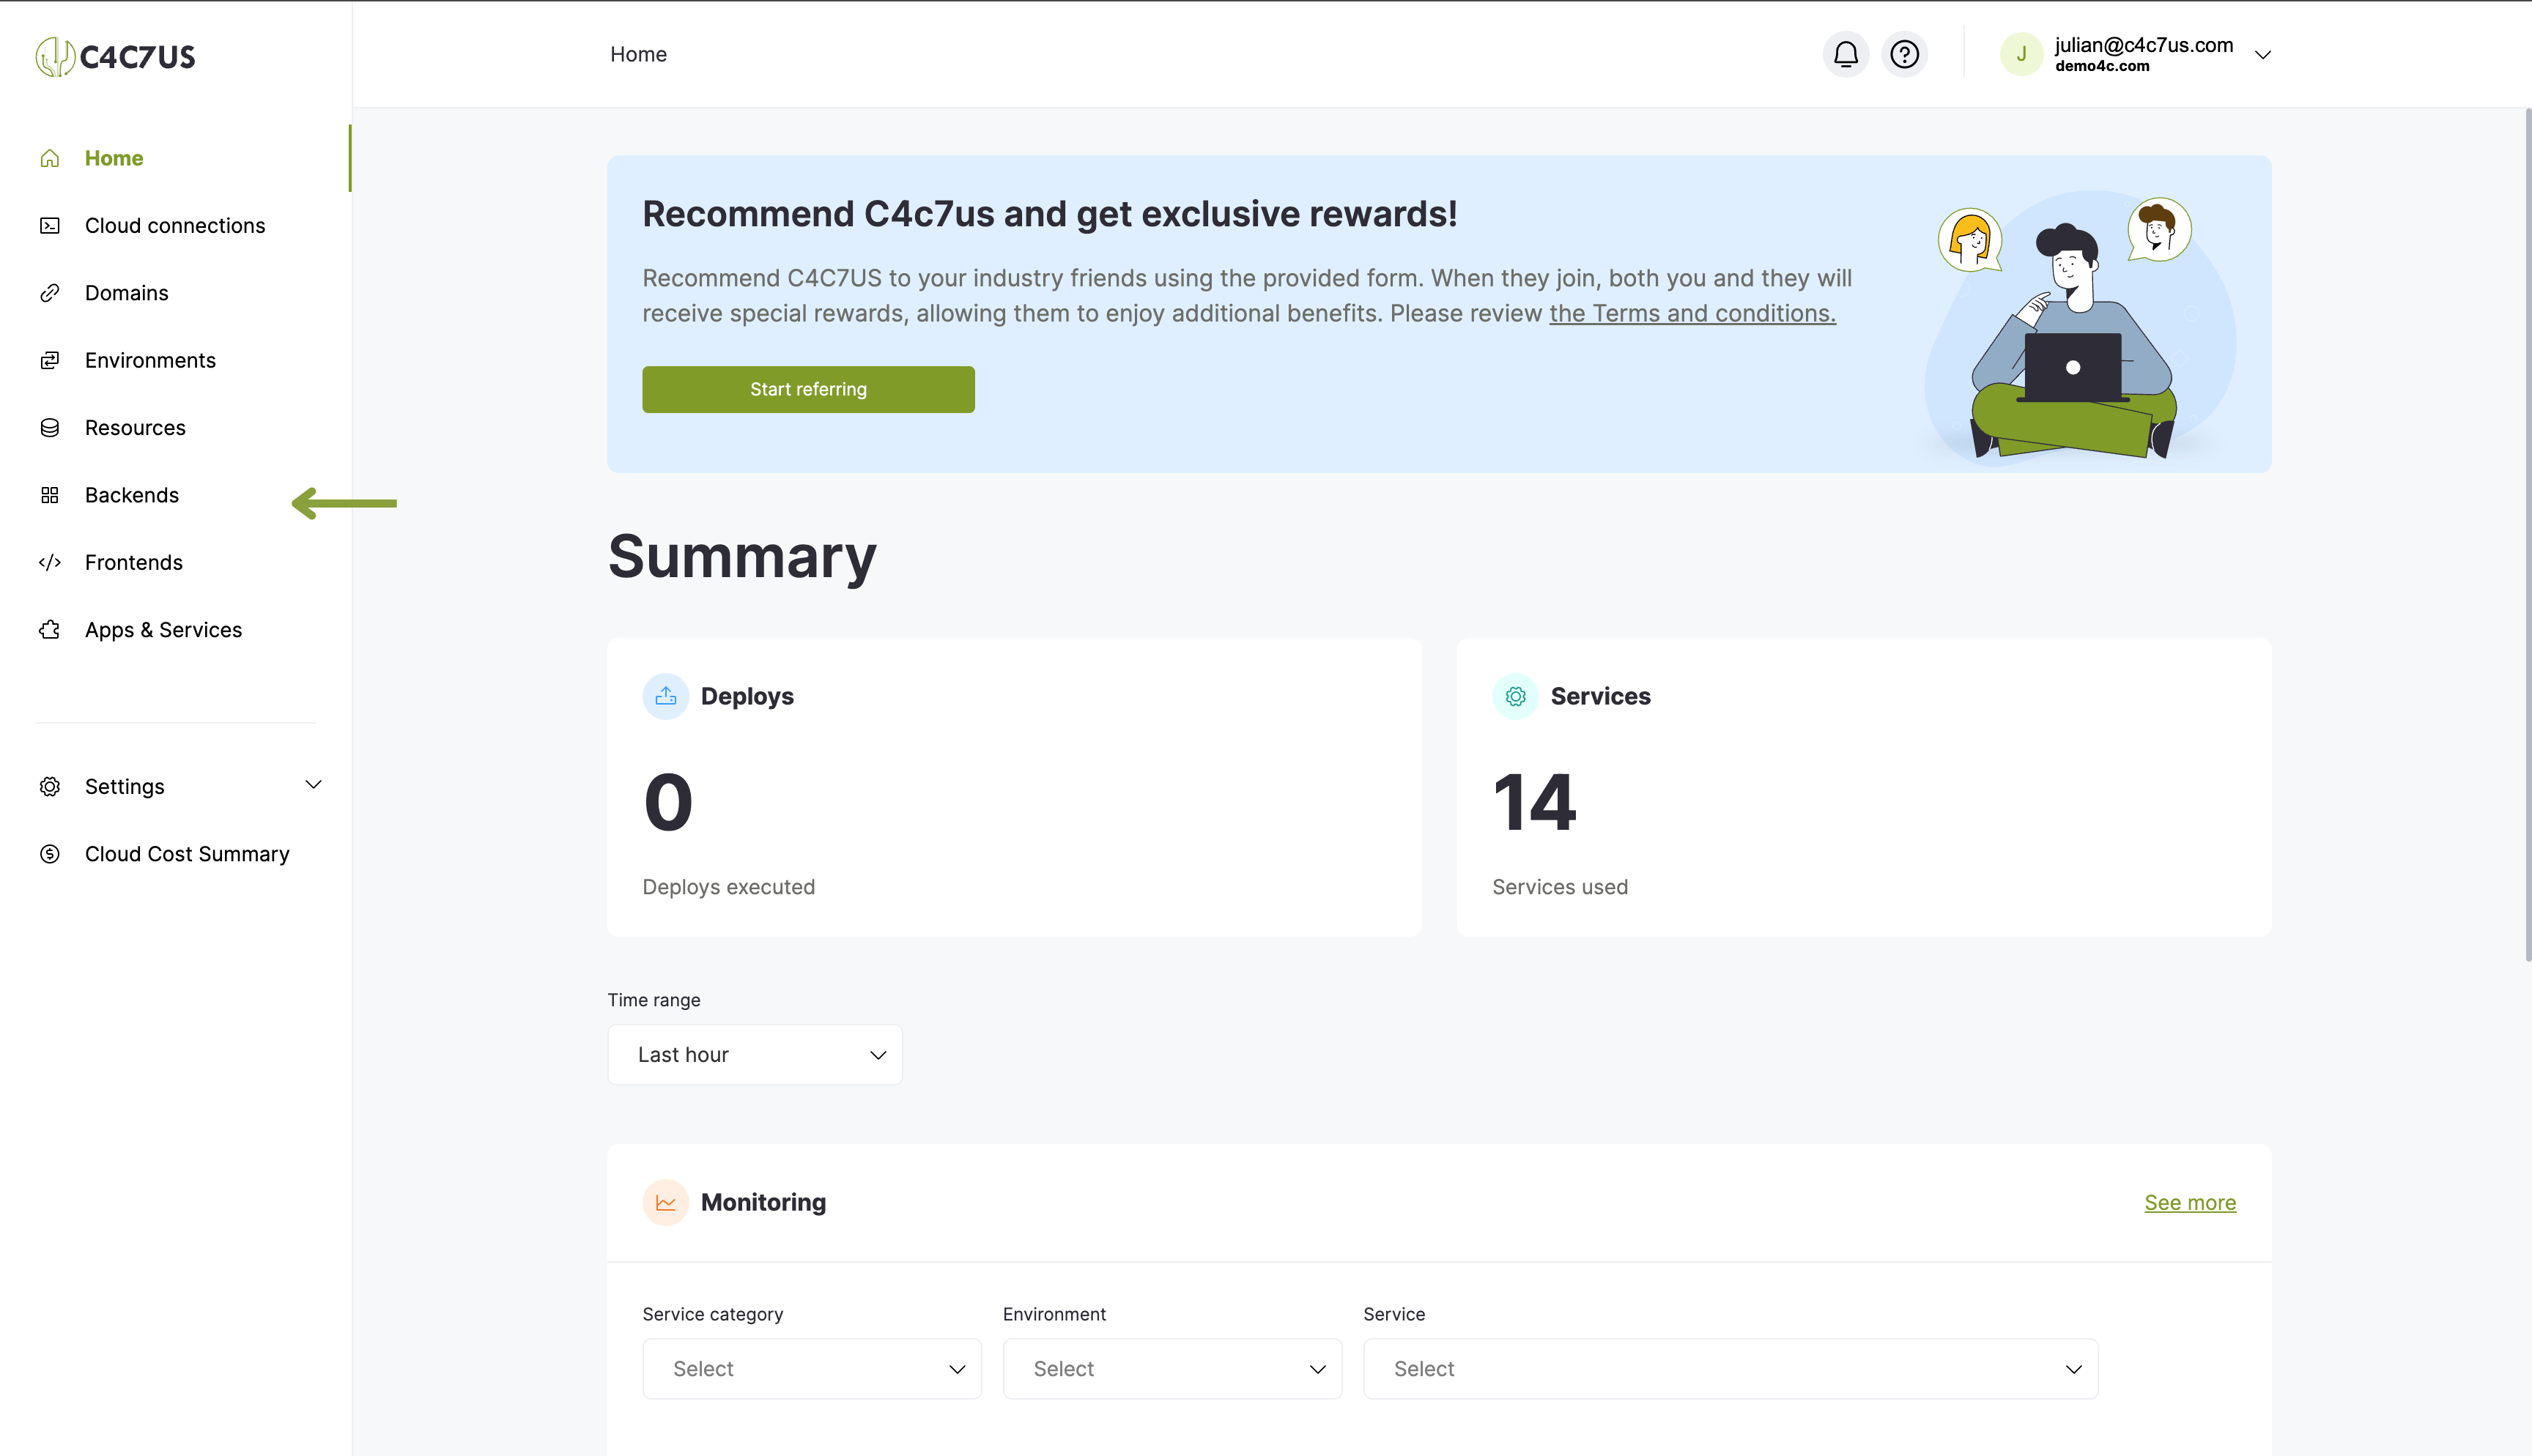
2.1 Go to the "Backends" section in C4C7OPS:
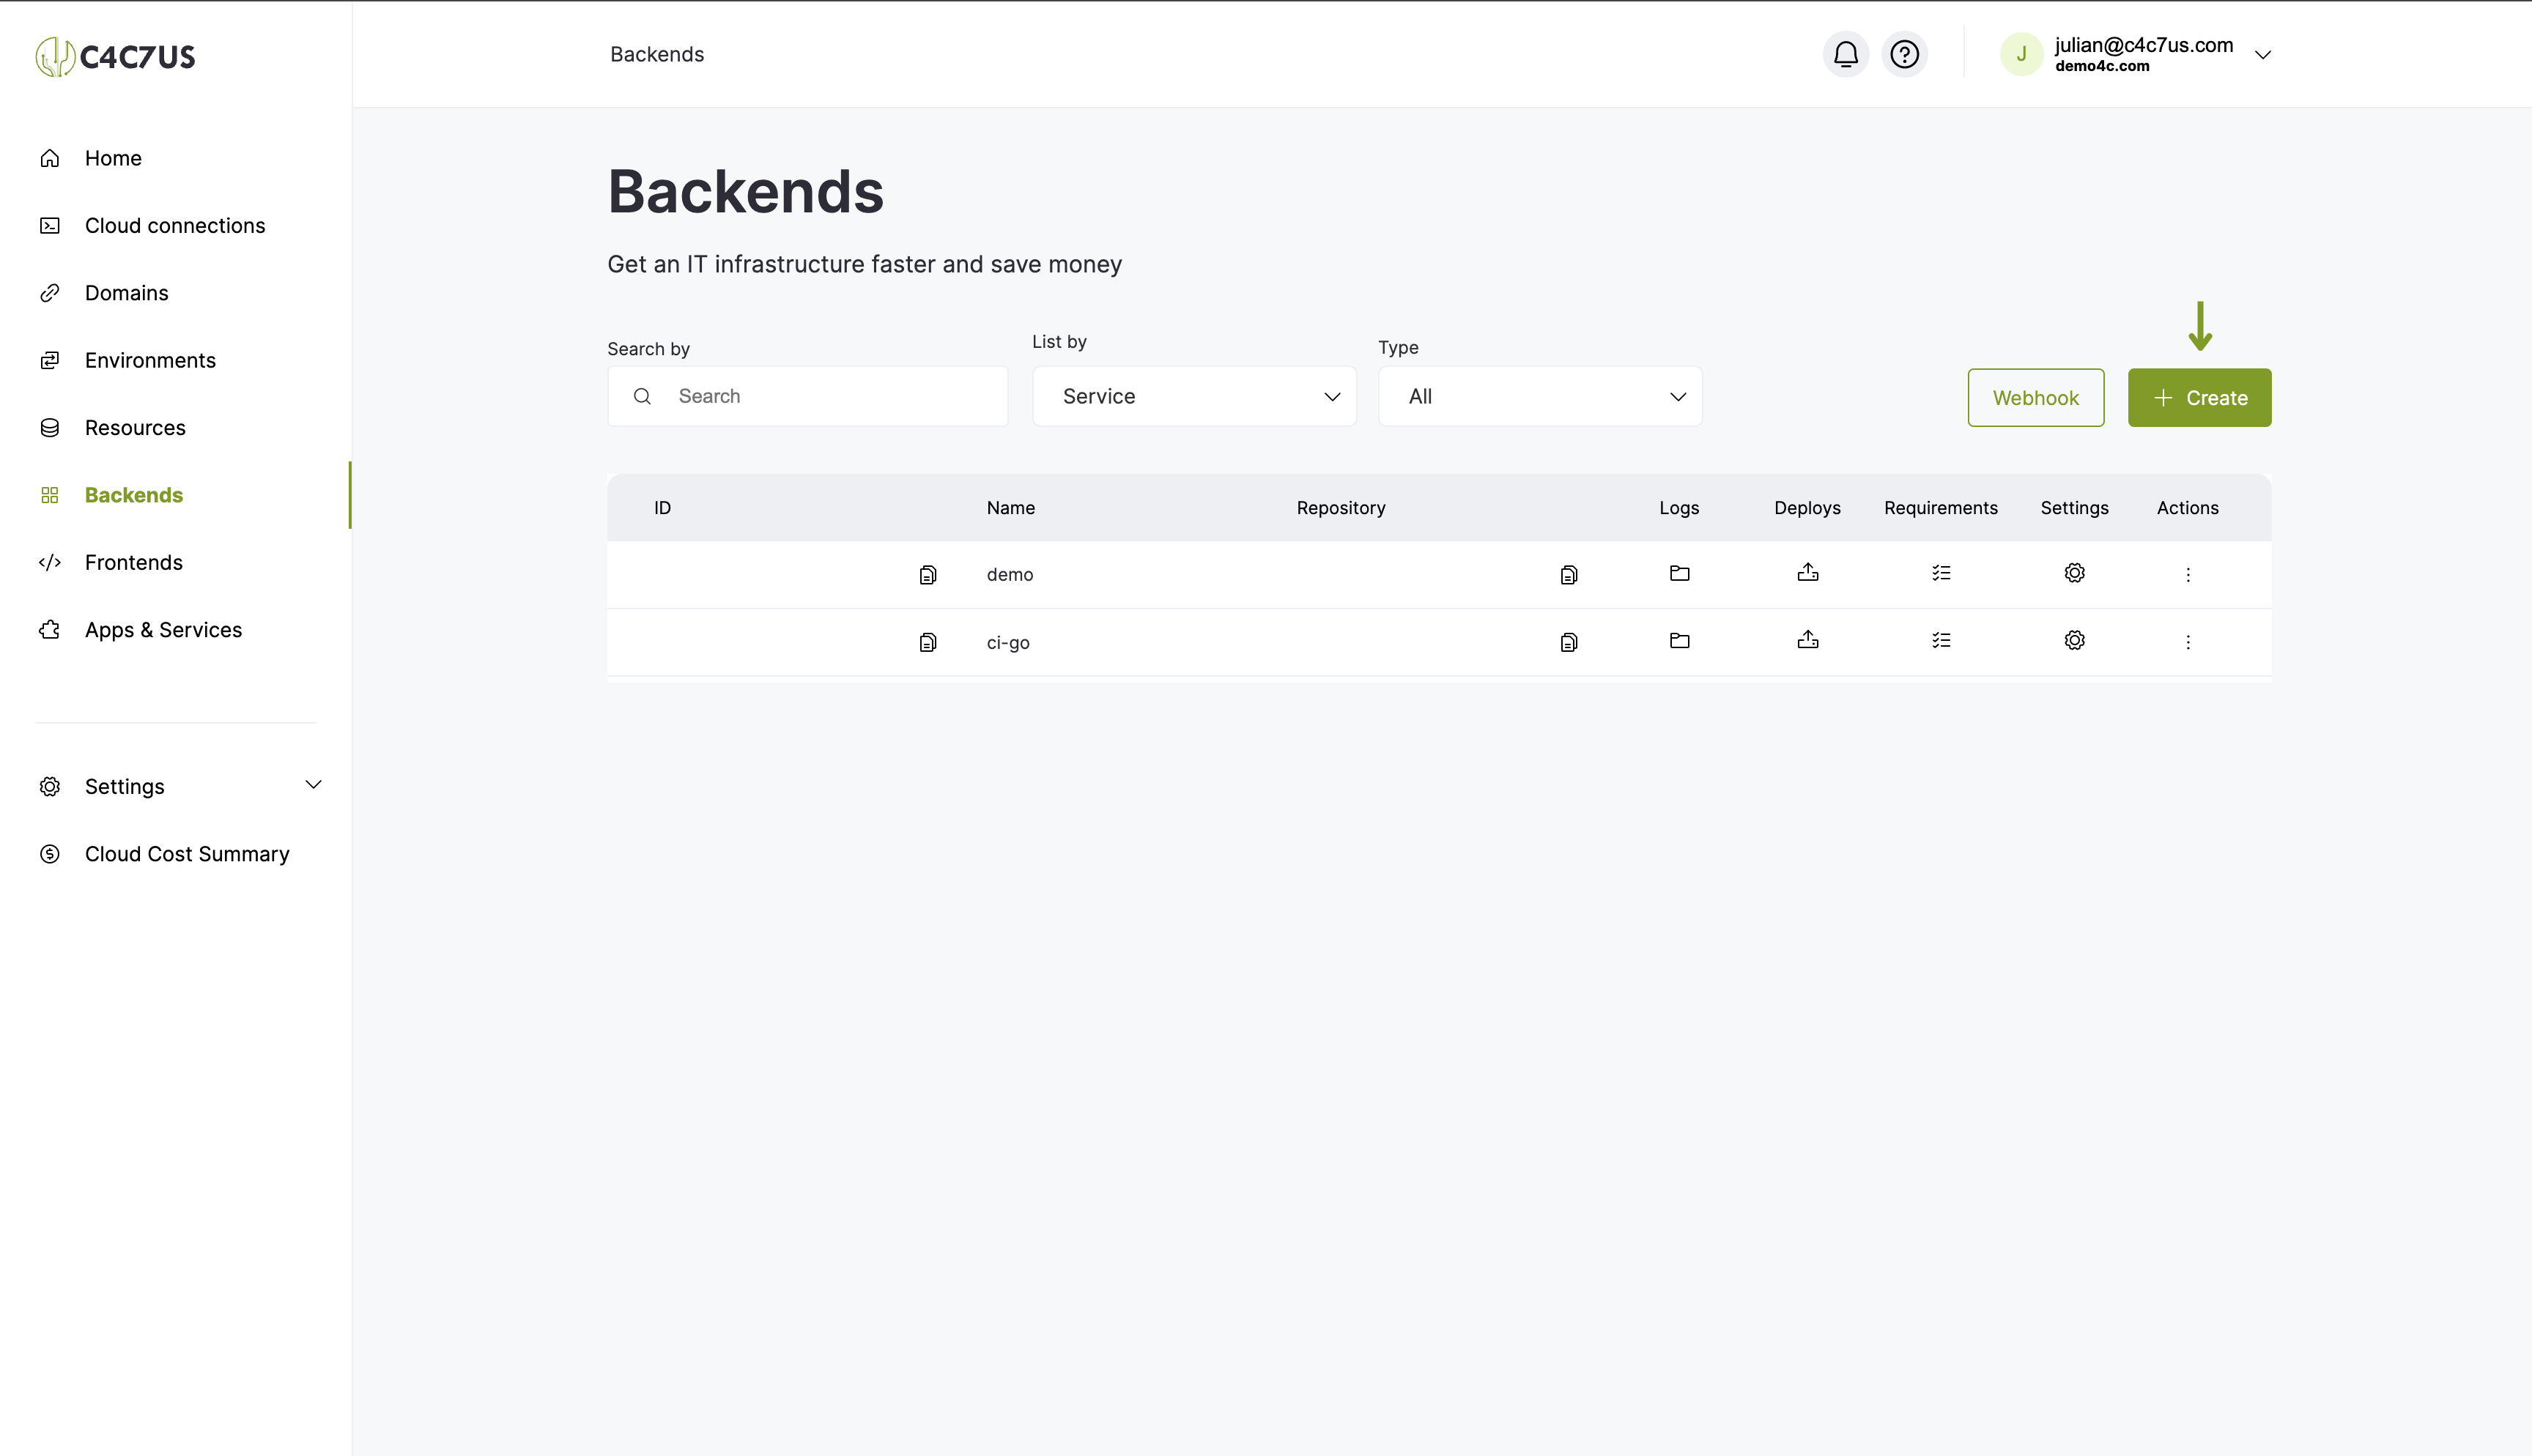
2.2 Click the "Create" button:
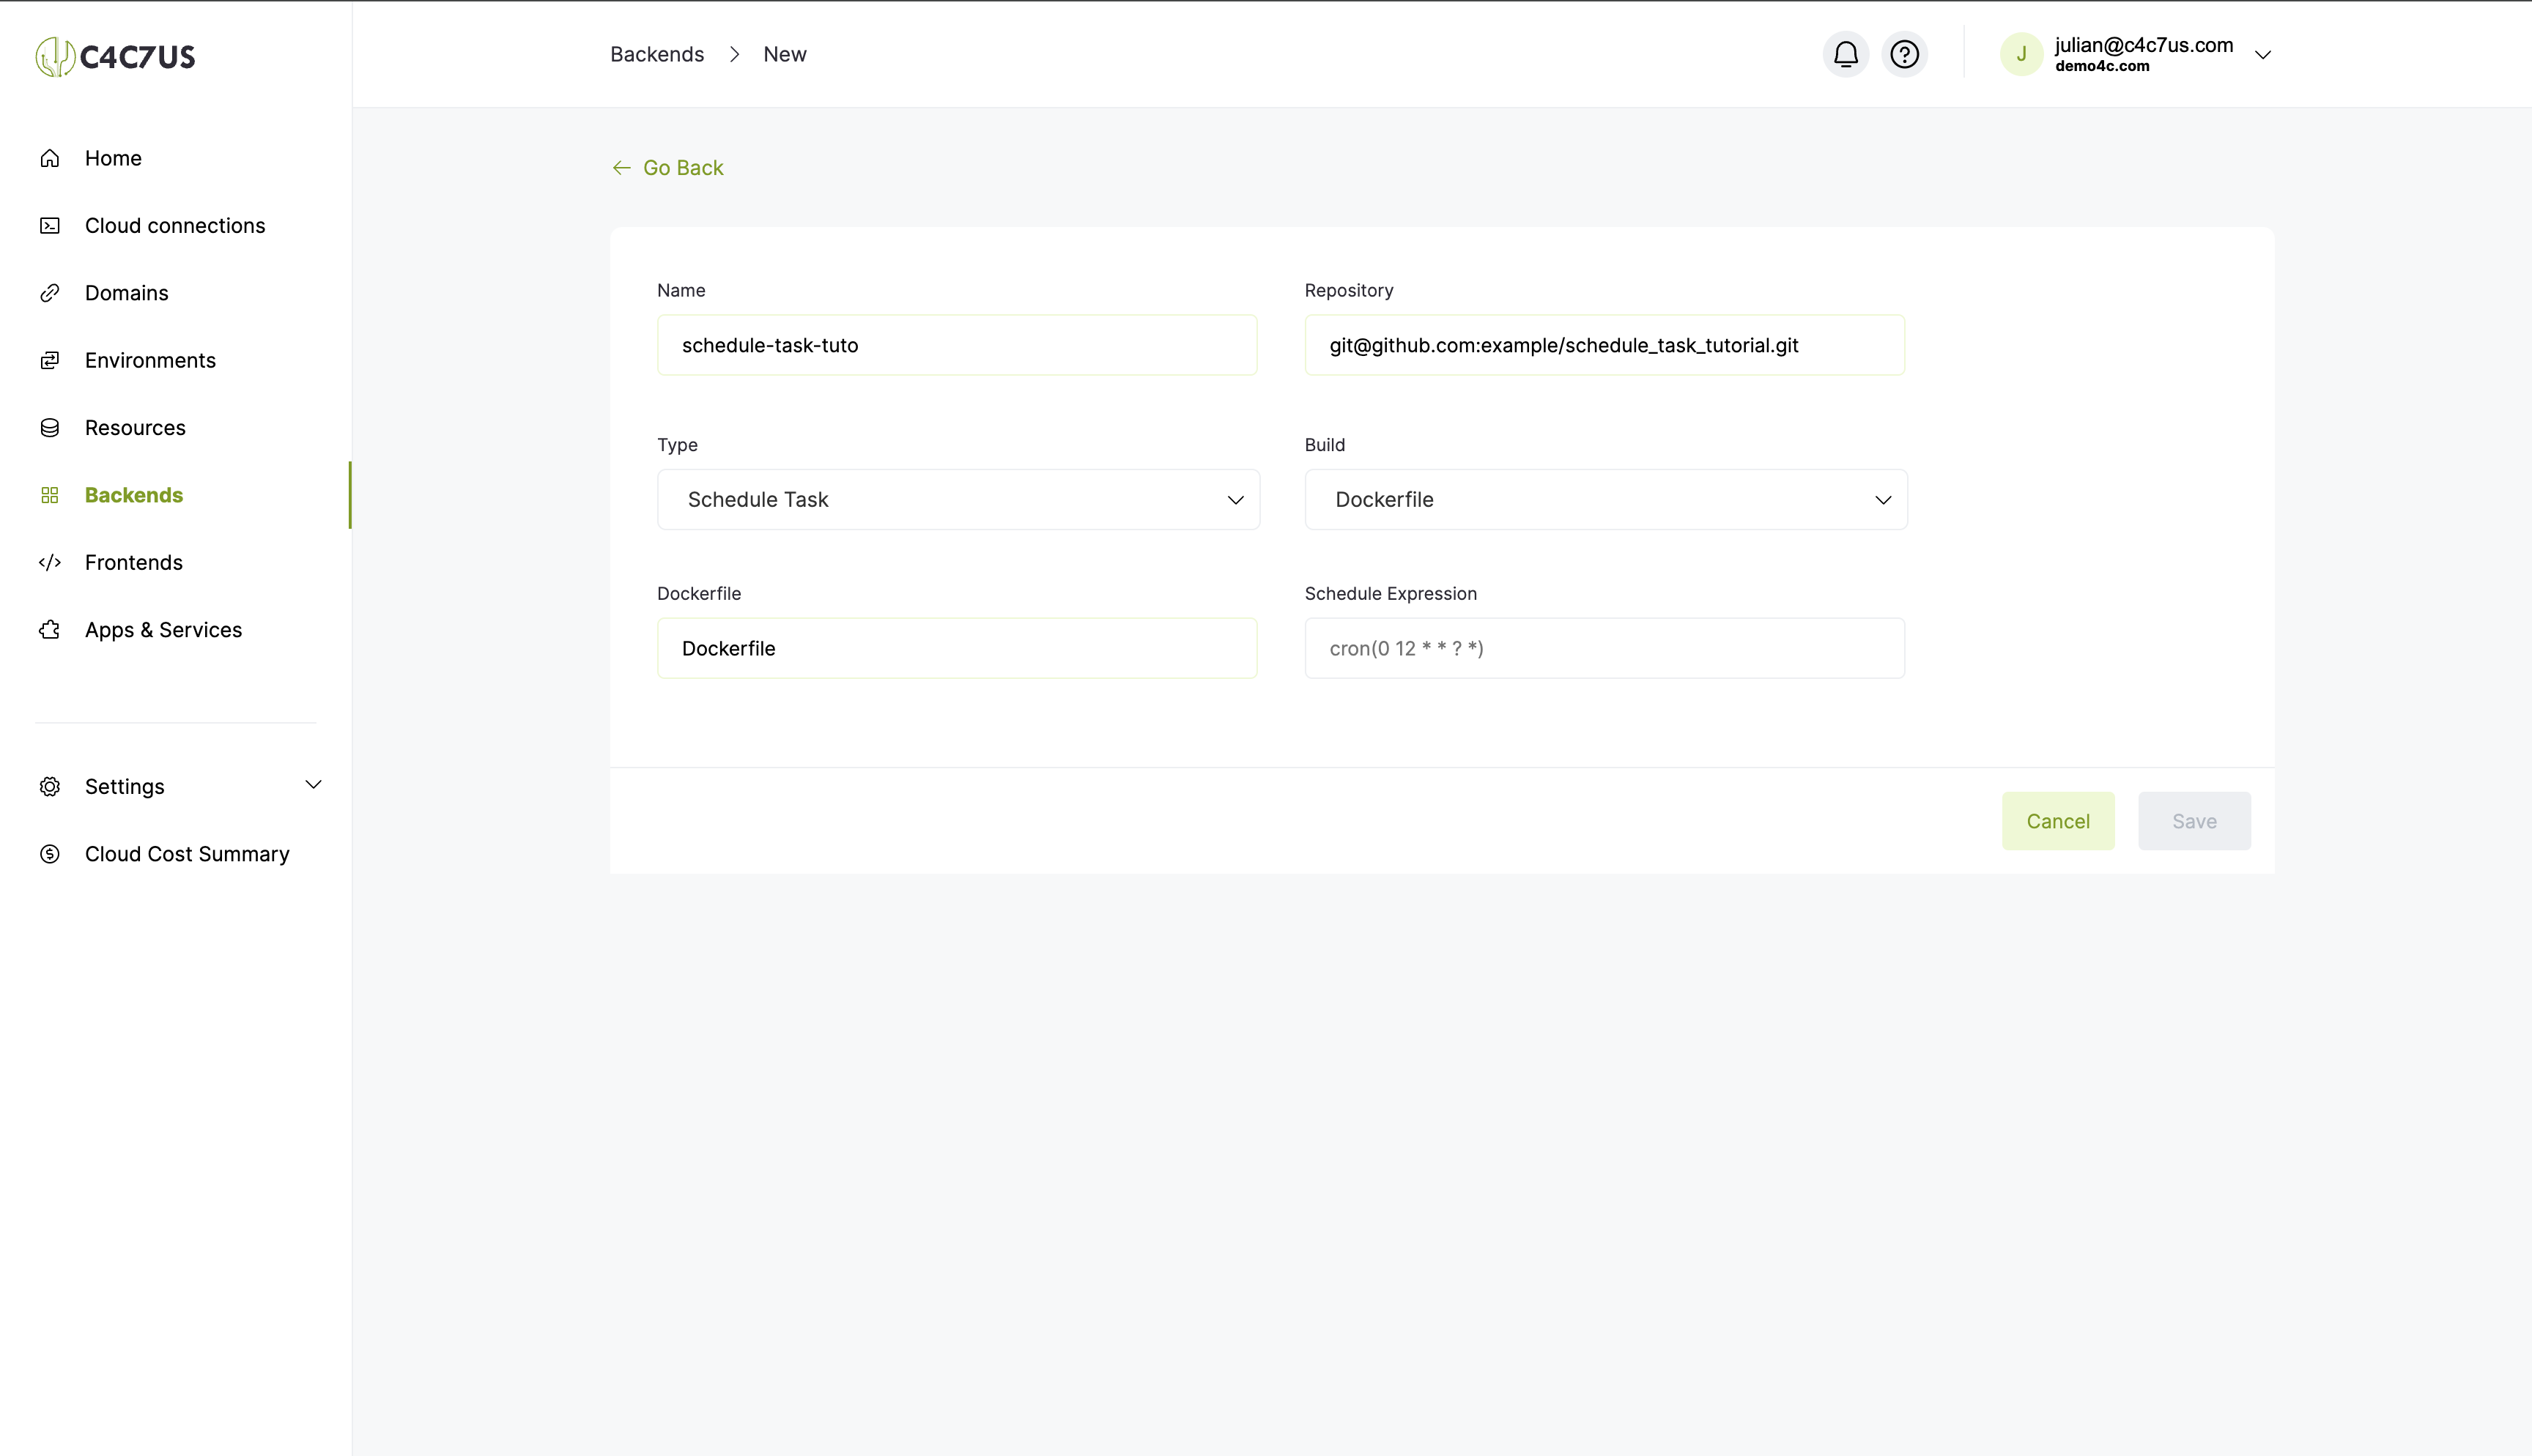
2.3 Fill in the fields:
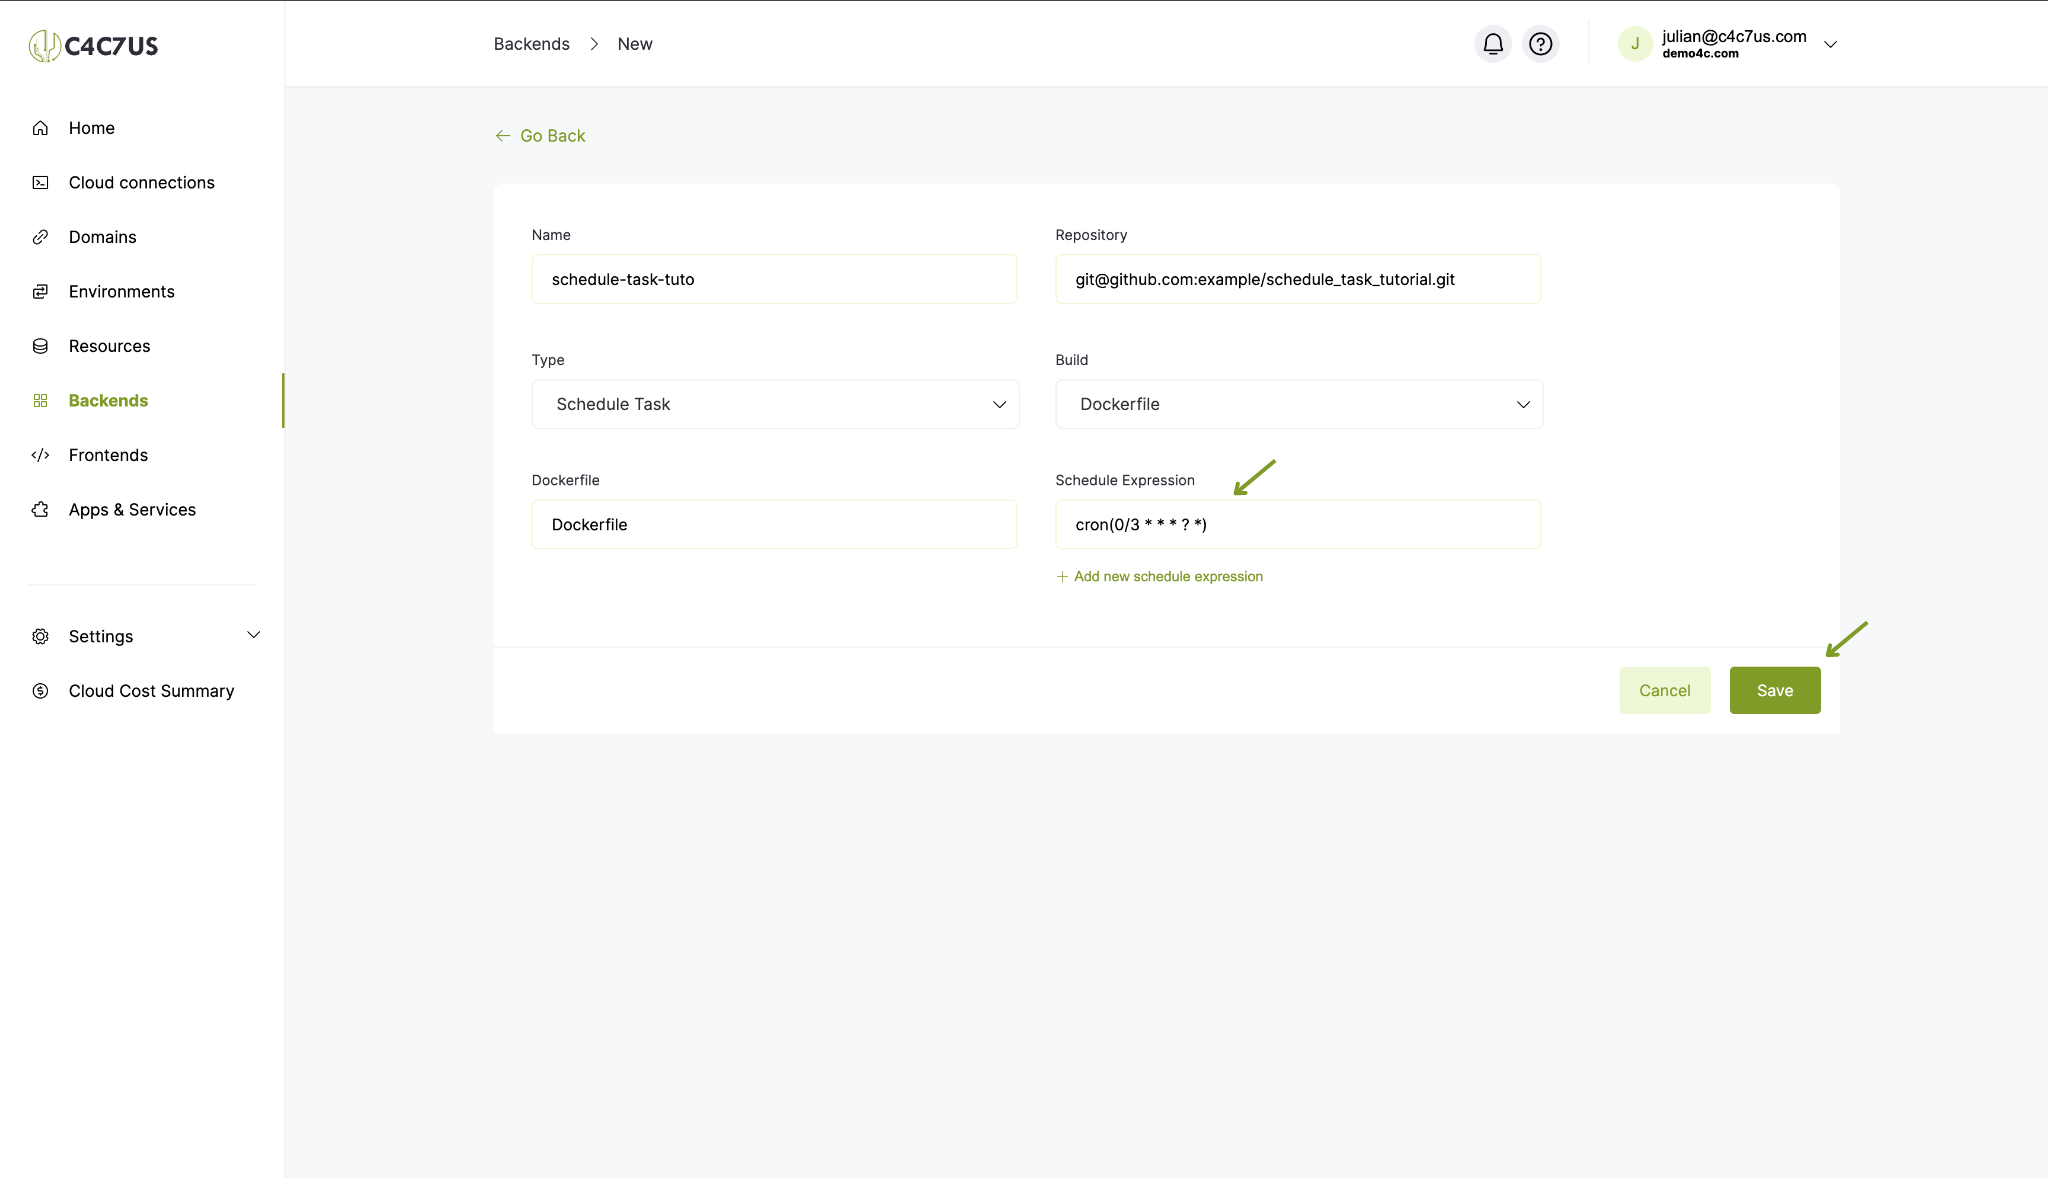
2.4 Configure a cron job to run every three minutes, all day, every day, and press "Save".
3. Deploy Our Project
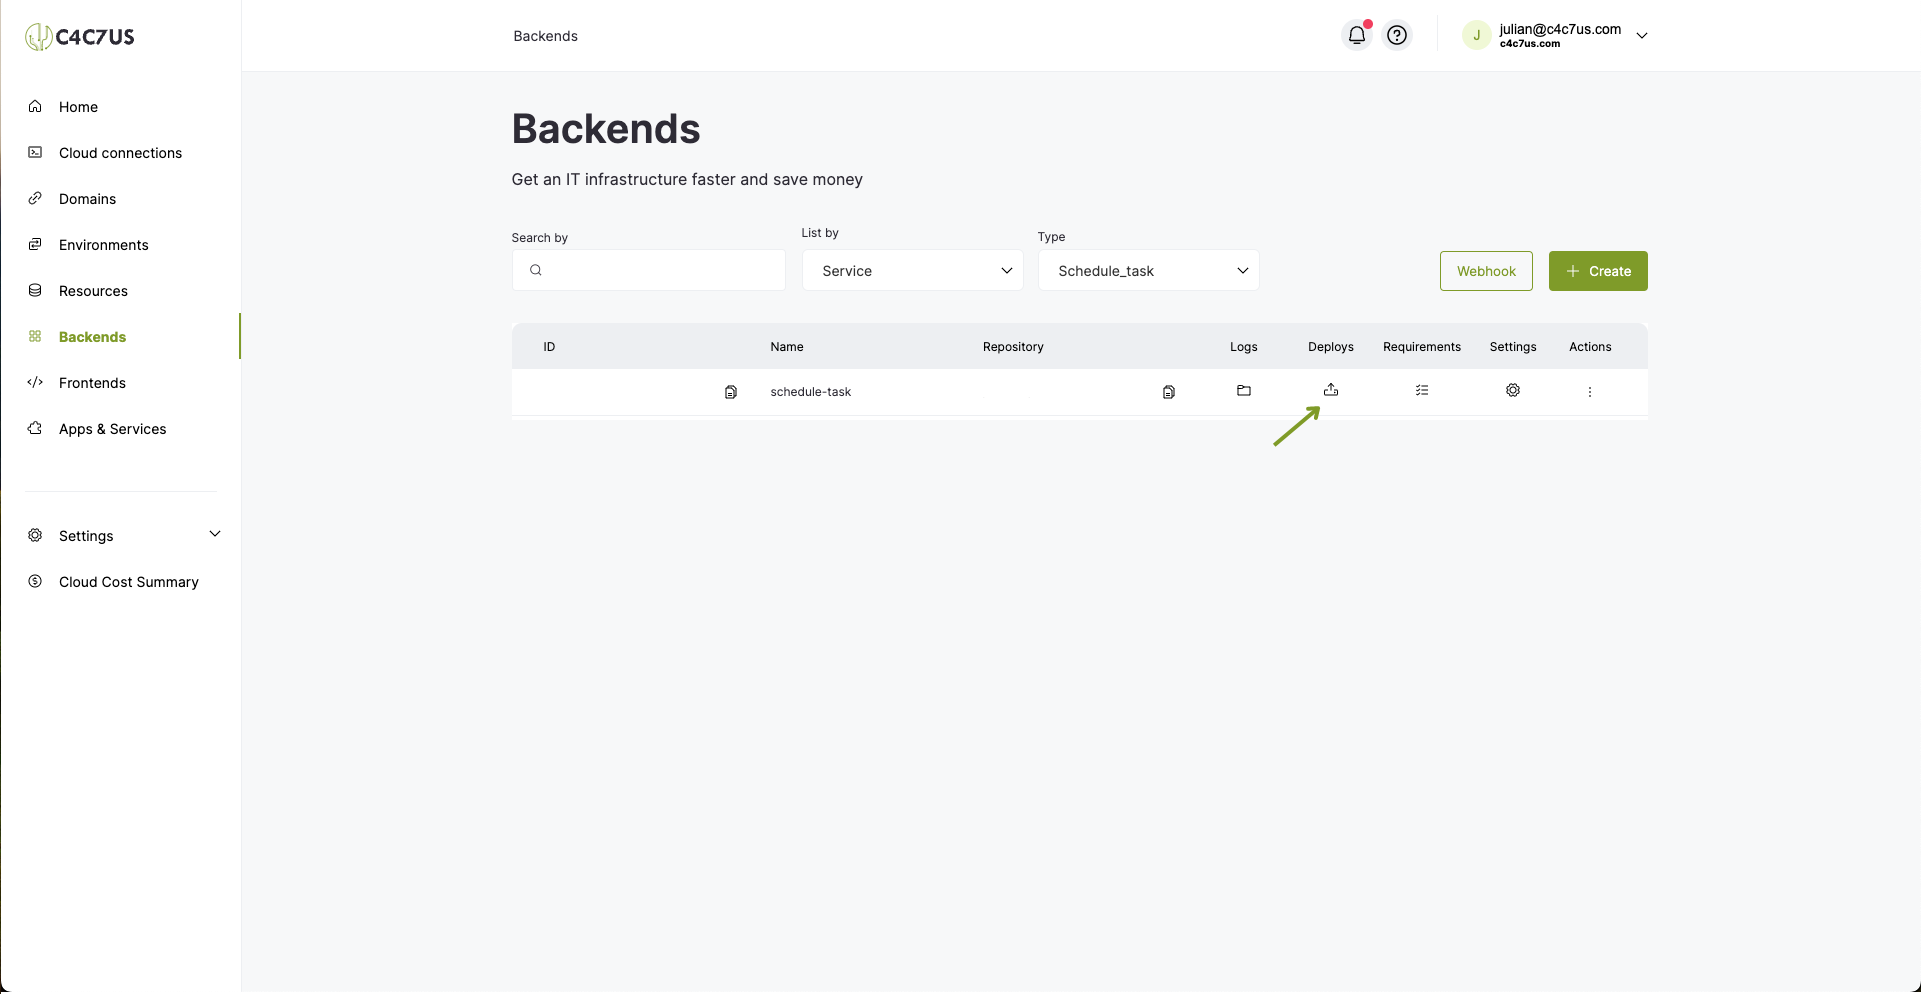
3.1 Go to Backends again, find our new service, and click on "Deploys".
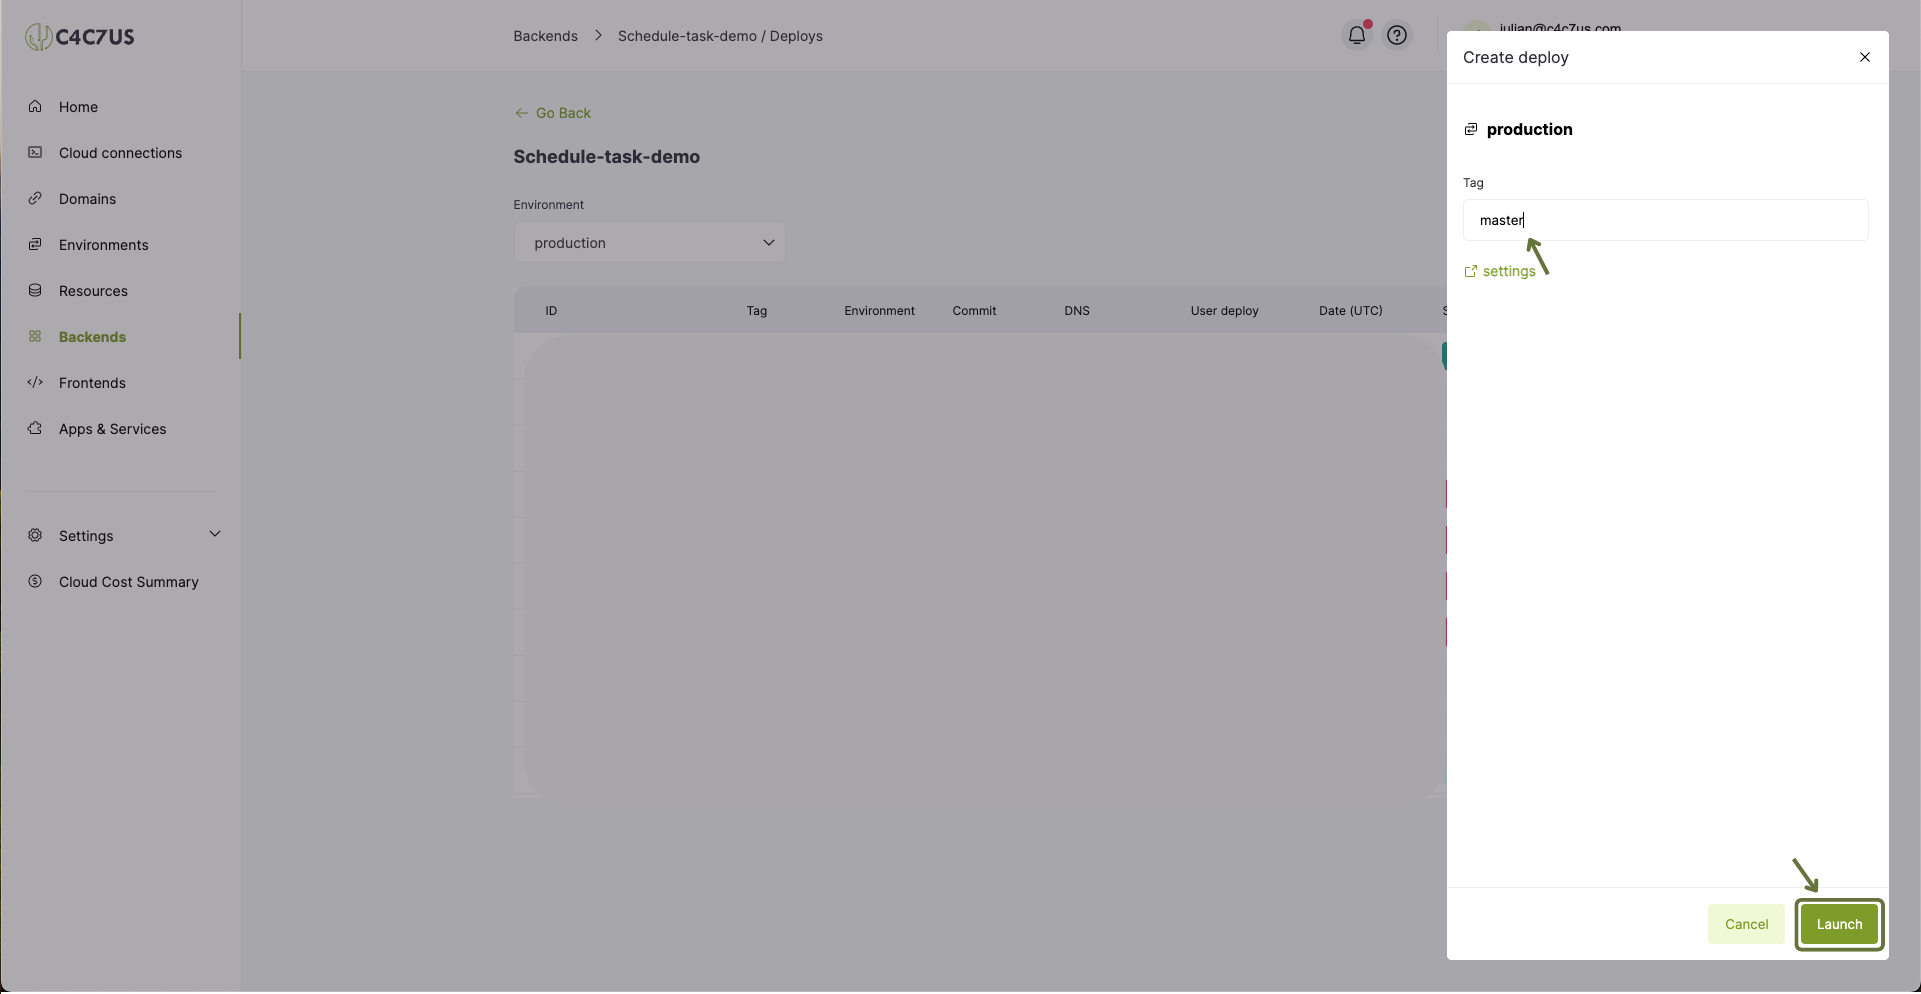
3.2 Click create, write a tag or branch, and click "Launch"
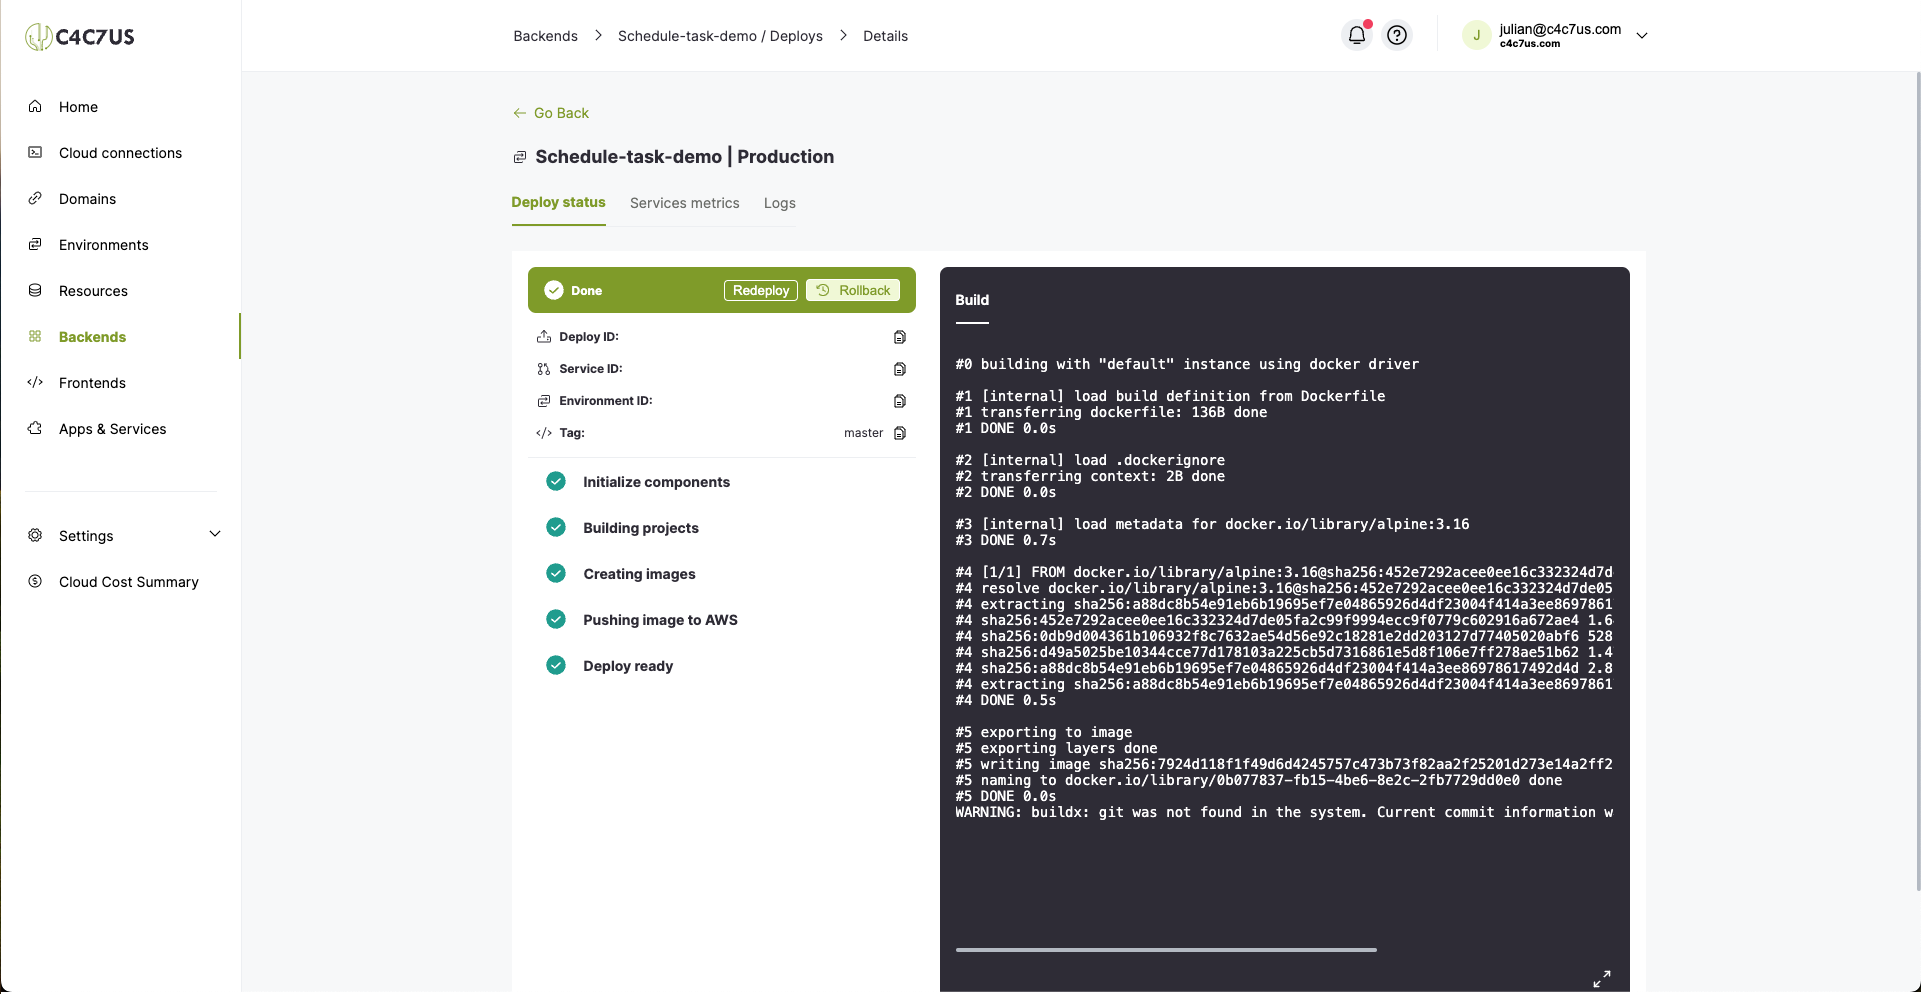
3.3 Wait for the deploy to finish executing.
4. Ensure Successful Execution, View the Defined Logs, and Execute It Manually
4.1 Search again for our service in the backends section and click "Executions".
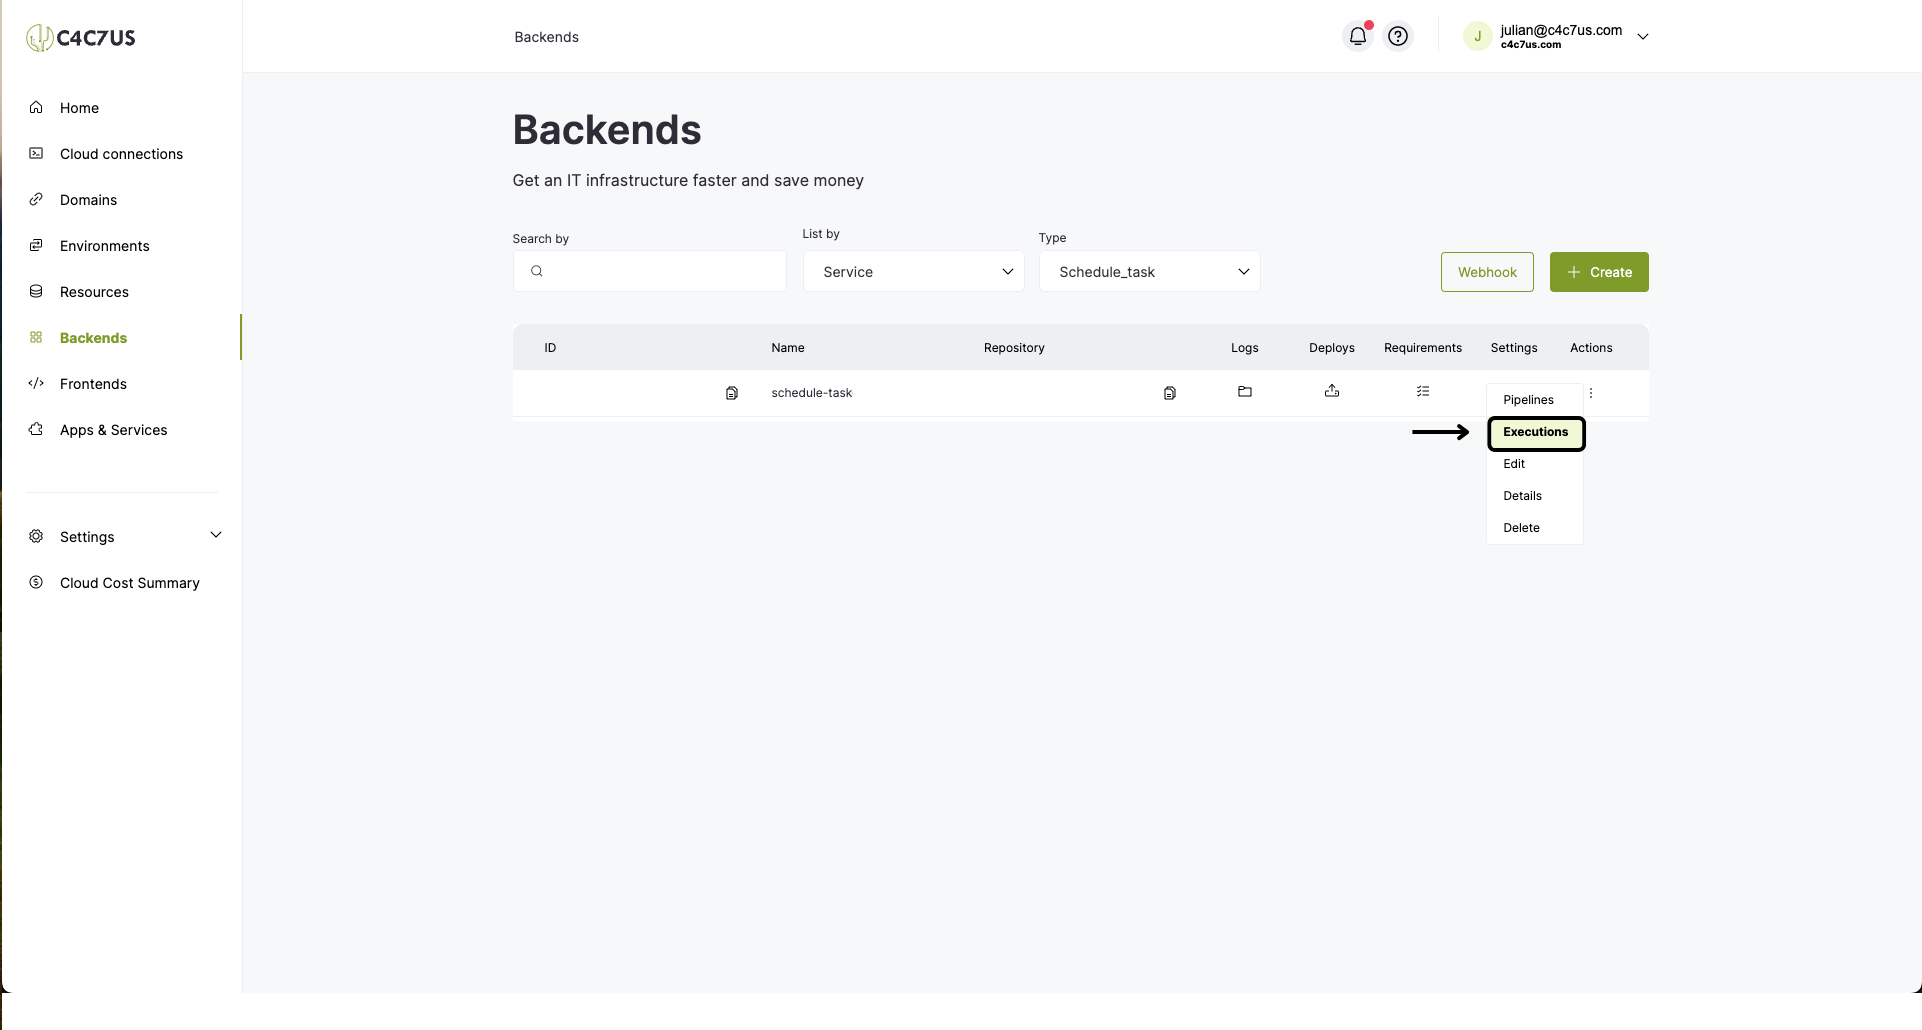
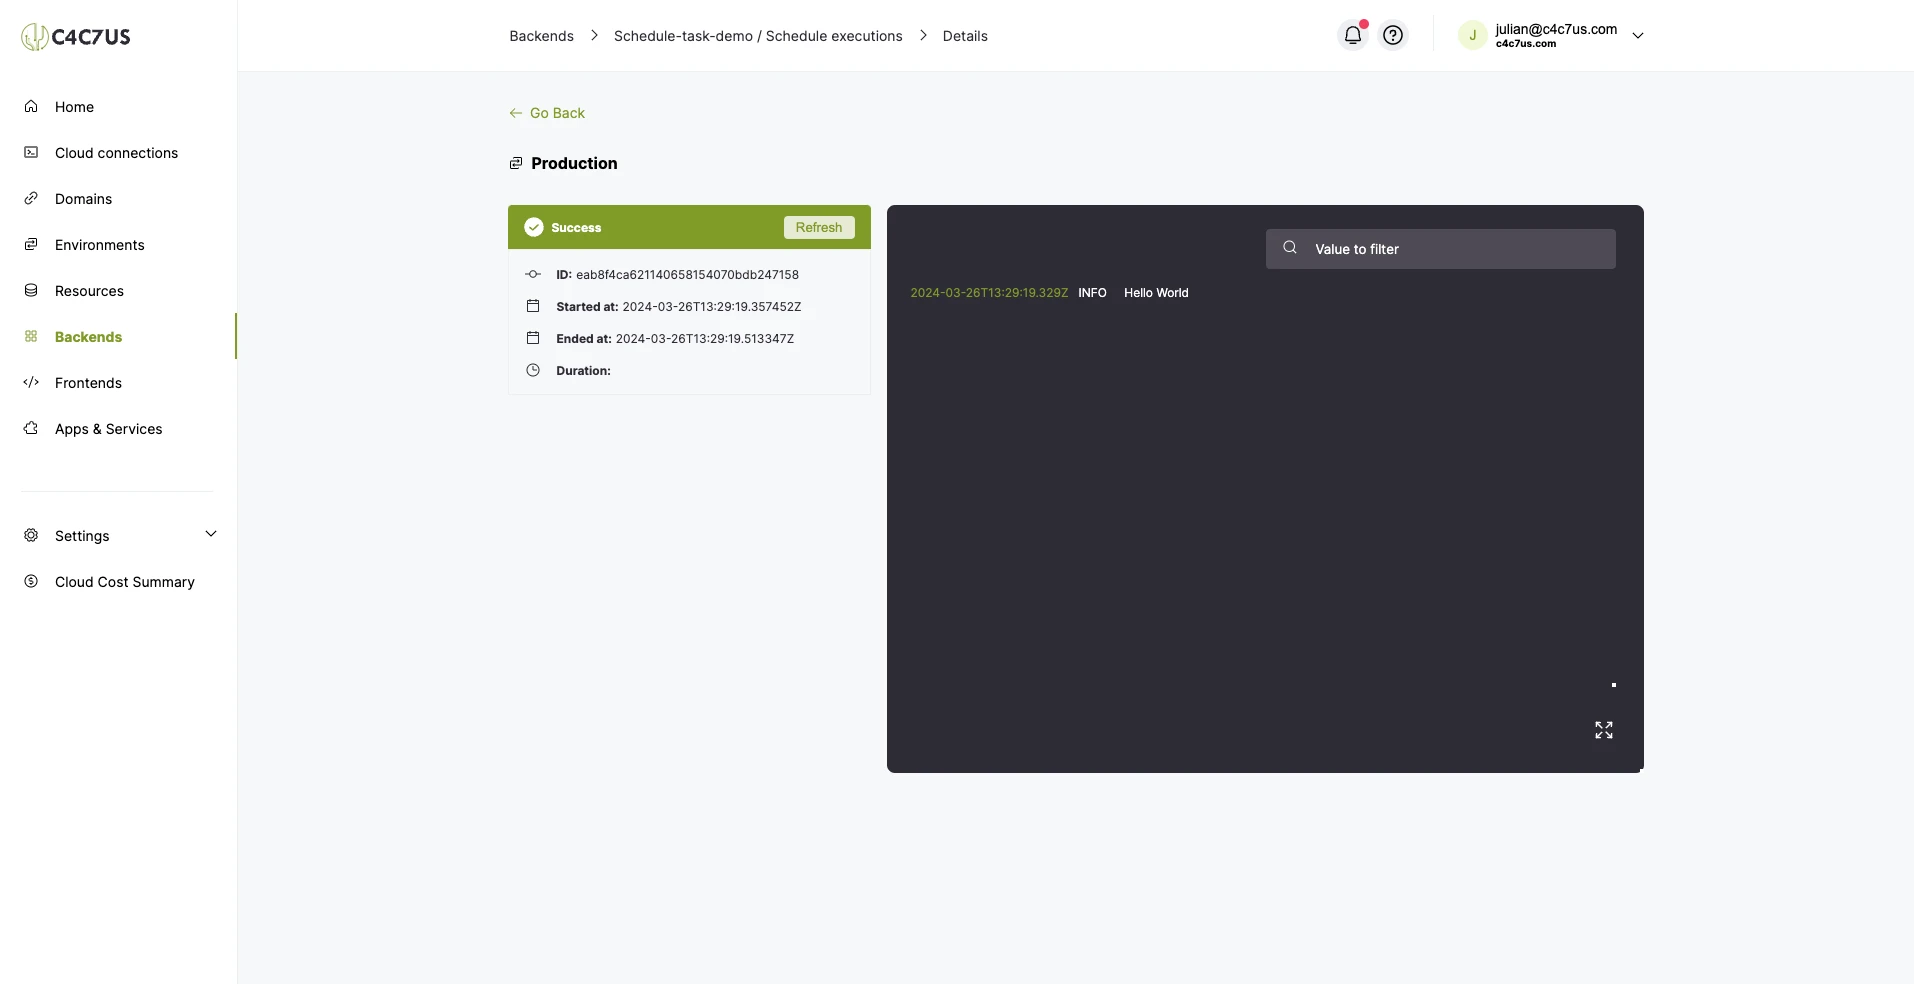
4.2 Here we can see all the executions of our task, click "Run manually", we will see that a new execution will start, and we will click on its status to see the detail.
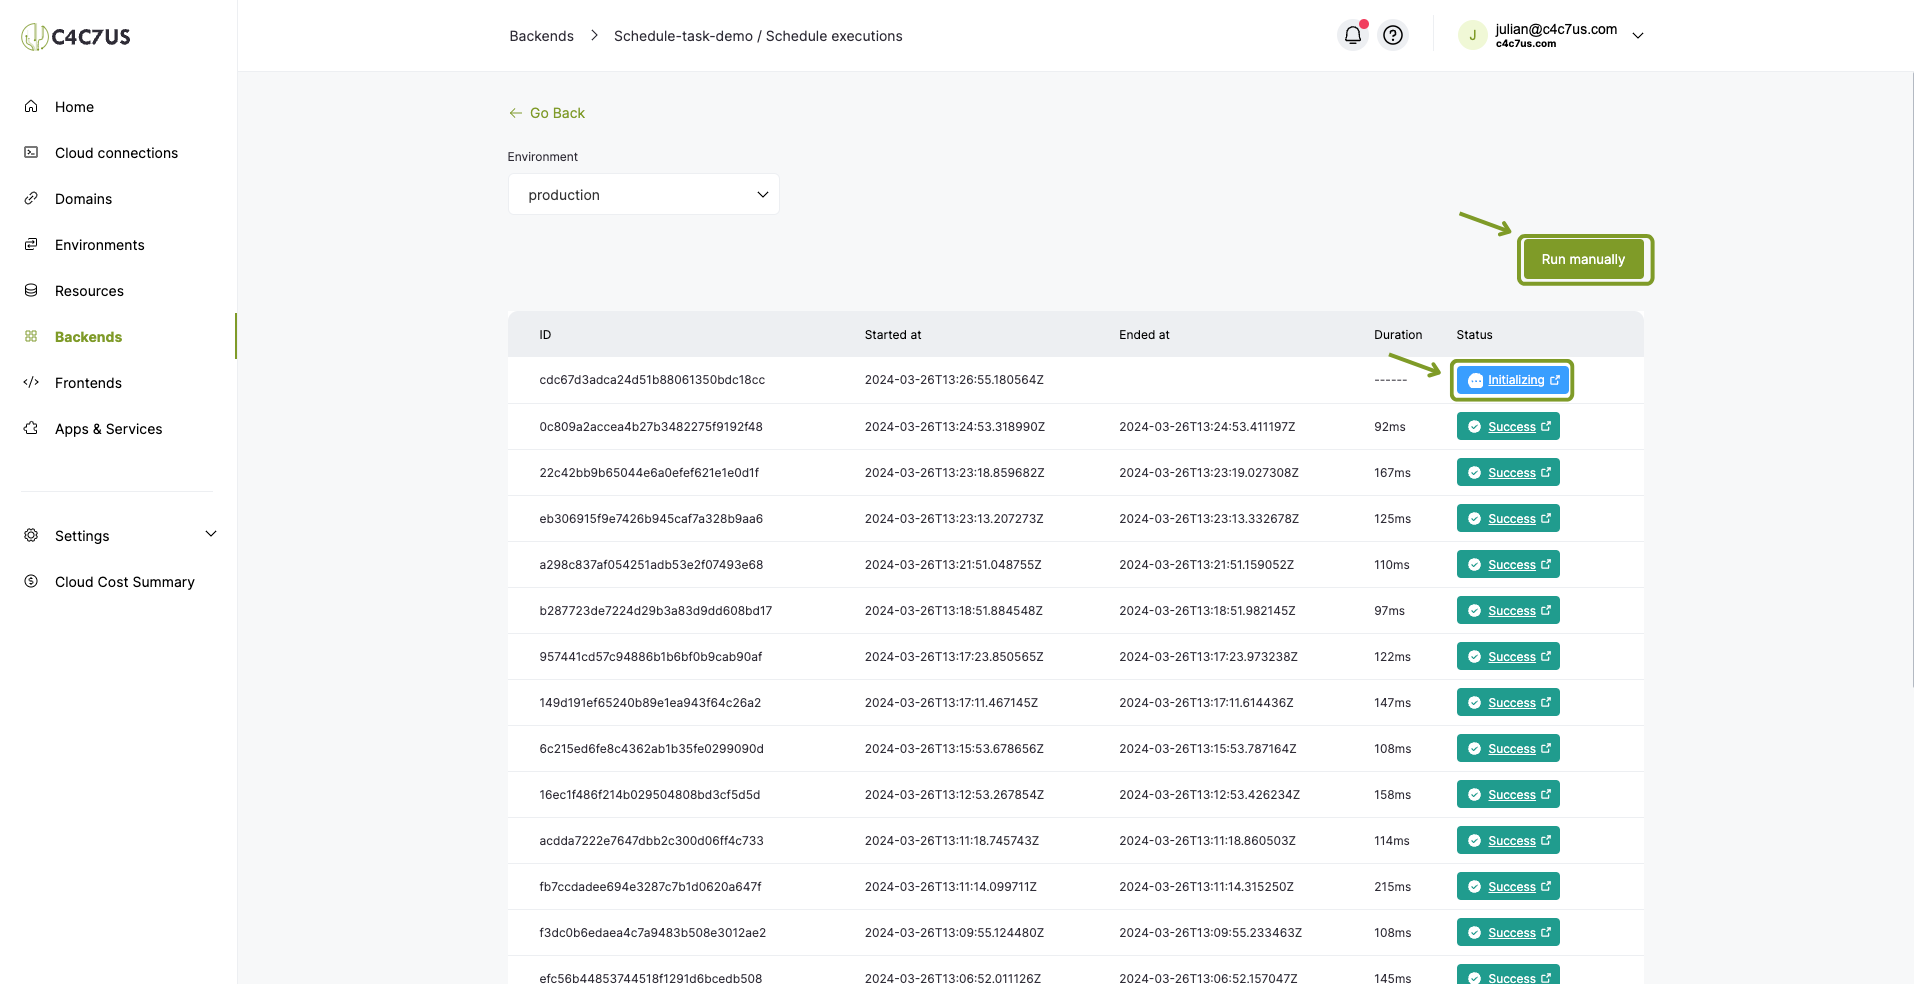
4.3 Here we will see the logs of the execution.
5. Conclusion
Once the complete flow of creating a "Schedule task" type service with a cron expression configured to define the execution intervals is finished, we will know how to configure this valuable tool and integrate it with our C4C7OPS console.