


Integrating CI from C4C7OPS to a service and extending it
The goal of this blog is to show you how you can activate a CI flow on the C4C7OPS platform and extend it to improve code quality through unit and integration testing.
What is needed to activate CI in a service for the first time?
Below, we will detail the steps to integrate your services with CI:
- Configure the necessary files to generate coverage
- Upload the files to your Git provider
- Activate CI for that service from C4C7OPS
- Launch a pull request from your Git provider to trigger CI for the first time
By following these steps, we will have the service configured so that with each Pull request, a pipeline will be triggered that runs our tests and generates coverage to validate the percentage of code that was tested and if all tests were successful.
1. Configure the necessary files to generate coverage.
The first thing we need to do is create the following files in the project's root:
1.1 docker-compose-ci.yml:
This will be responsible for triggering the execution of the tests and generating a coverage, it varies from language to language and in this case, we will use a Node.js base for this example, usually we will have to modify the “image” and the “command” to adapt it to the language we are using.
services: test: network_mode: host" image: node:16" working_dir: /code" volumes:" - ./:/code" command: sh -c "npm install && npm run test:coverage""
1.2 sonar-project.properties:
This file will allow C4C7OPS to read the coverage generated by the file from the previous step and compare it with the project files to determine if it meets the standards to be approved, we can adapt it to basically any of the languages that we support but in this case for Typescript it would be something like this.
2. Upload the files to your Git provider.
This is a relatively simple process where you must execute the basic commands to upload a file to your main branch.
2.1. We create a commit and upload it:
2.2. After this, we must leave our files on the main branch of the project:

3. Activate CI for that service from C4C7OPS.
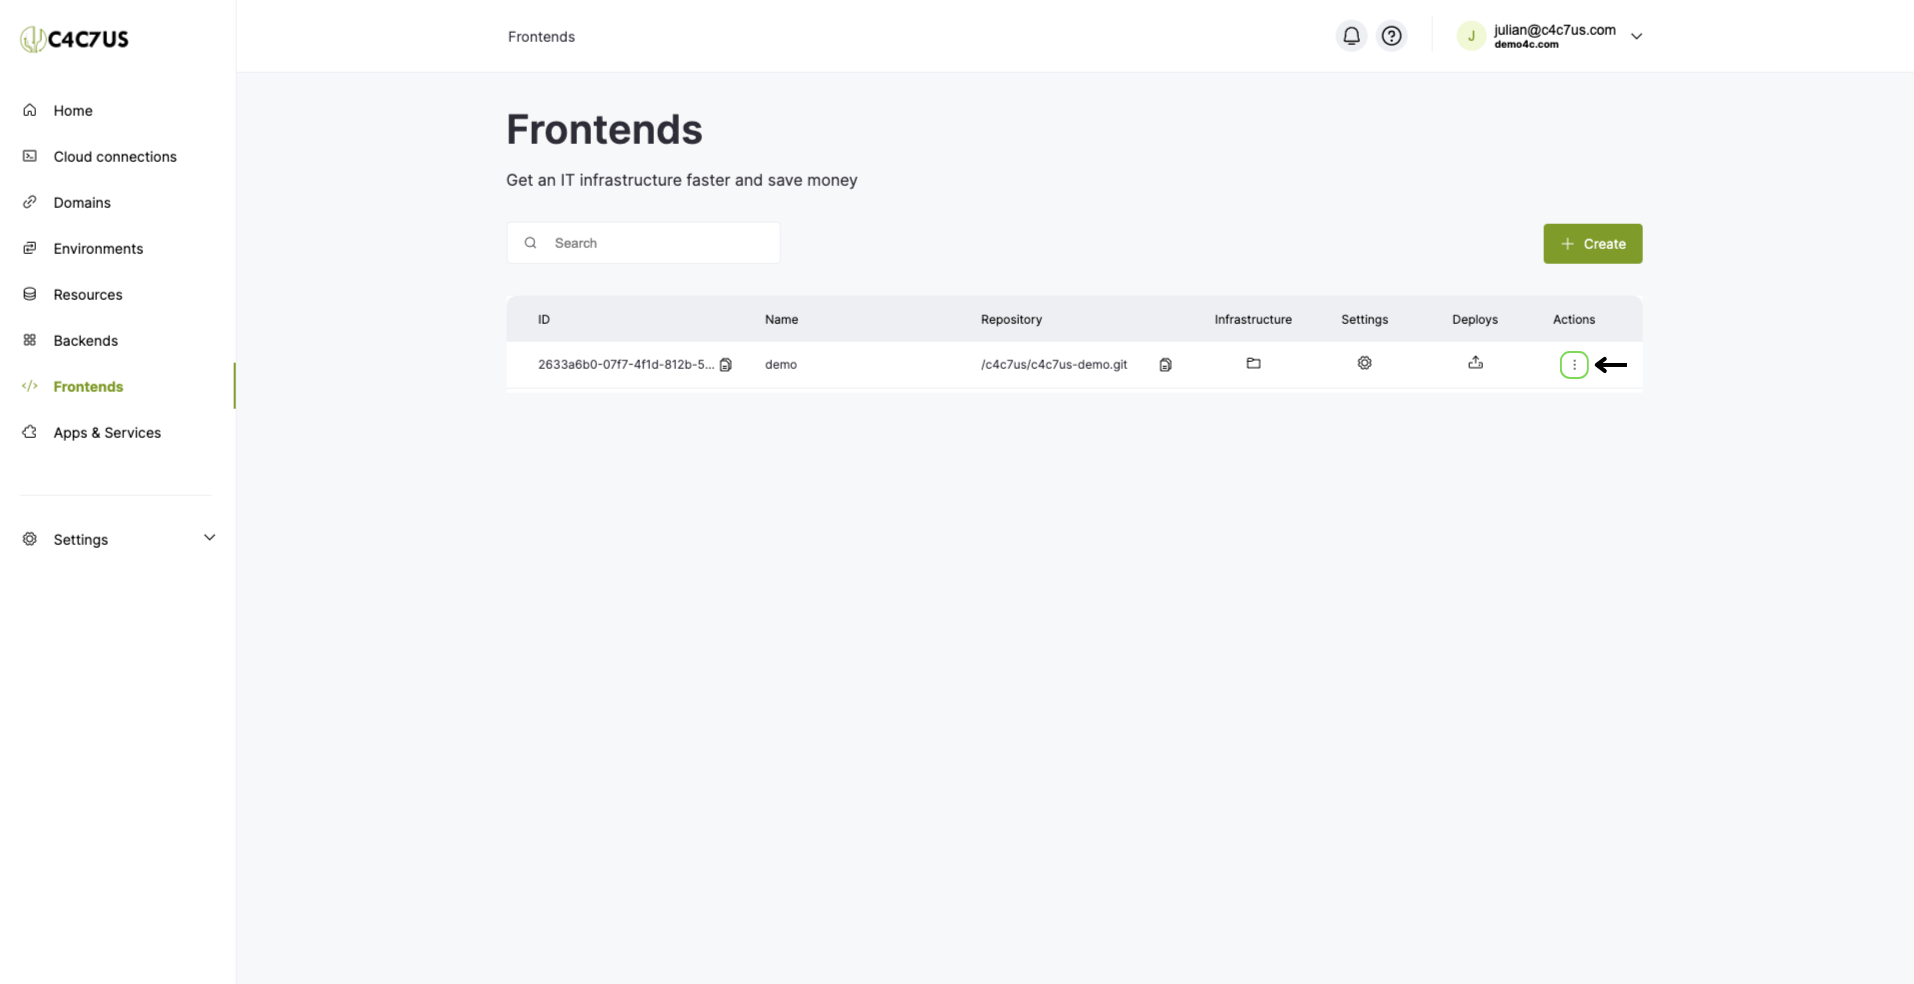
The next step is to access C4C7OPS and look for the service you want to add CI, to, whether it's a backend or a frontend, and activate it:
3.1. Press the "Actions" button for the service you want to activate CI for:
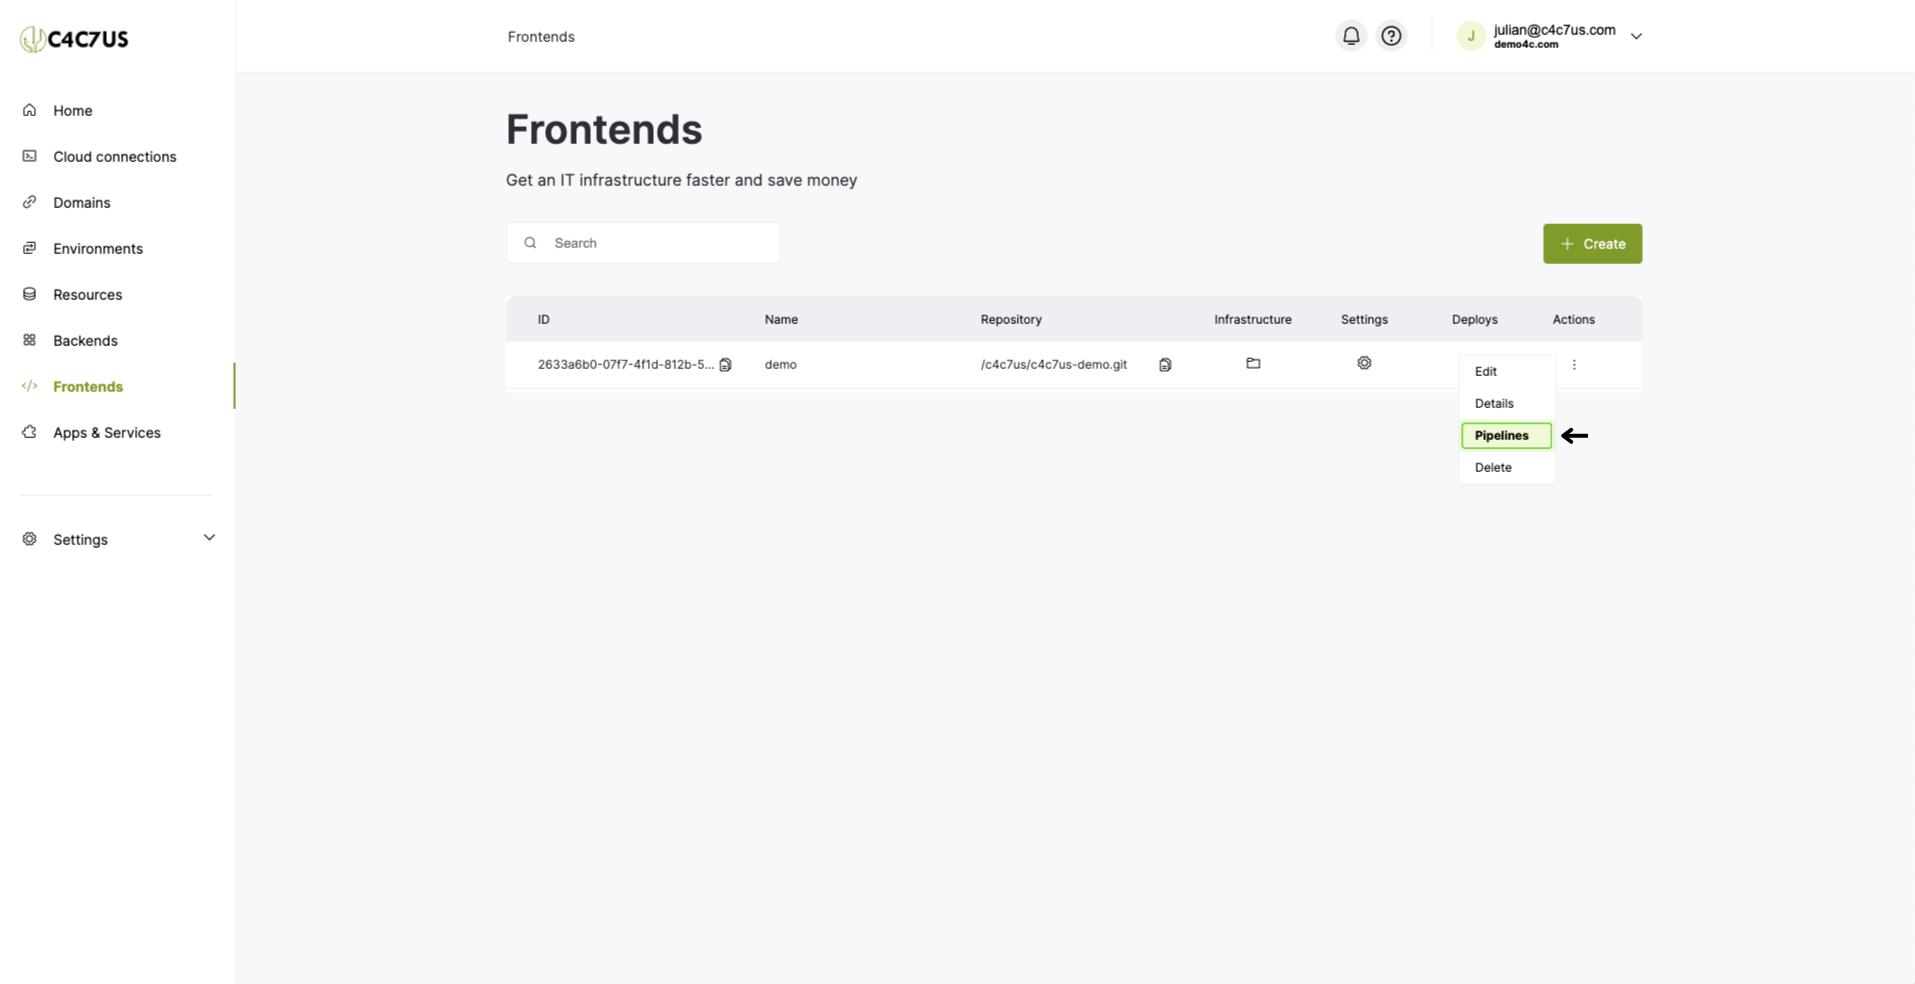
3.2. Select the "Pipelines" option.
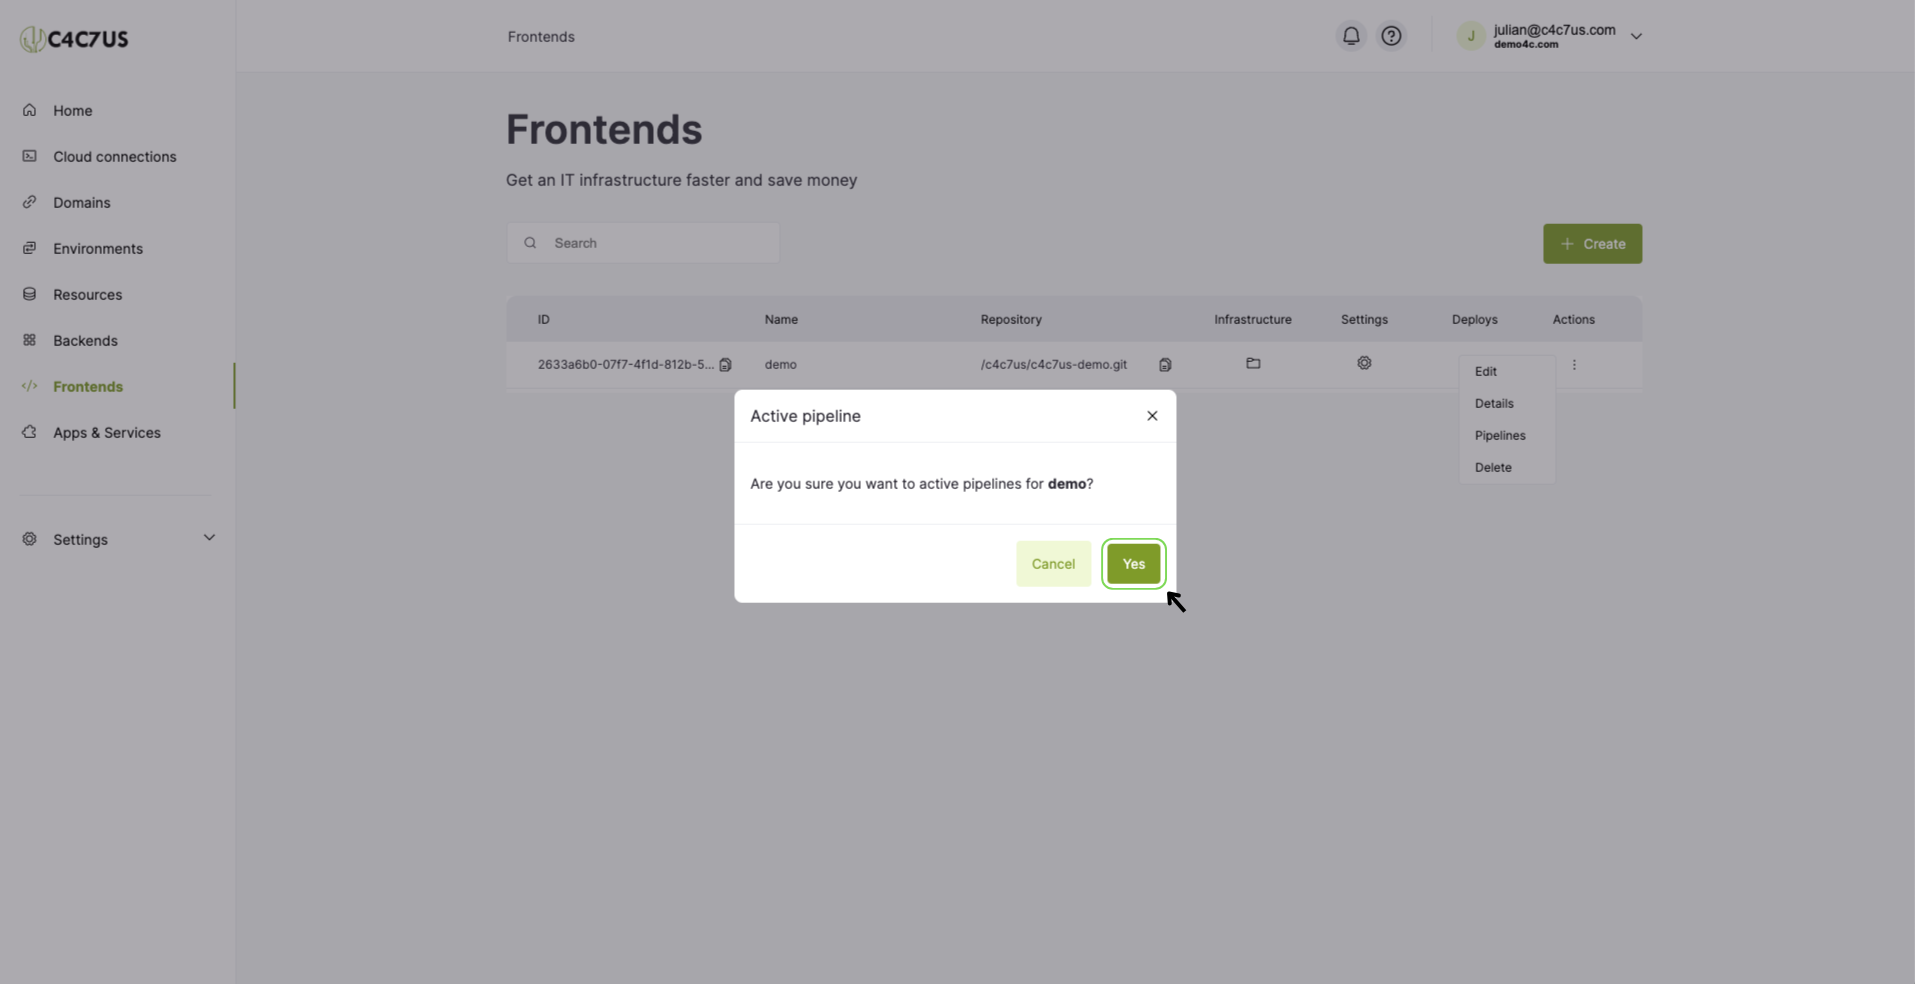
3.3. Finally, click the "Yes" button to activate CI on your service:
4. Launch a pull request from your Git provider to trigger CI for the first time.
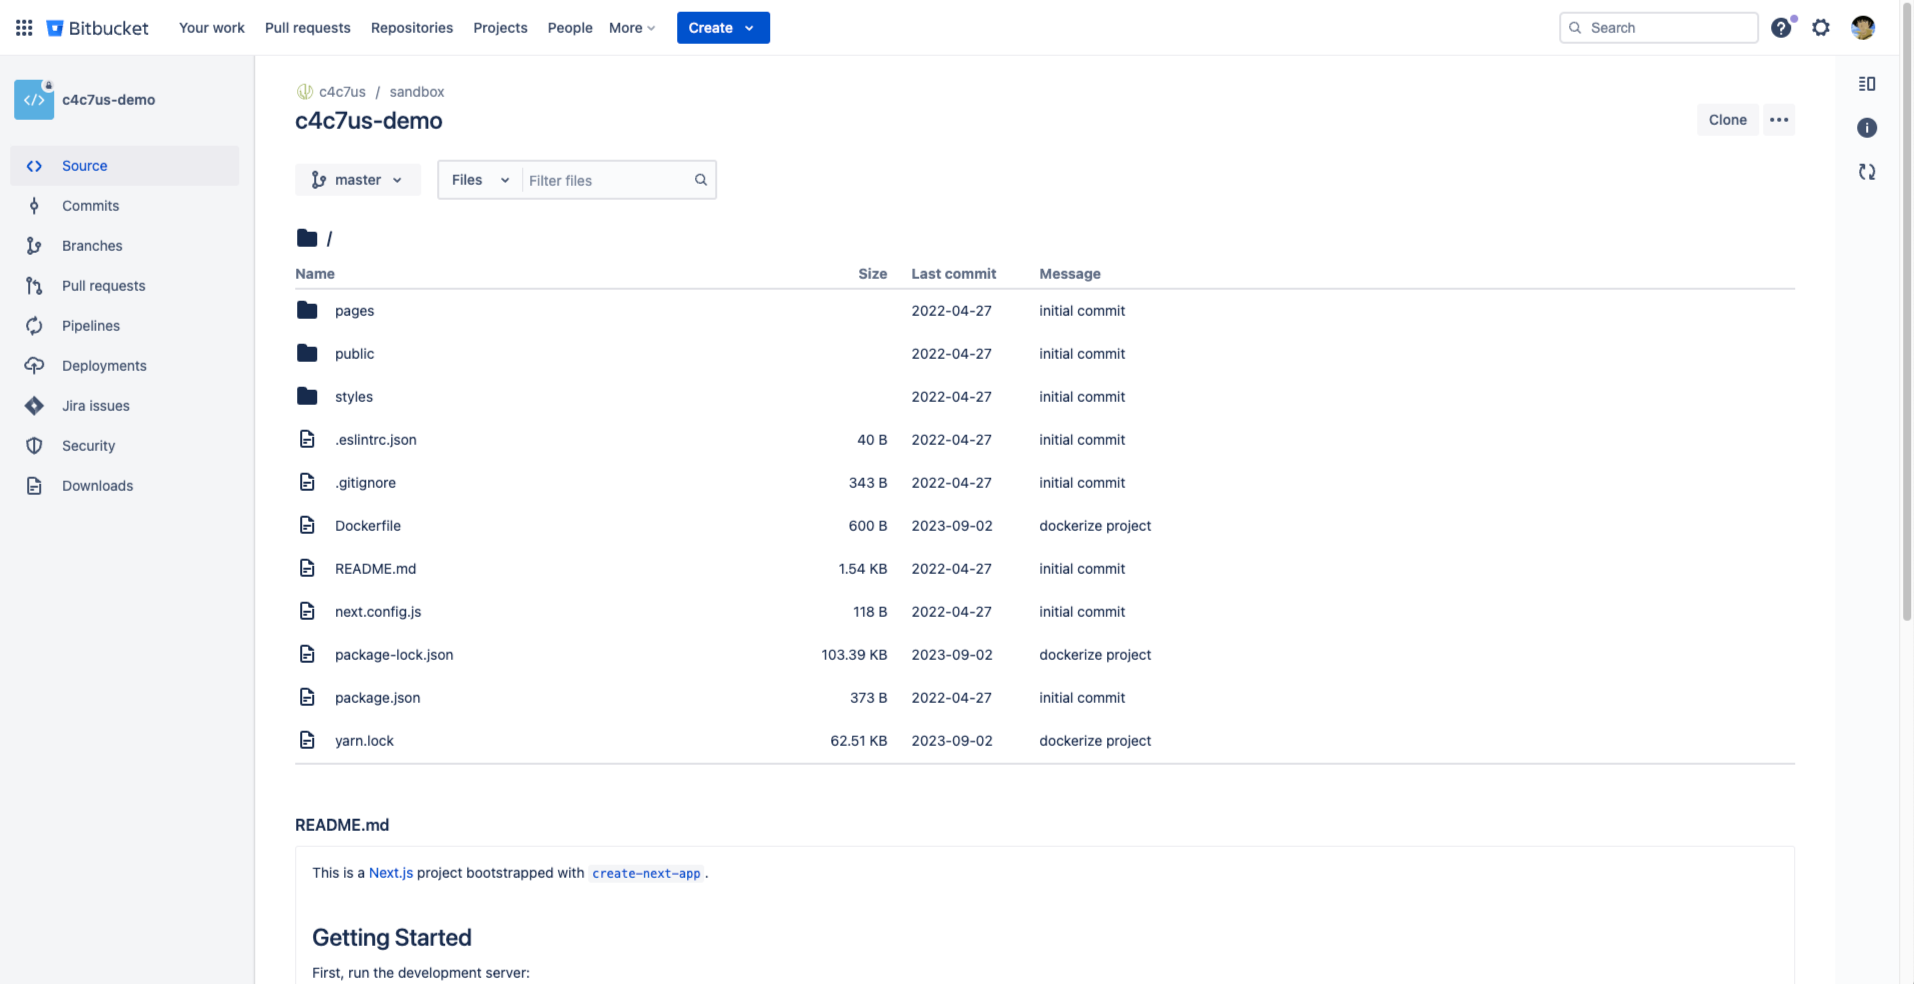
To conclude, you must go to your git provider, search for the project, create a branch, make a change, and launch a pull request to execute the service's pipelines from C4C7OPS:
4.1. We search for the project on your git provider:
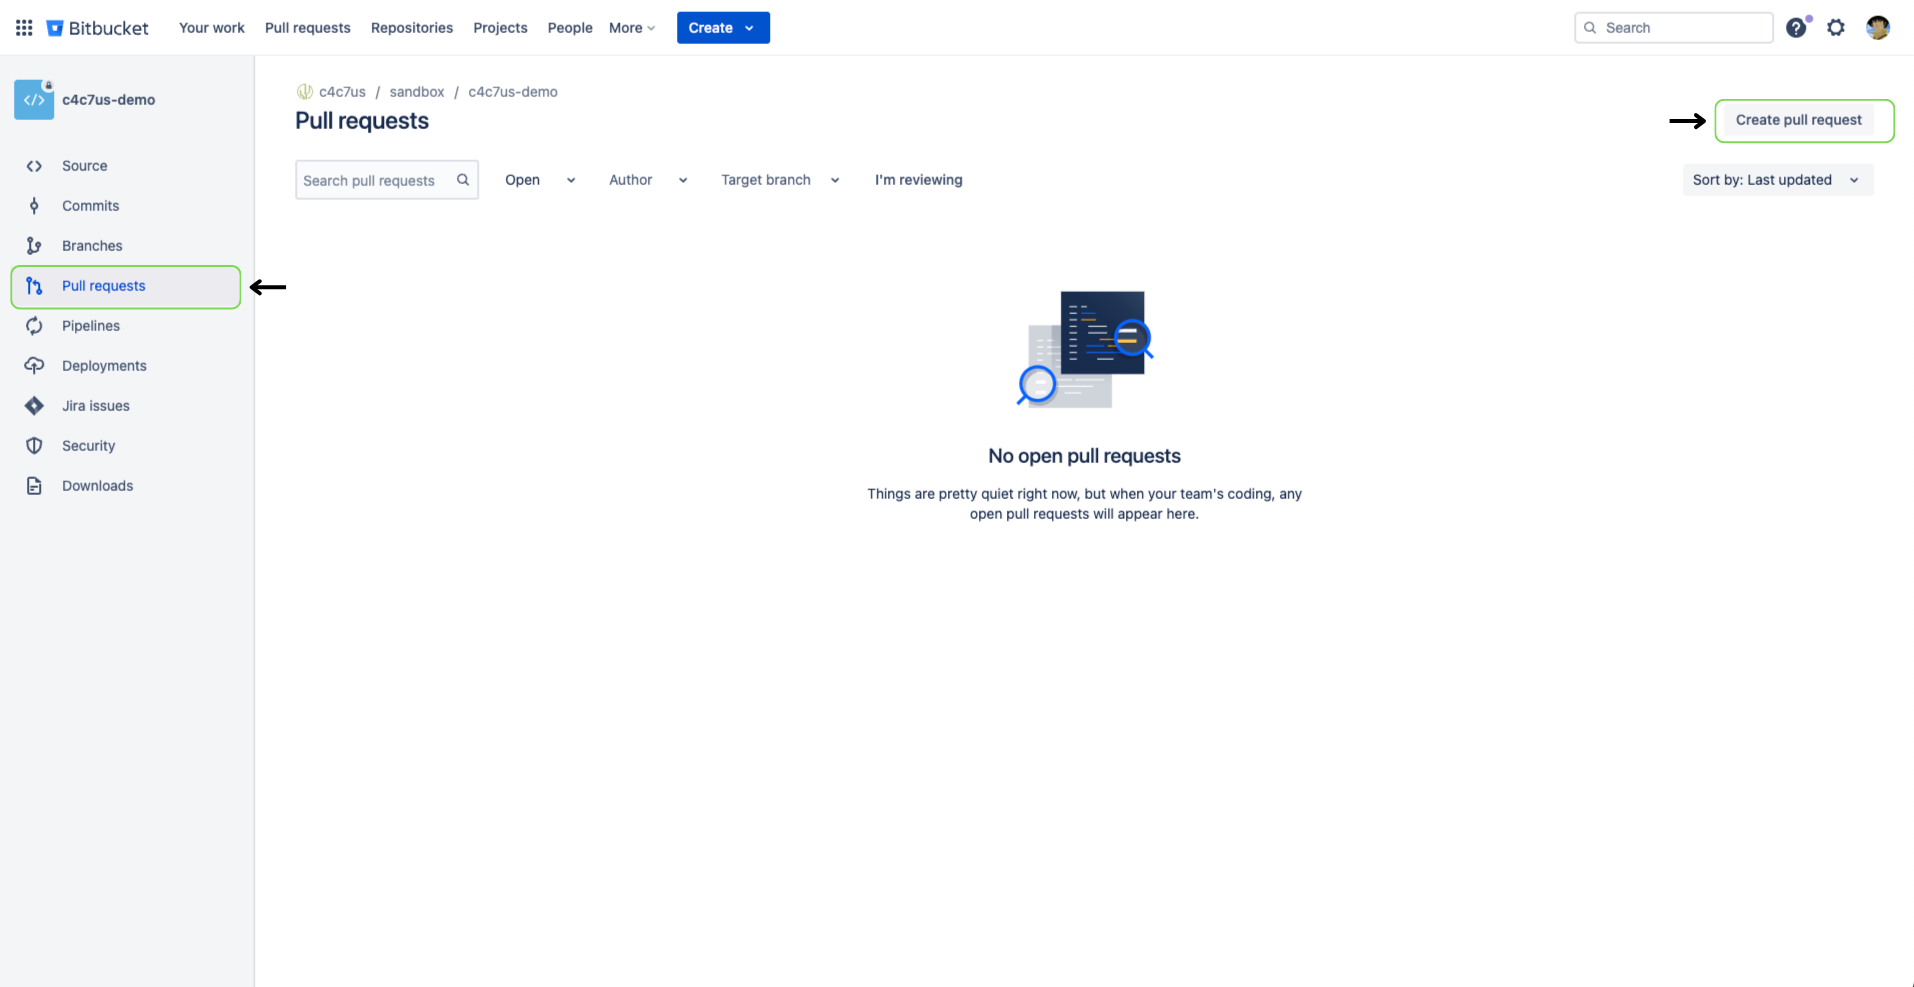
4.2. We go to the "pull requests" section and click "Create pull request":
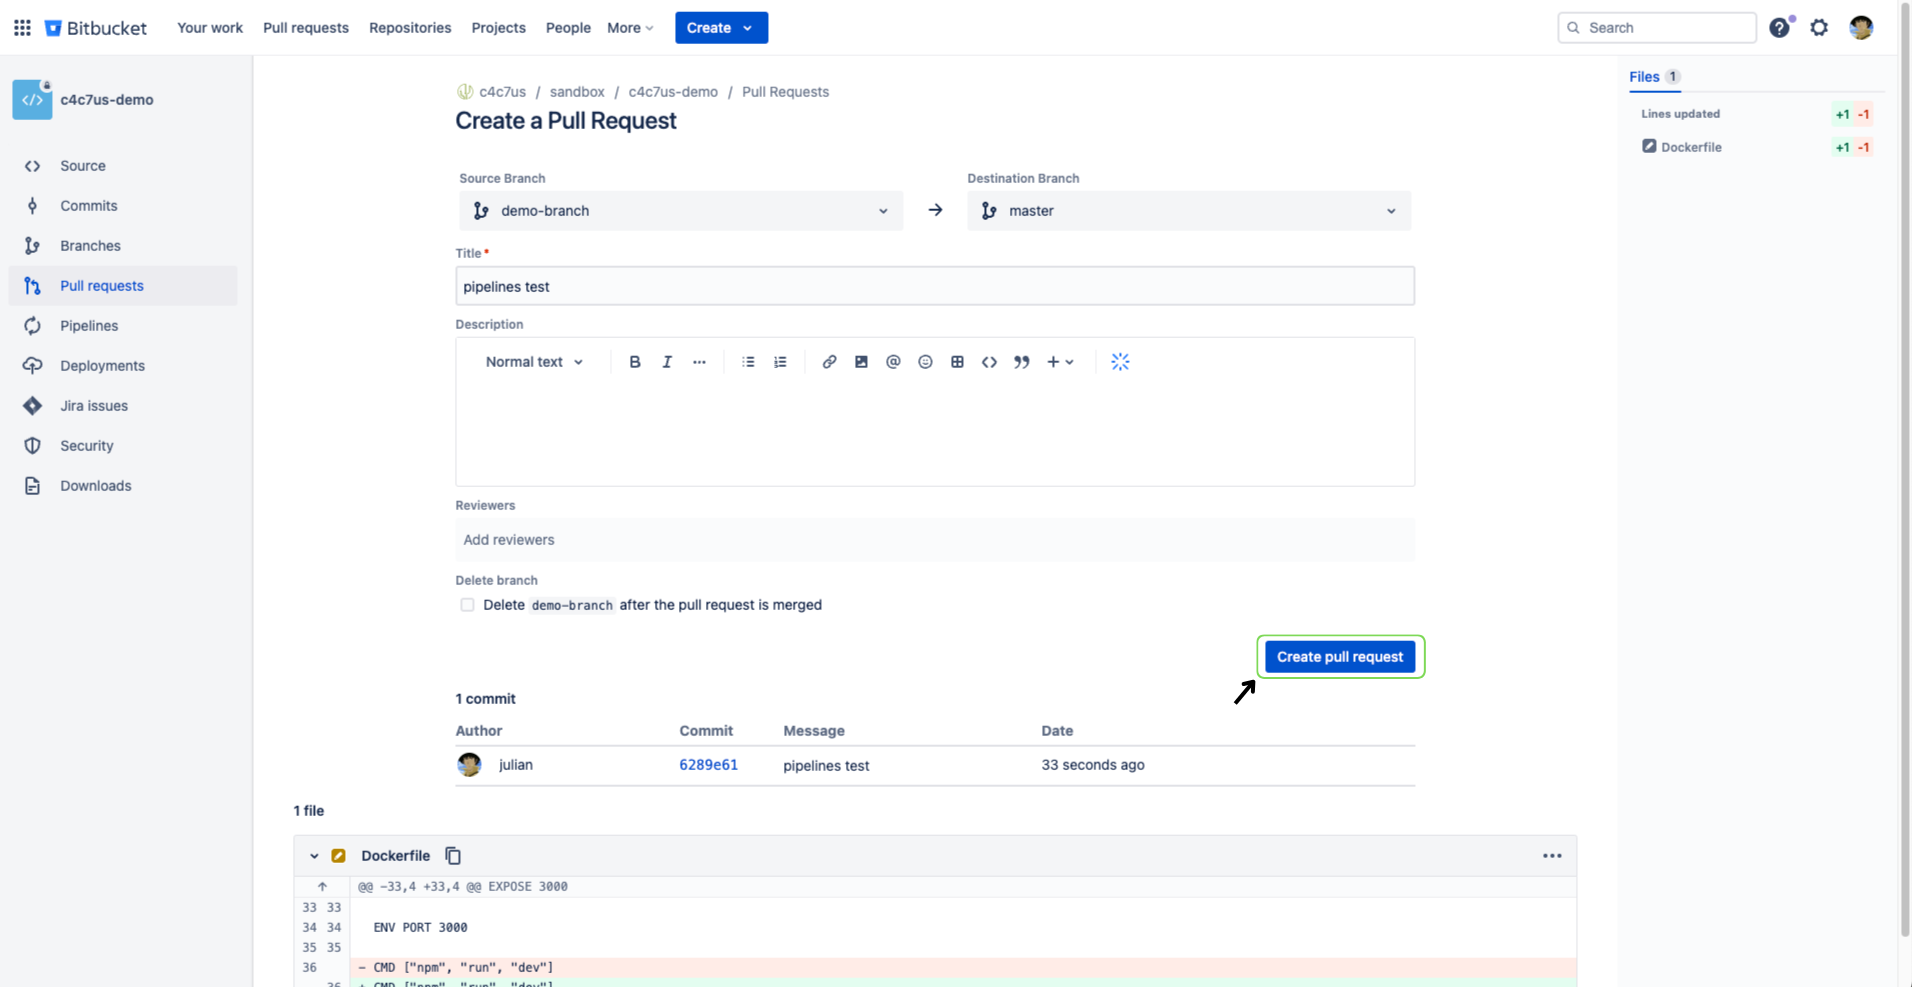
4.3. We confirm the "pull request" and create it:
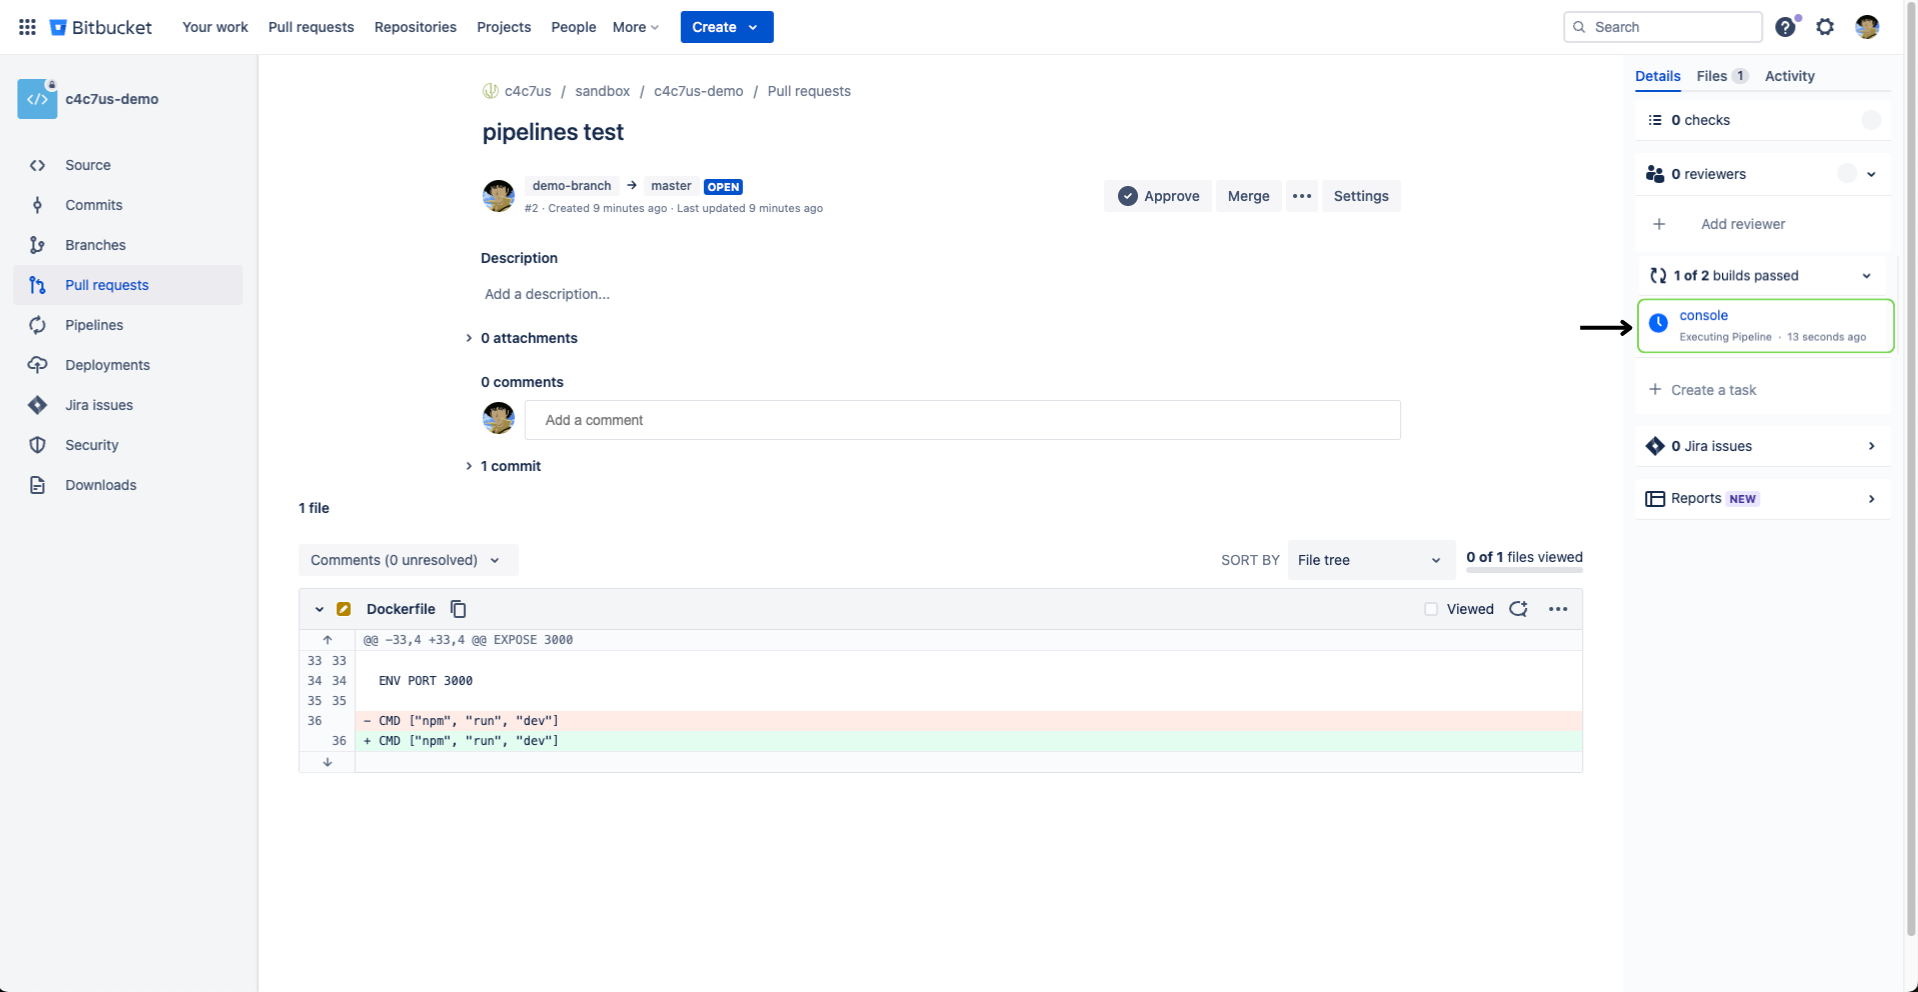
4.4. If everything goes well, we will see the "pipeline" reflected under the name "console":
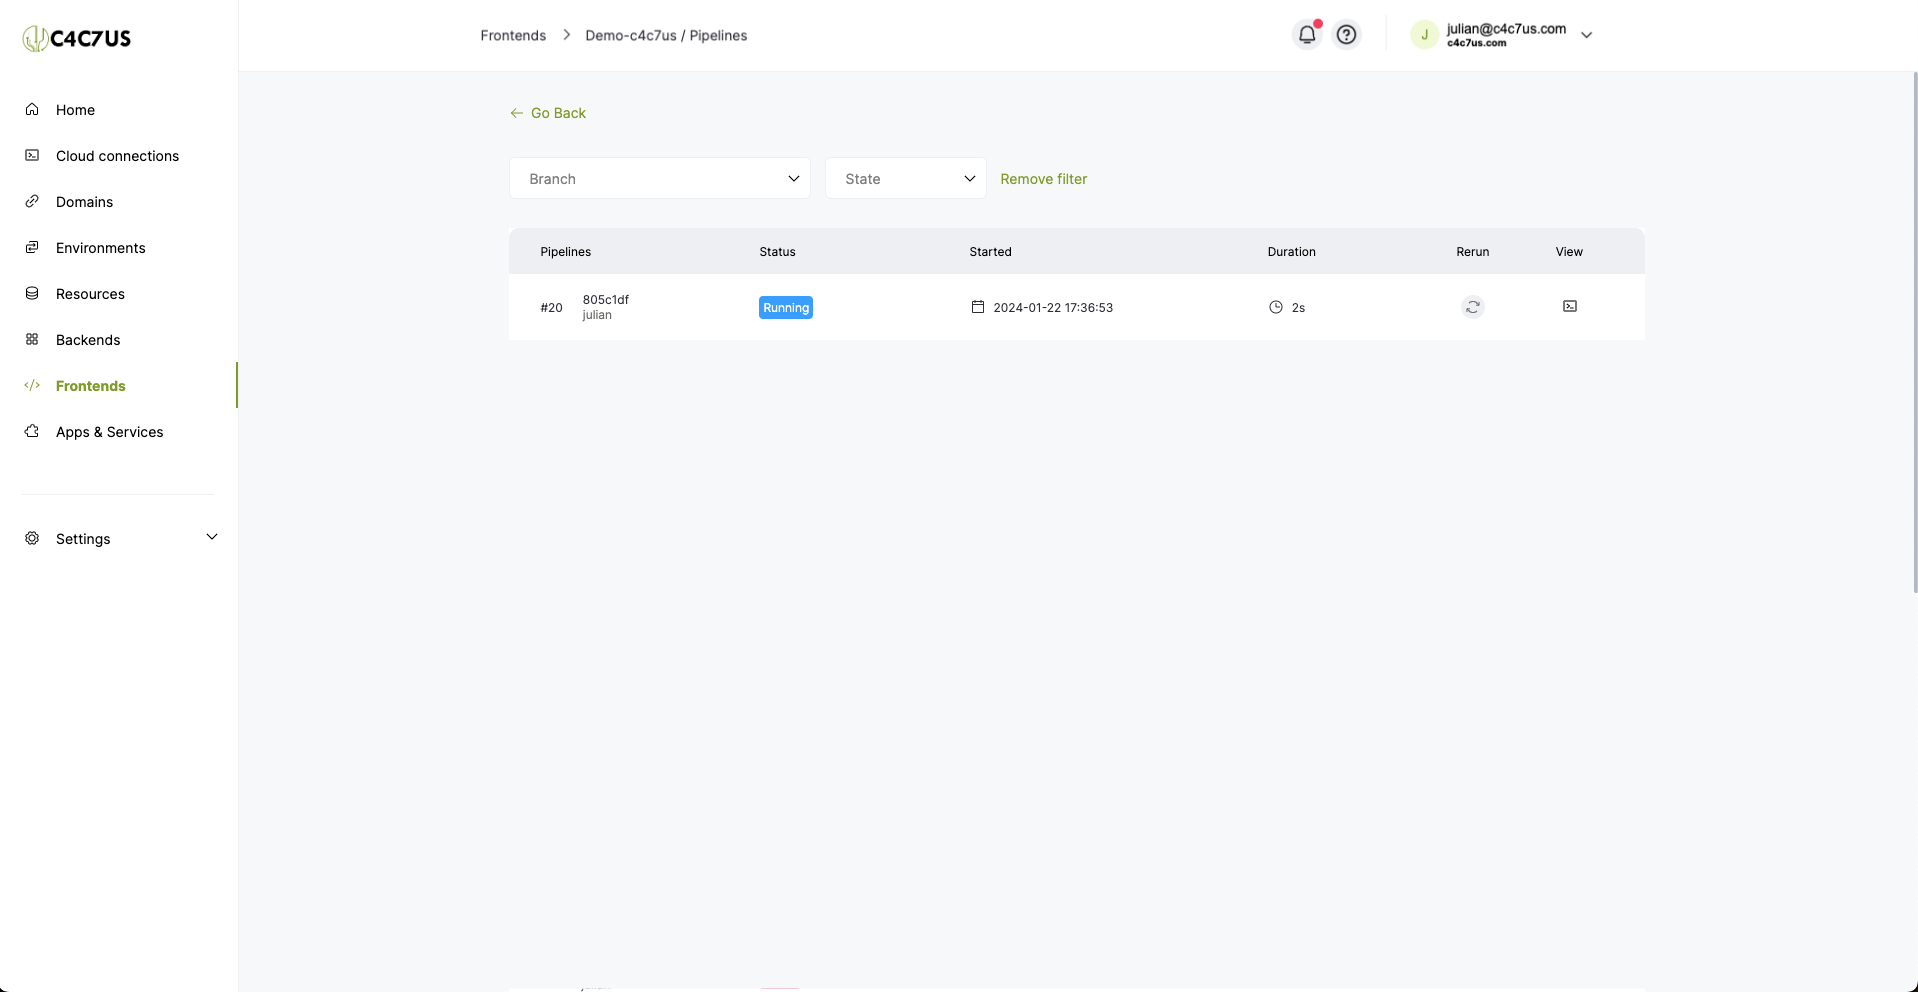
4.5. We return to C4C7OPS and click again on "Pipelines":
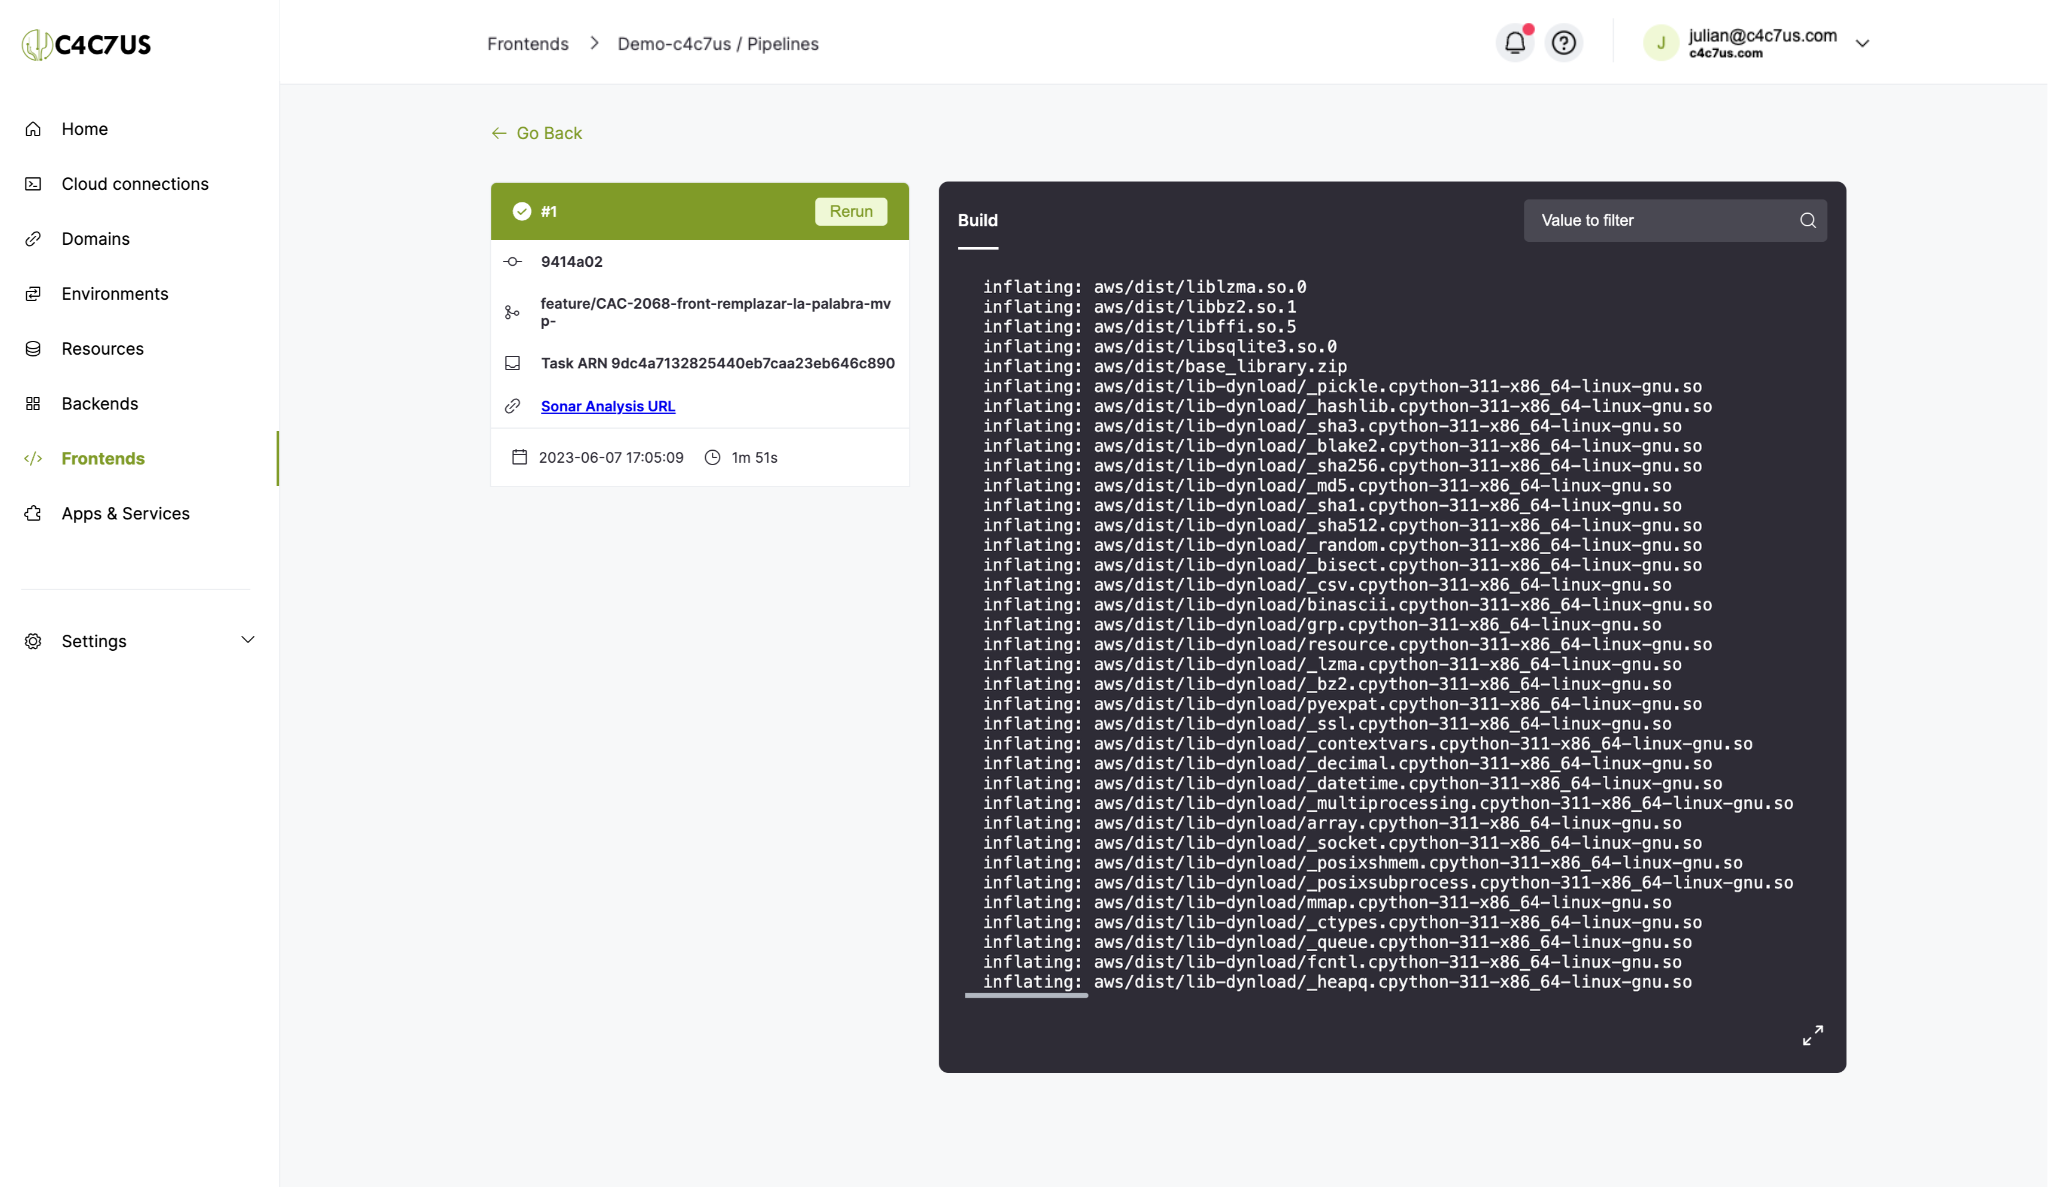
4.6. Here we can see the execution of the new "Pipeline":
5. Conclusion:
Once the complete configuration flow is finished, we would have the integration with the git provider for this repository ready along with the docker image that runs the tests and generates the coverage, and the sonar configuration to interpret this coverage.
The pipelines will be executed automatically when a user creates a pull request from the Git provider, validating the coverage and successful execution of the project's tests 😊.