


How to Create a UDP Service and Implement It on C4C7OPS
The goal of this post is to create a service that communicates a UDP client and server, and then be able to deploy it on C4C7OPS to see our service in production. In this example, we will use Node.js and the dgram module. To achieve this, we must follow these steps:
1. Initialize our service in Node.js:
1.1 To create our project, we will run the following commands in a terminal:
1.2 Configure our project to receive UDP requests on a server
We create a file at the root of the project called index.js
1.3 Configure a run script in the package.json
1.4 Run our script in a terminal

With this, we would have our server set up
2. Initialize our client in Node.js:
2.1 To create our project, we will run the following commands in a terminal:
2.2 Configure our project to send UDP requests from a client.
We create a file at the root of the project called index.js
2.3 Configure a run script in the package.json
2.4 Run our script in a terminal
We will see that a message was sent from the client to the server and a response was received from the server

And on the server, we can see that the message was received and a response was sent correctly

With this, we would have our client configured.
3. Upload our service to Git.
3.1 Return to the server terminal.
Here we will write the following commands to upload our service to Git.
4. Create our service on C4C7OPS.
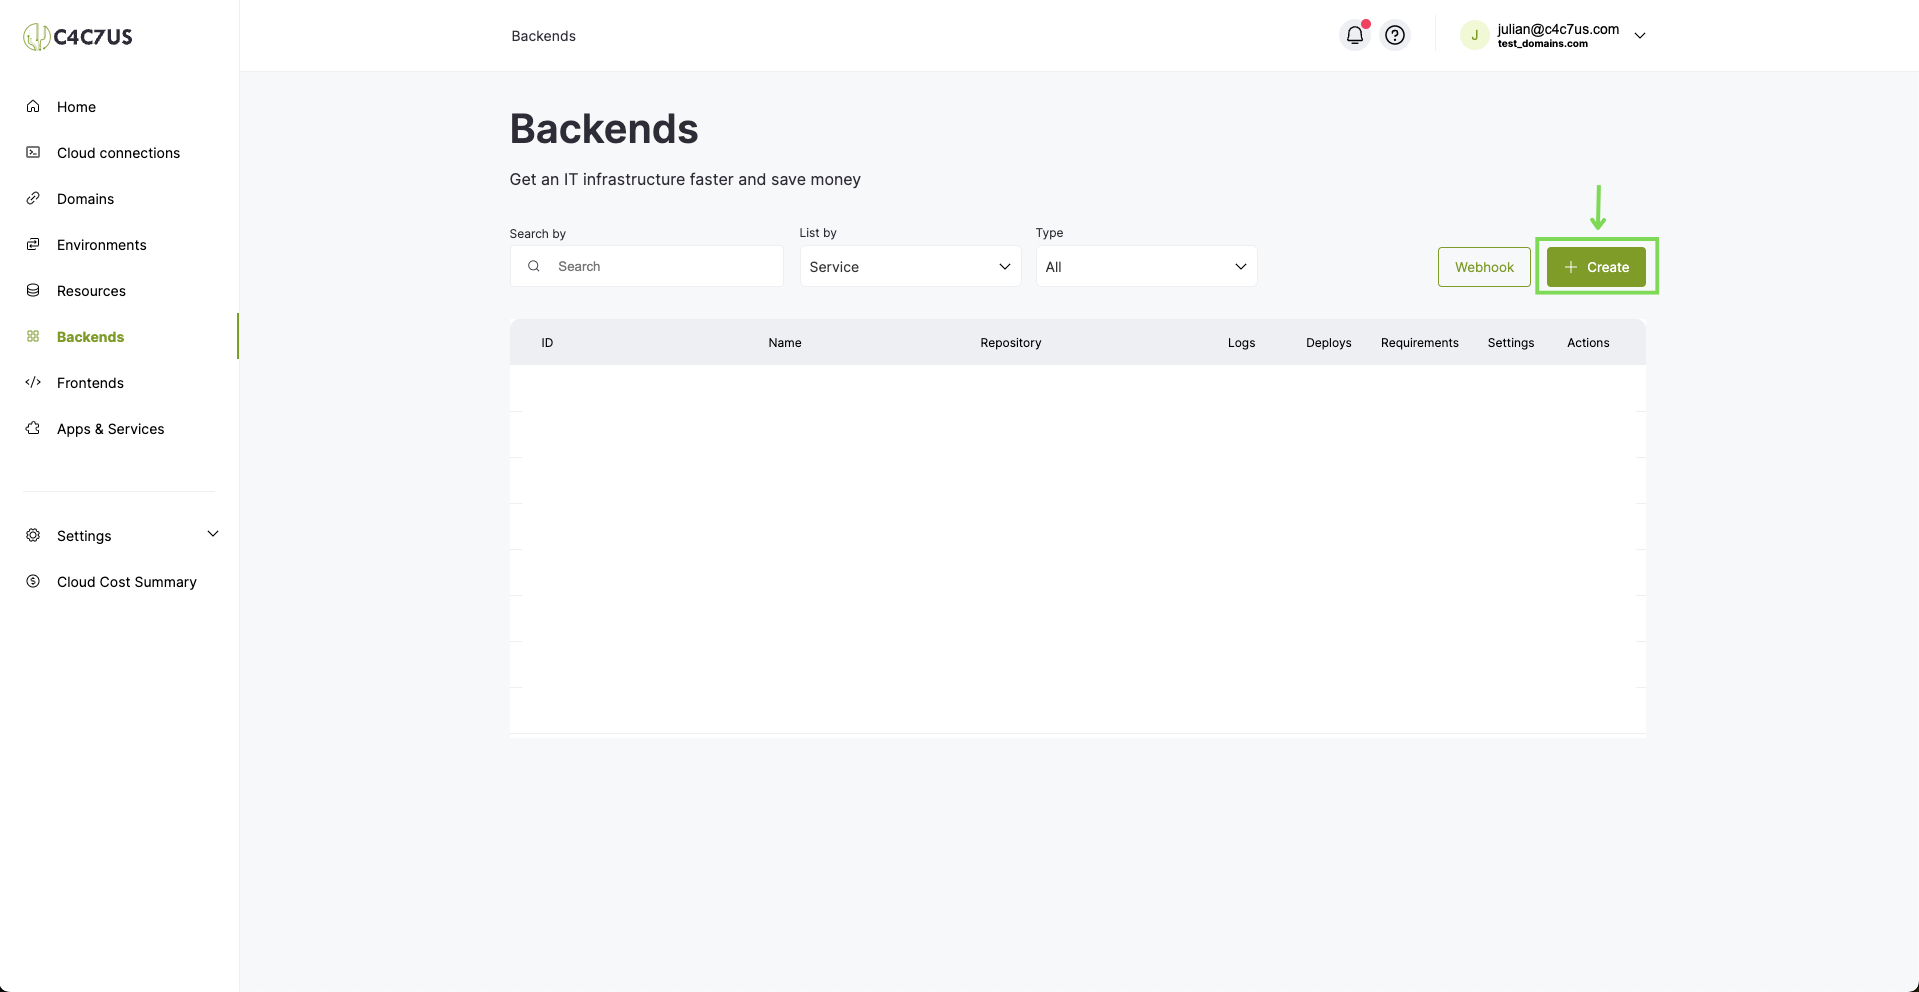
4.1 Go to the backends section on C4C7OPS and press create:
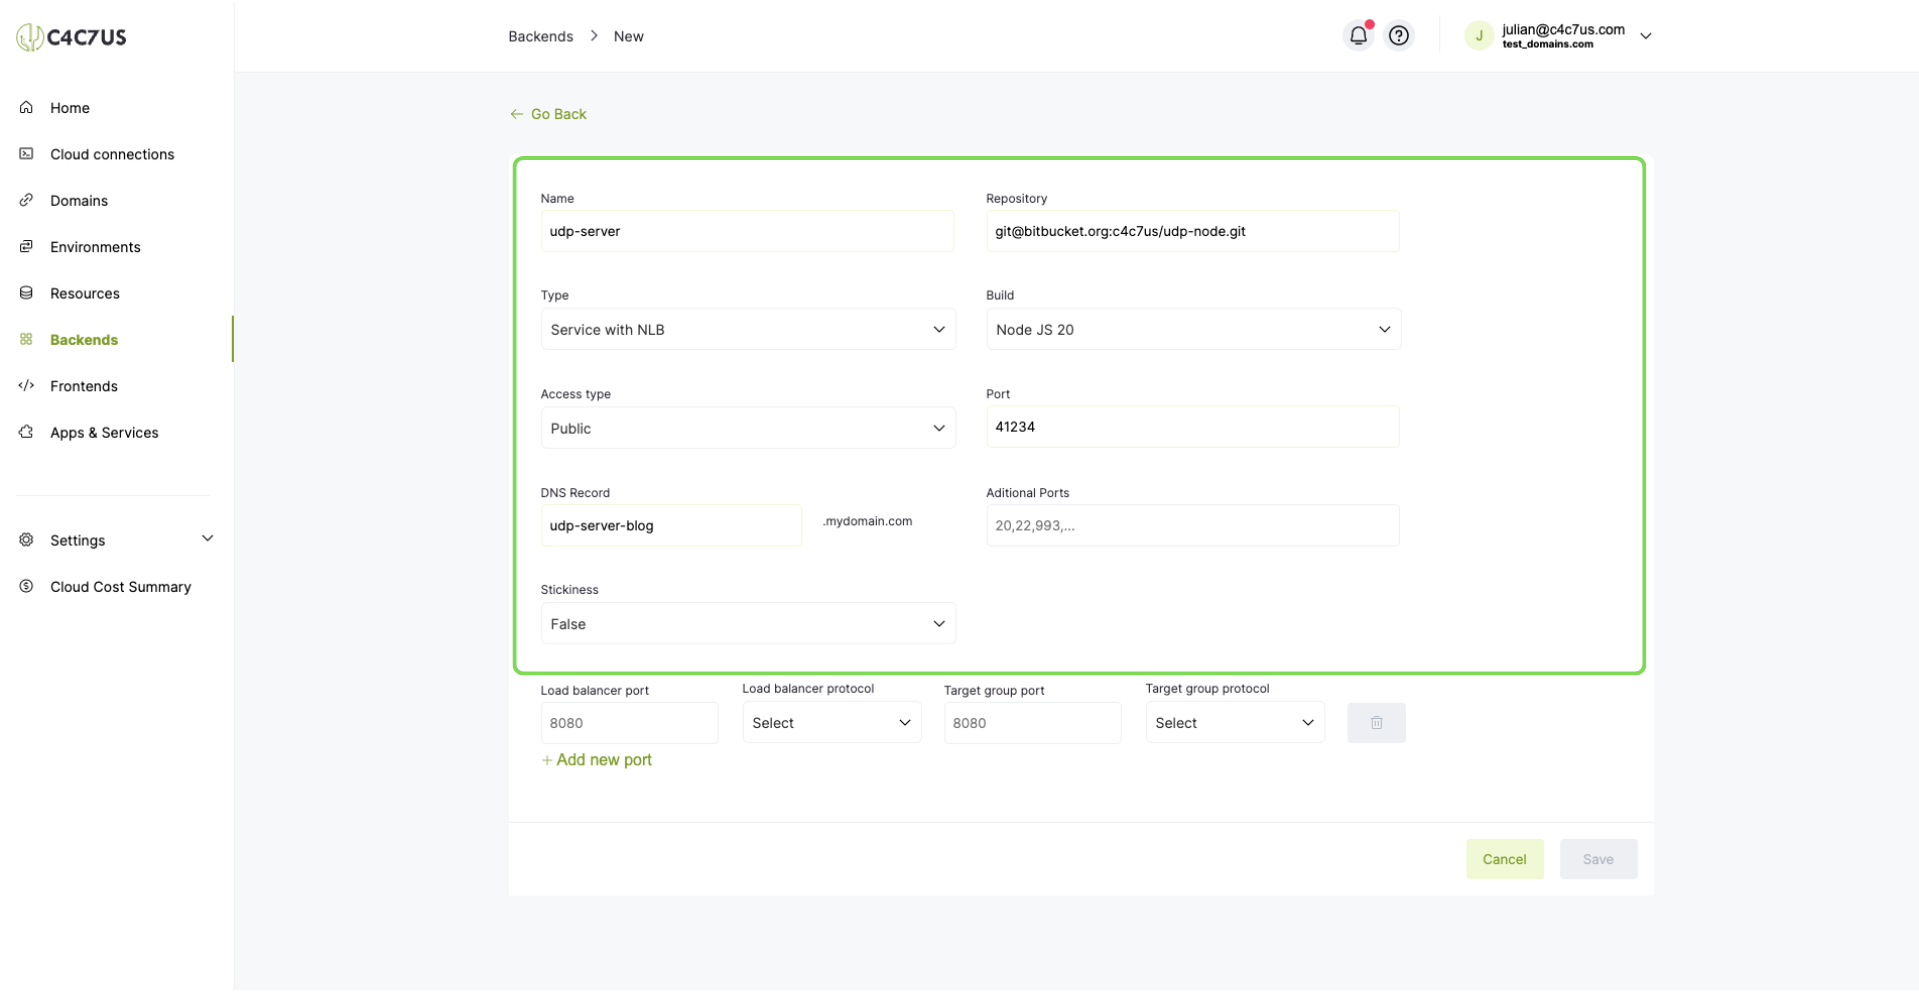
4.2 Once here, fill in the values with the configuration of our udp-Server service:
We will first configure a name, the git repo where we uploaded our service, choose Service with NLB as the type, define our Main Port, and assign it a DNS.
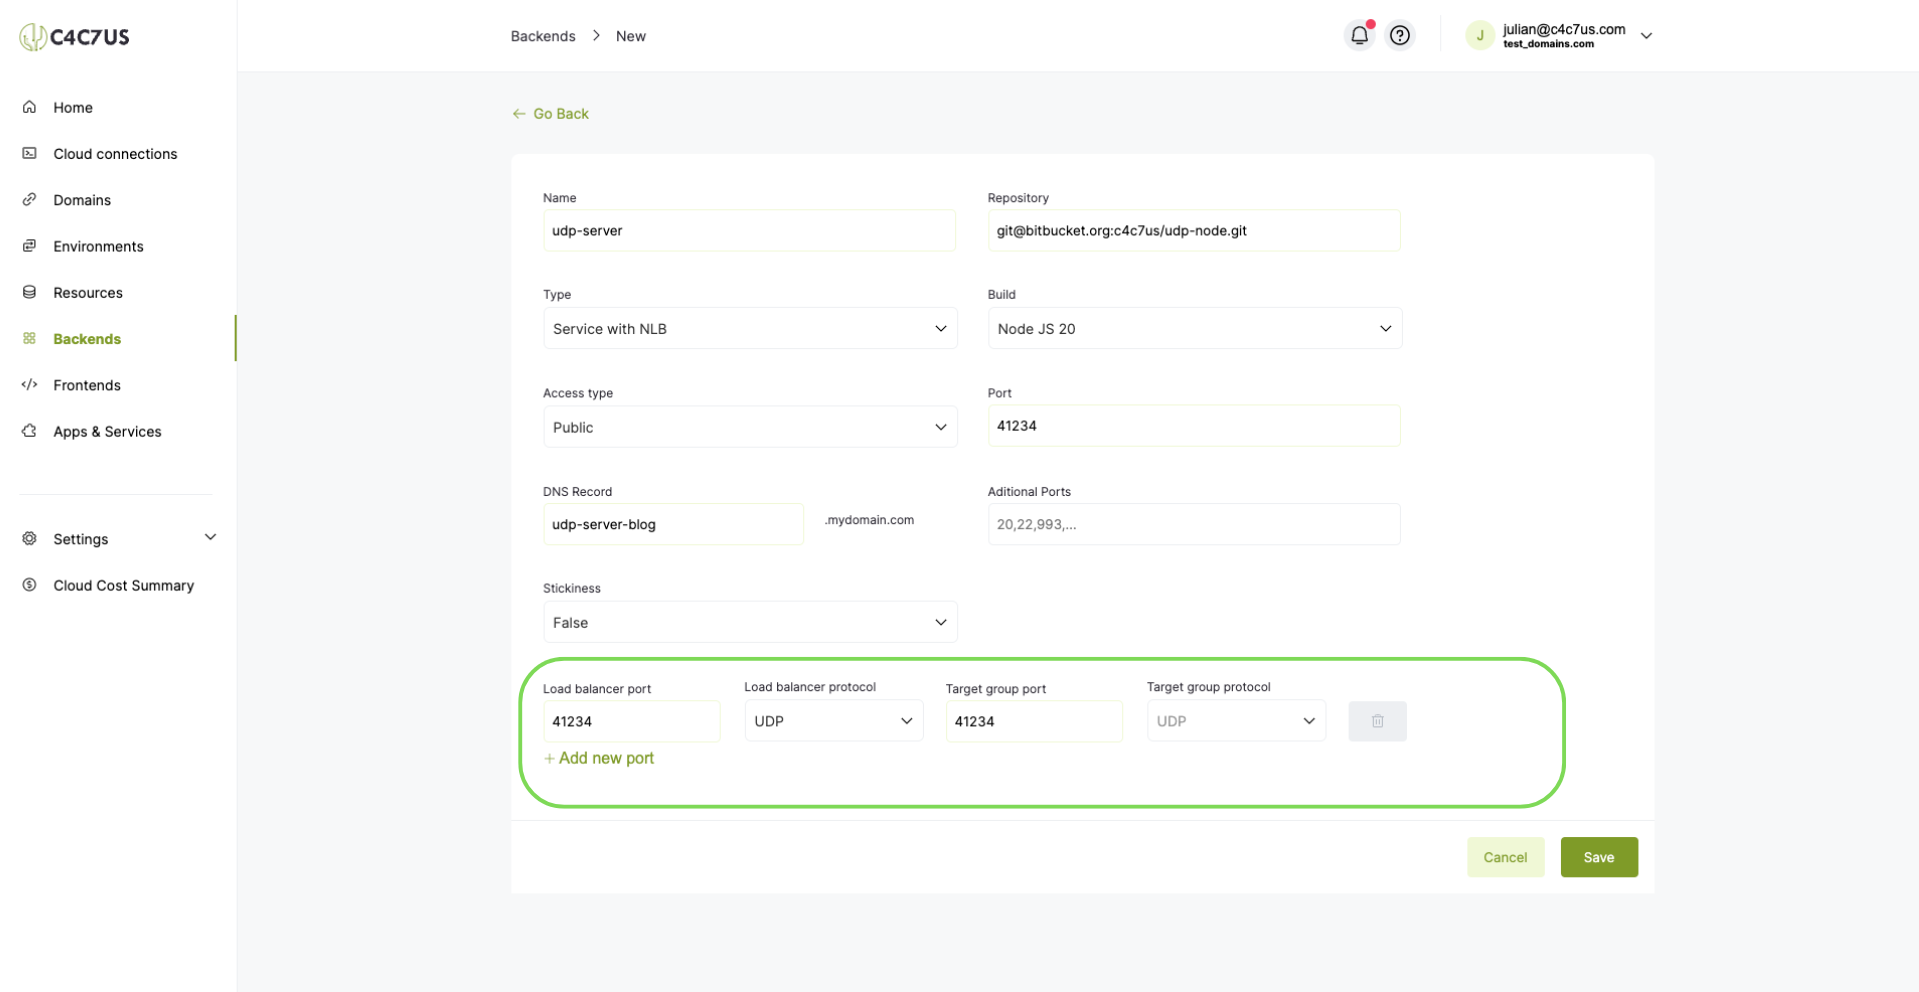
Next, we start configuring the ports for communication via the udp protocol and press Save.
5. Deploy our service.
5.1 Find our service and go to Deploys:
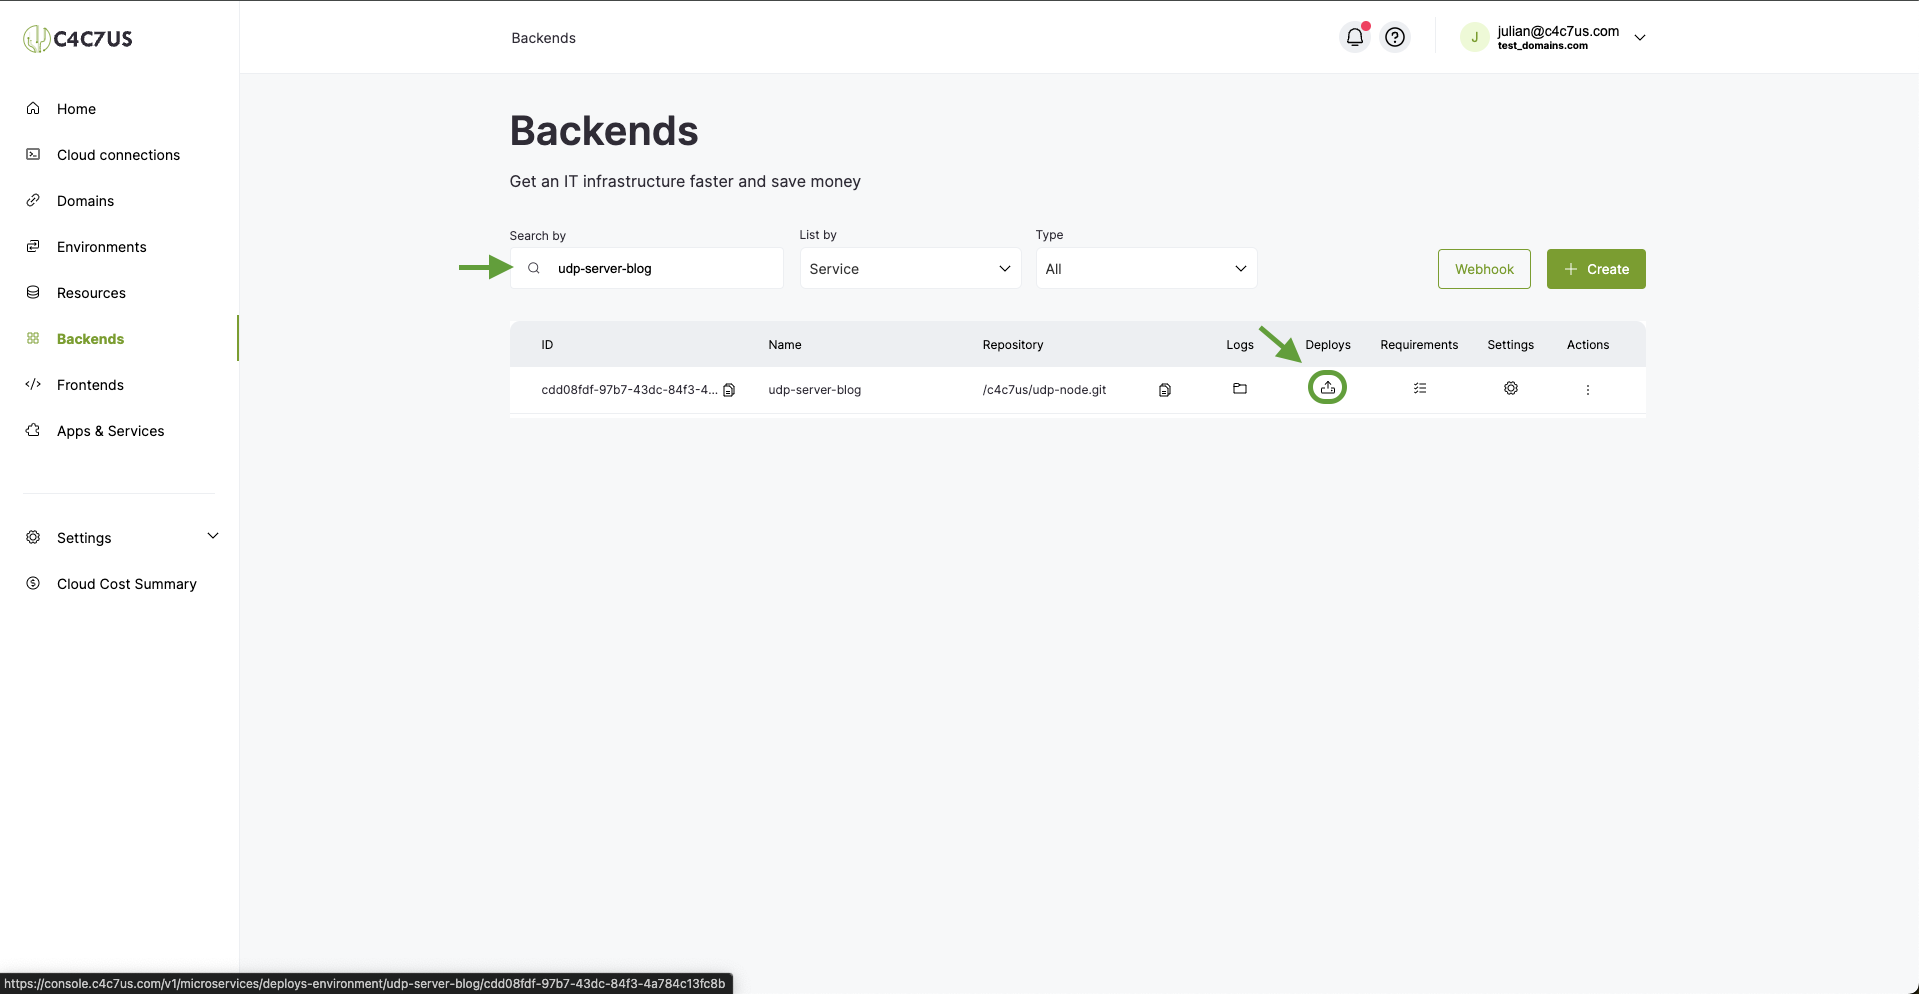
Press + Create.
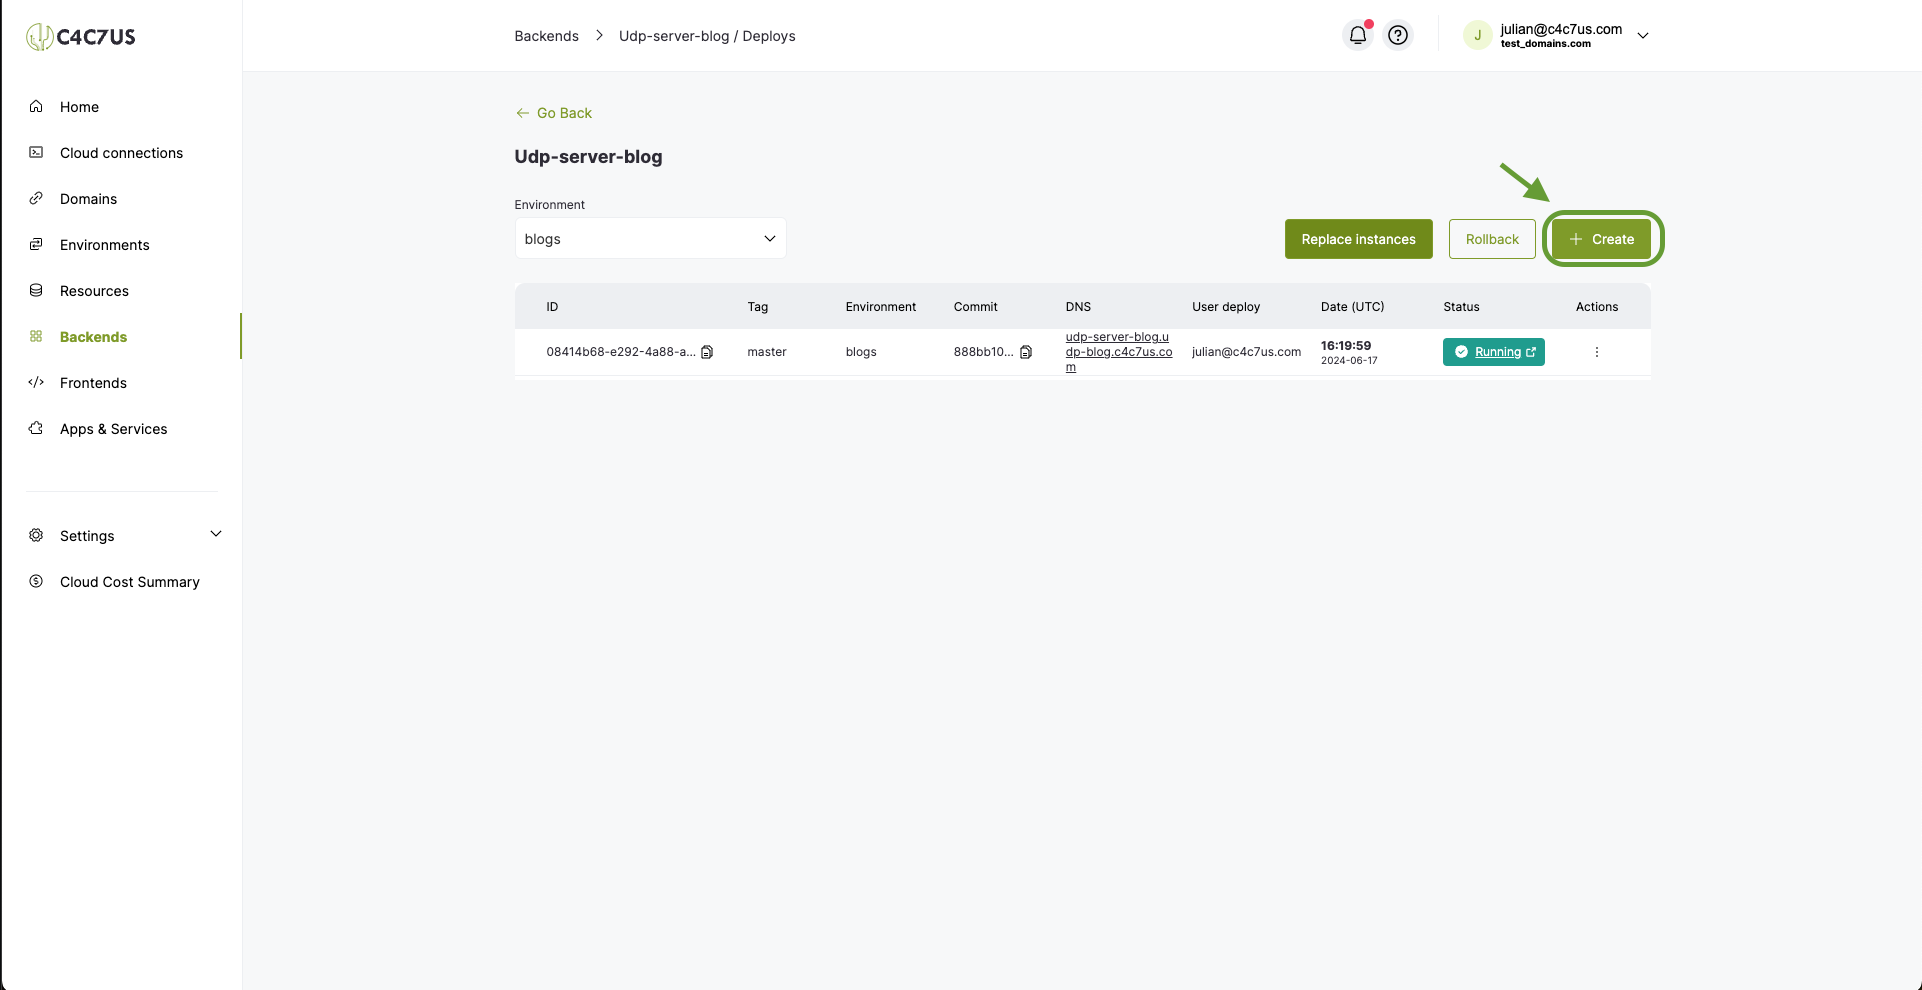
5.2 Select the branch of our project and press Deploy.
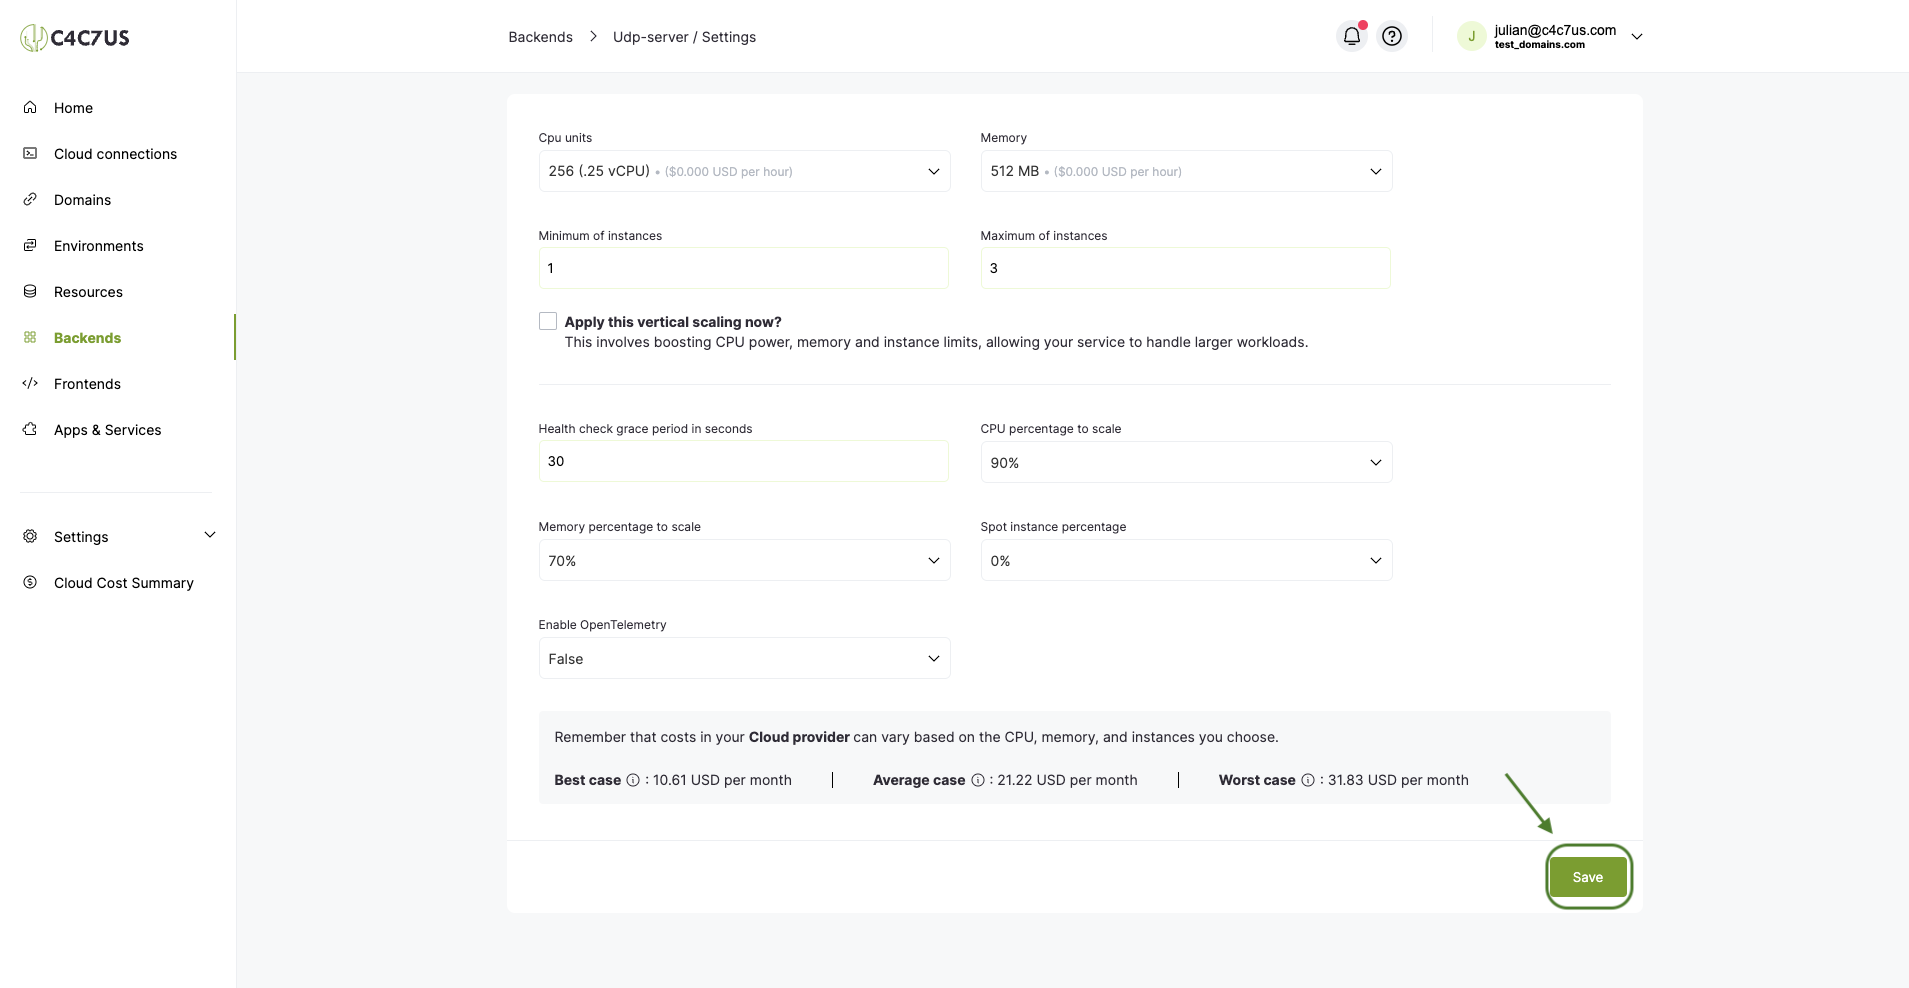
Press the option to assign Runtime settings.
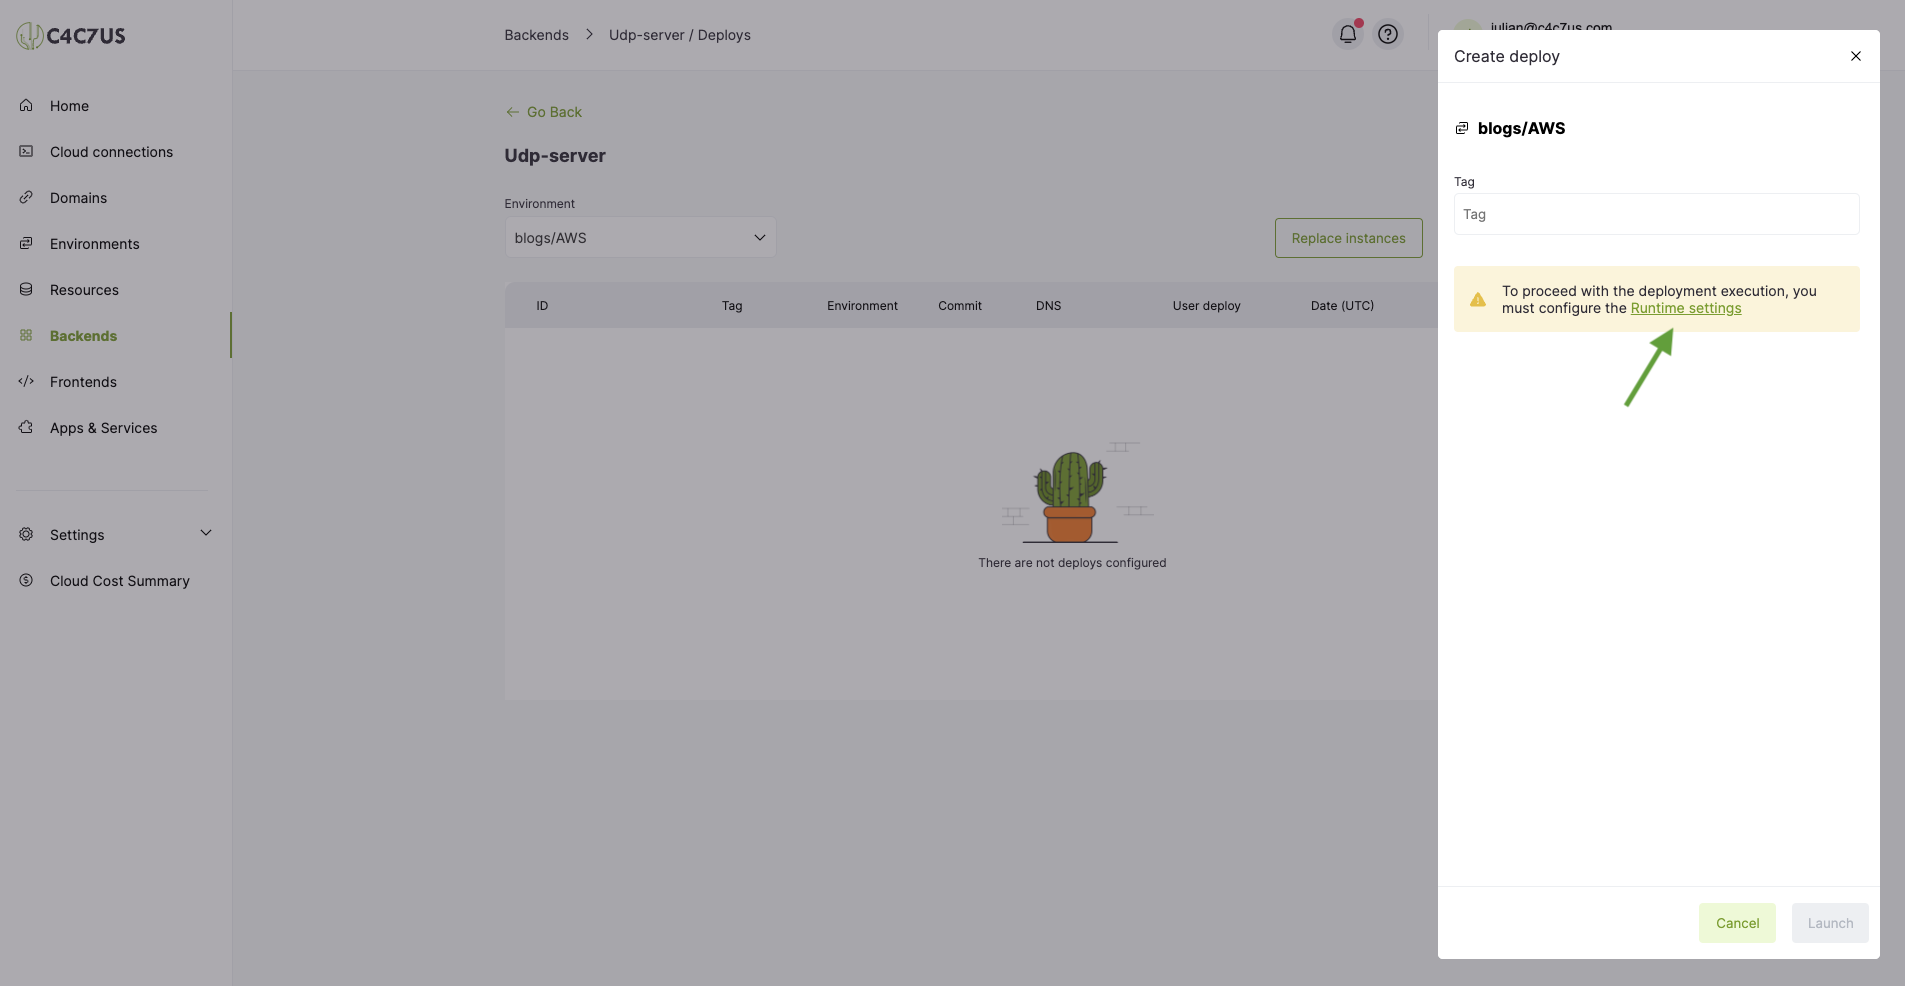
This will open a new tab where we will press Save.
We will close and reopen the modal again to reflect the change and then write the name of the branch we want to deploy, in this case, master, and then press Launch.
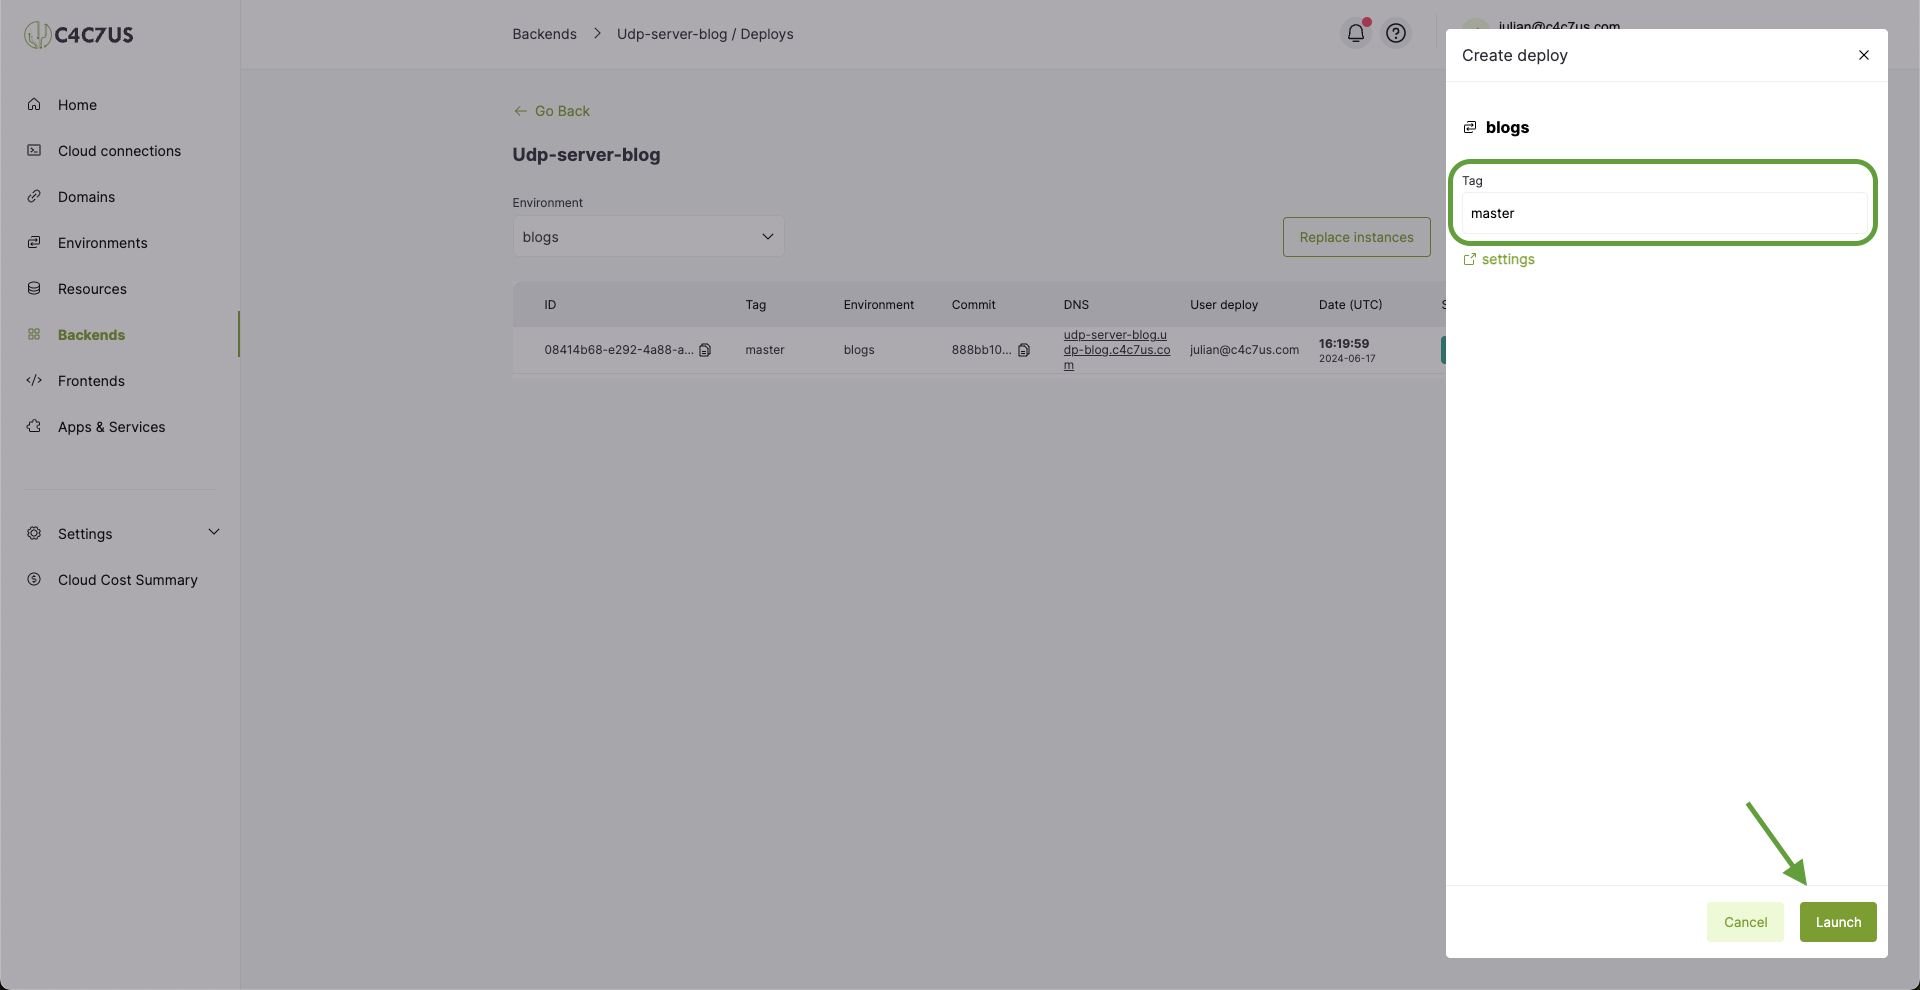
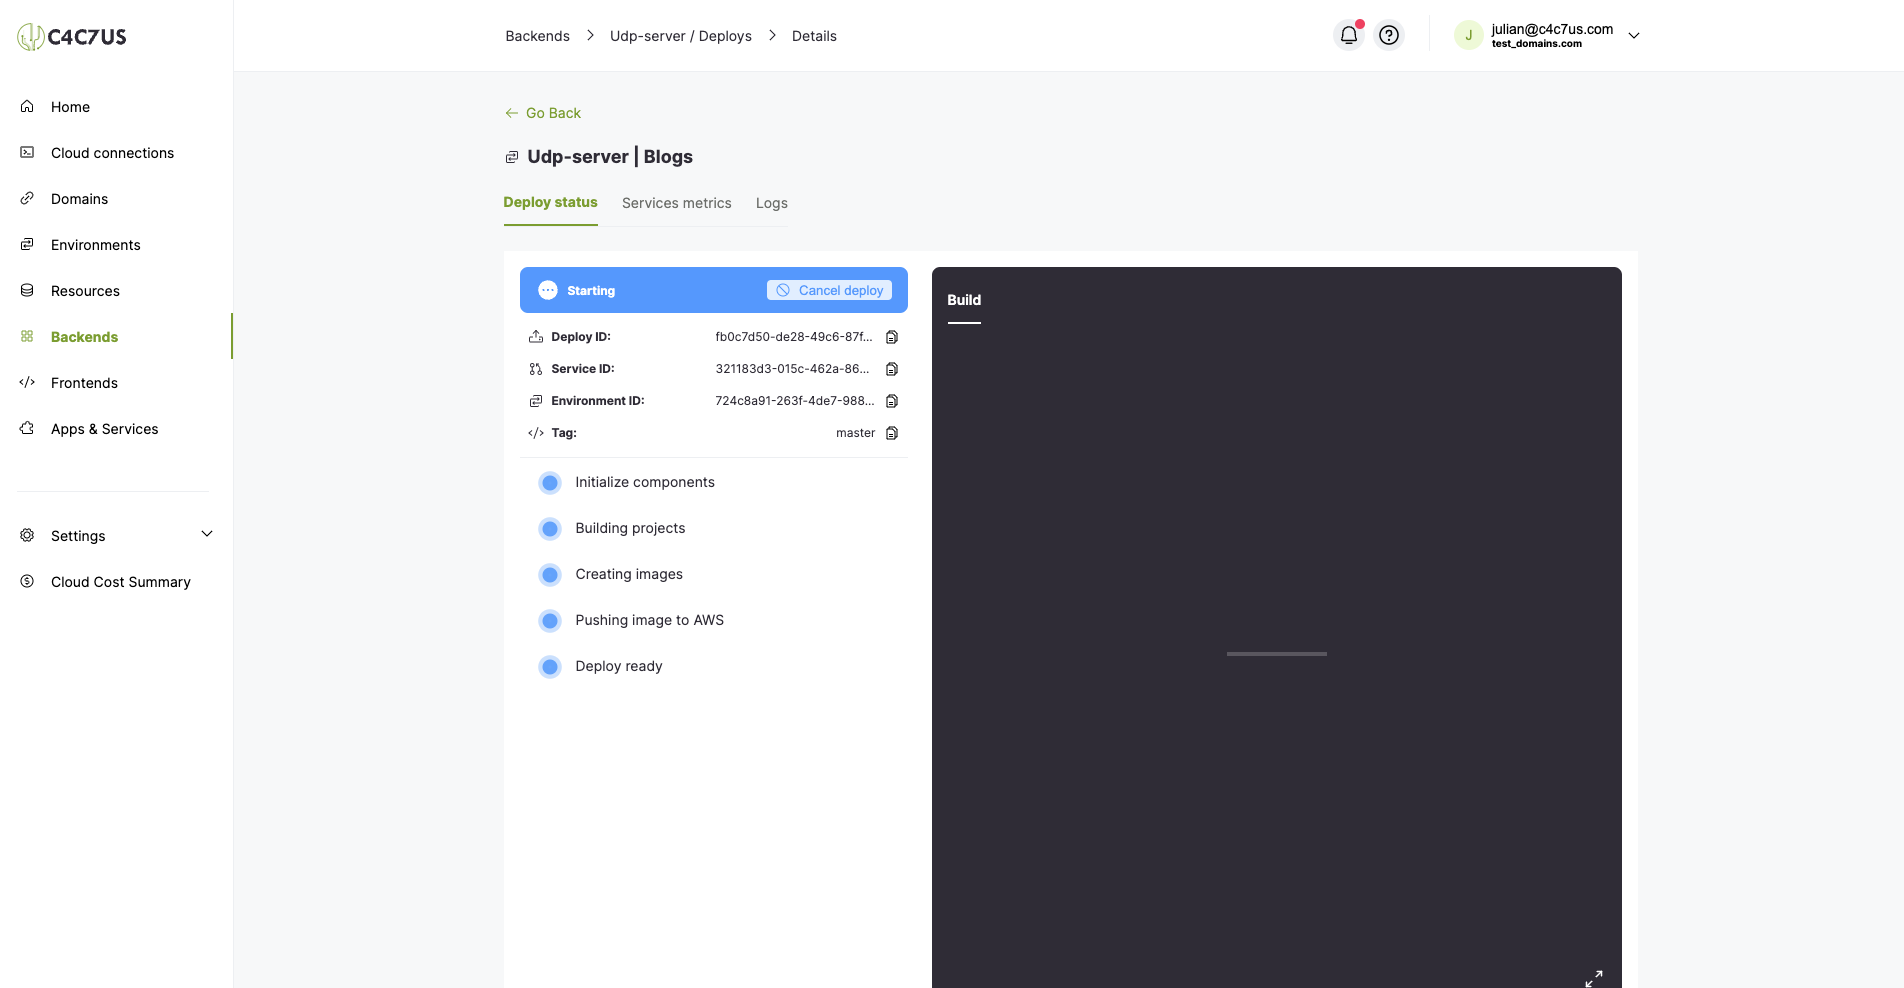
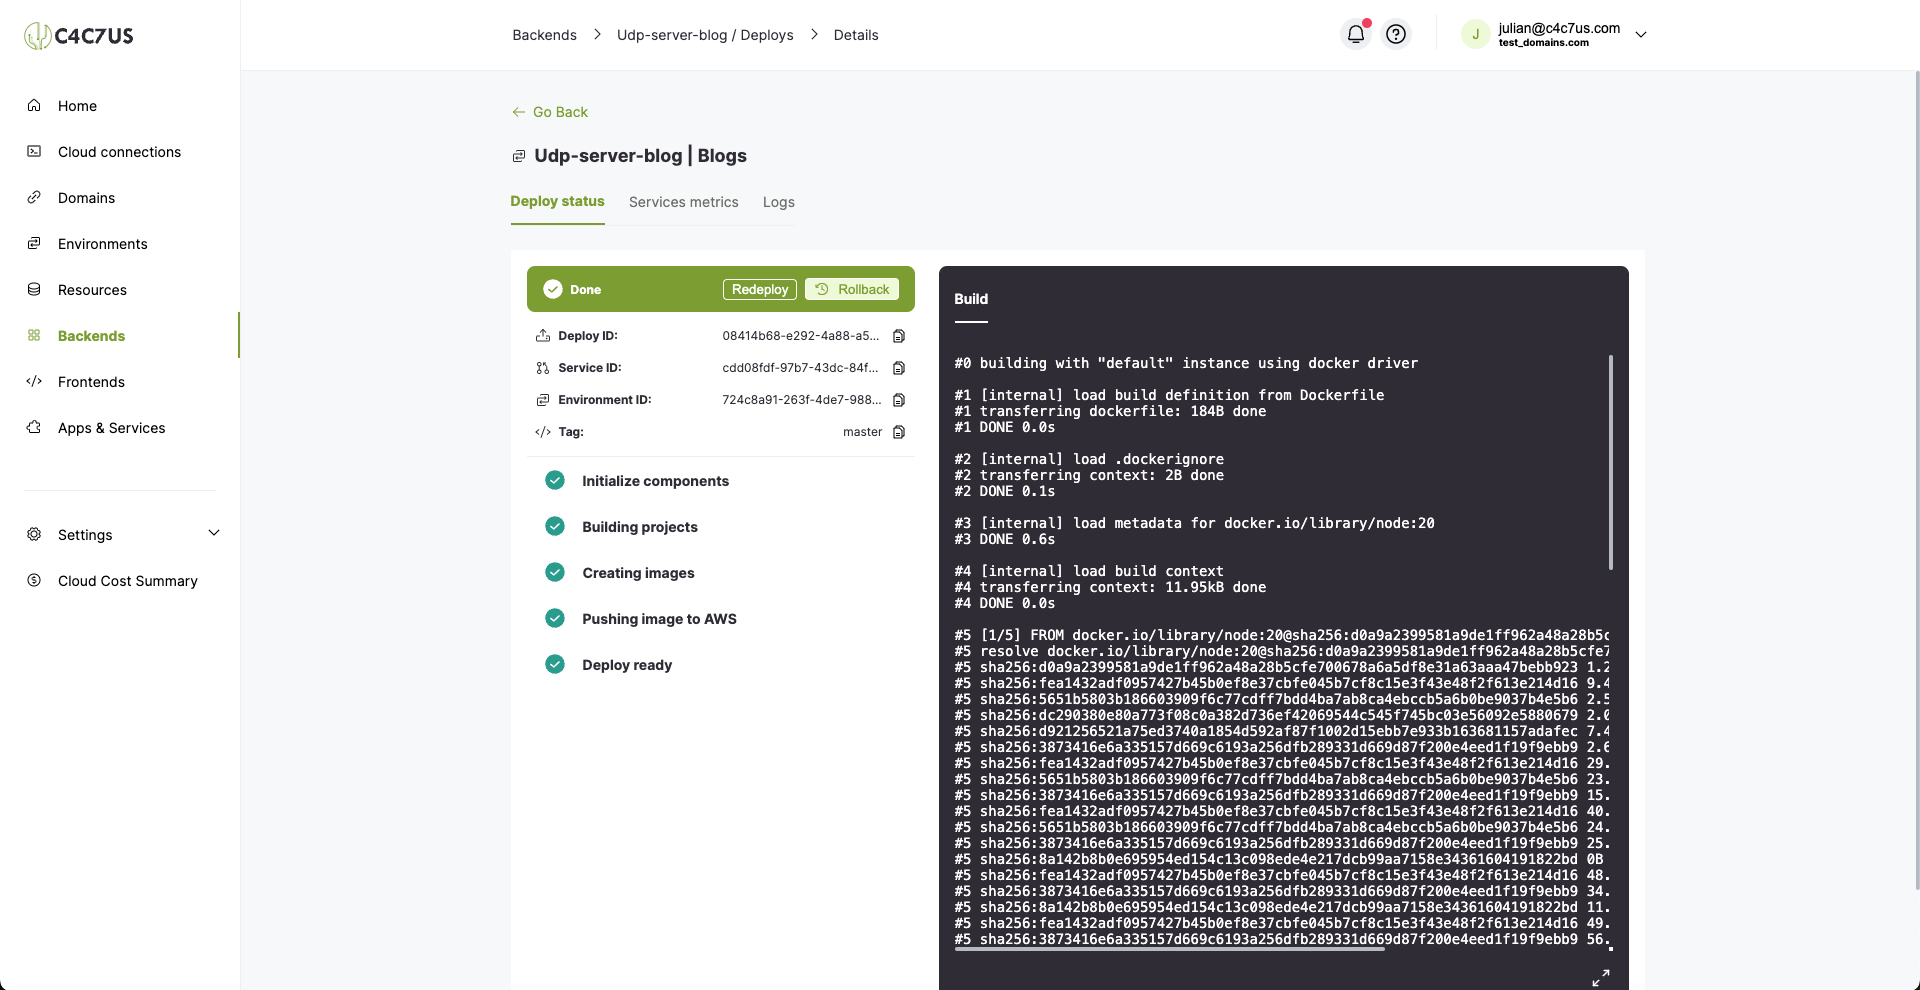
This will take us to the
deploy we just created where we will wait until it is finished.
6. Test our service in production.
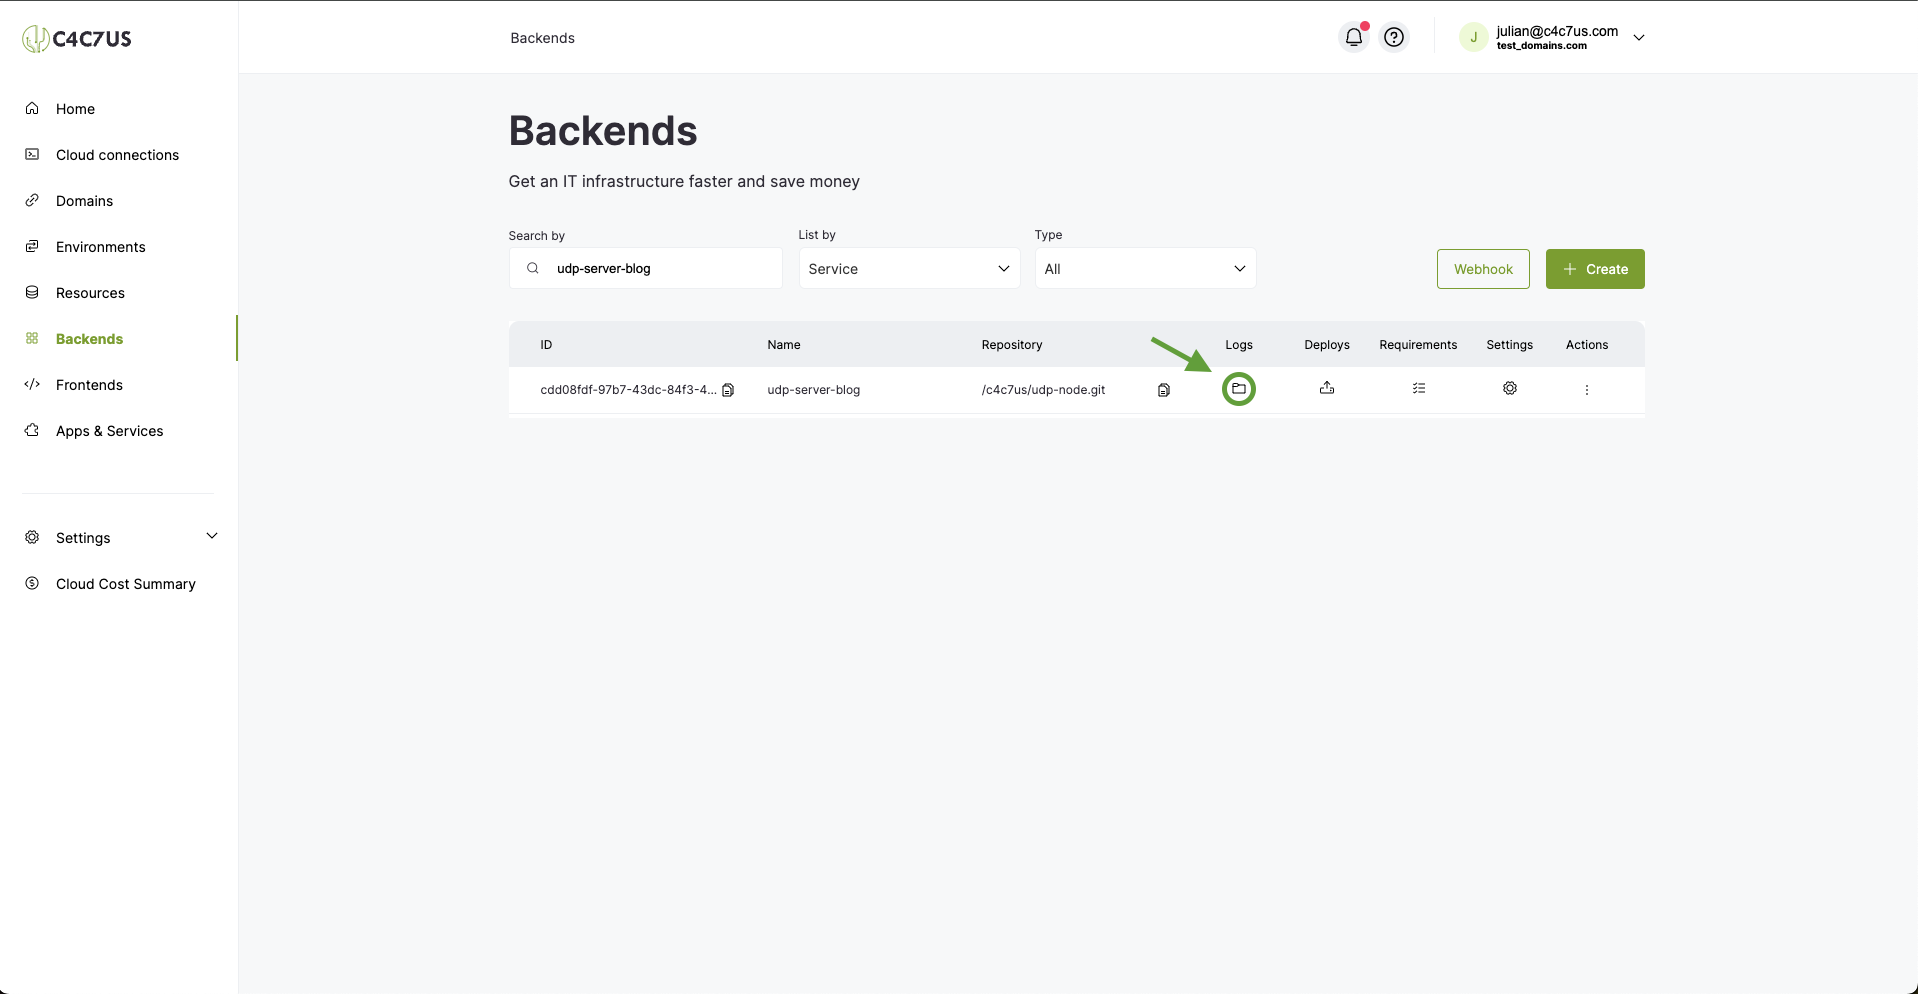
6.1 Go back to the backends section and enter the Logs of the service.
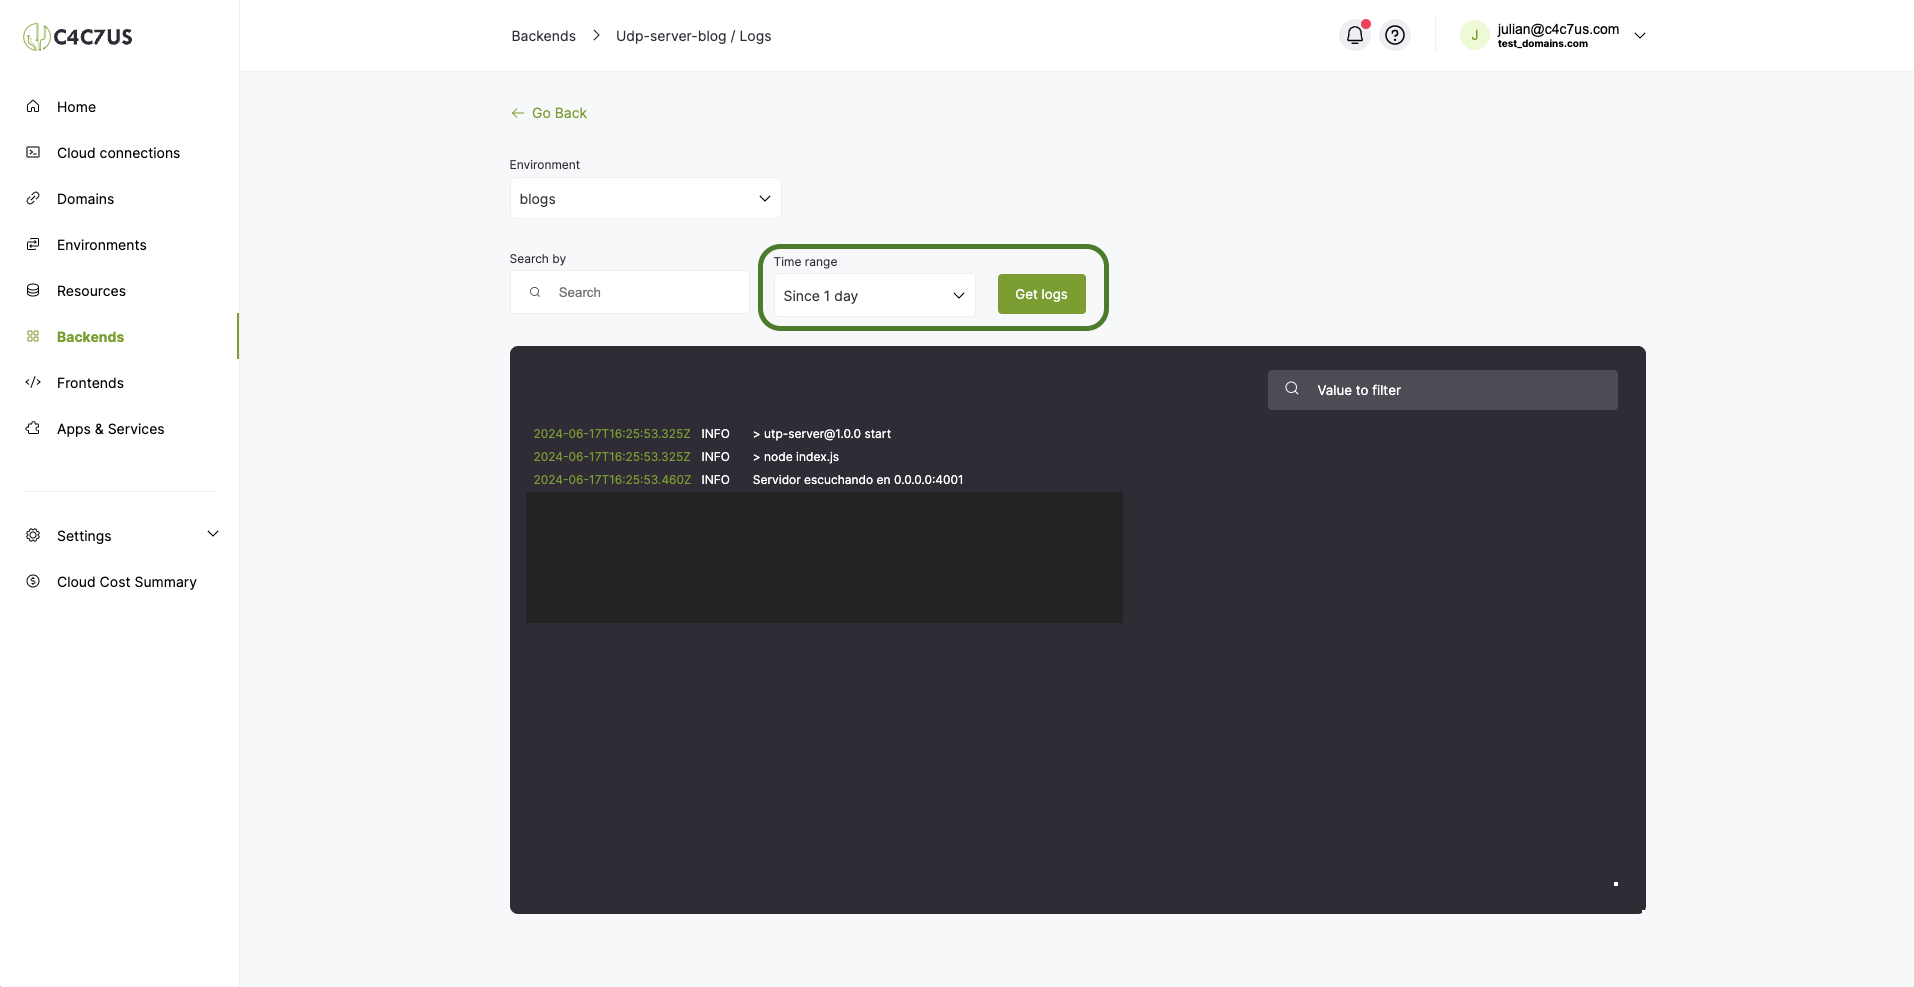
6.2 Configure the time range and press Get Logs to get the logs we configured when creating the service.
6.3 Go back to our UDP client and change the DNS to where we pointed it, replacing it with the one we set when creating our service.
After replacing these values with those we have in production, we will run the script.
And we see this message in the console.

Which means that everything was configured correctly and a message was sent to our service in production
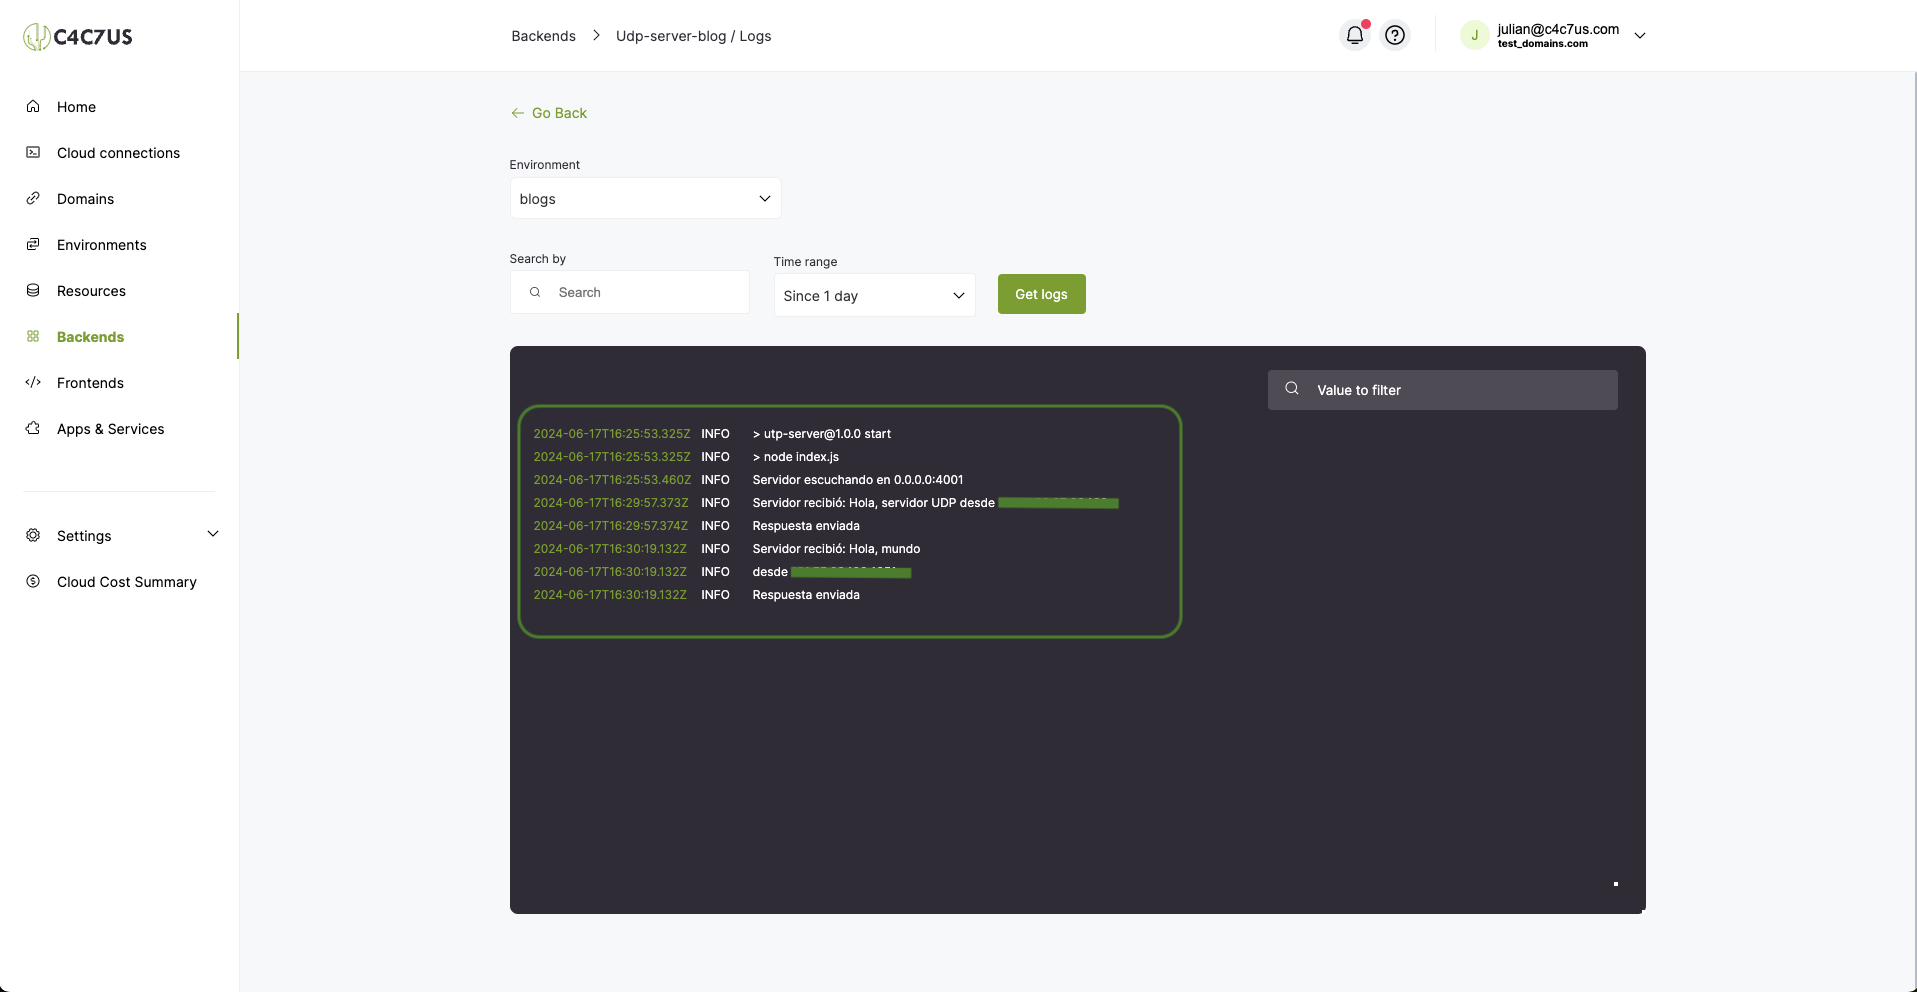
6.4 Go back to the C4C7OPS Logs and press Get Logs again.
Here we can see how the message arrived correctly and a response was sent.
Conclusion.
If you followed all the steps to the letter, congratulations, you will have correctly configured a udp communication service 🥳. For more of our guides, you can go to the Help center section on C4C7OPS and continue enjoying scalability and security in a few steps for all types of services 🌵.